
The Cosori air fryer toaster oven is not just another kitchen gadget. It’s a game changer that lets you cook crispy, delicious food without deep frying or heating up your whole kitchen.
This powerful machine combines air frying, toasting, baking, and roasting all in one compact unit that fits on your counter.
Whether you’re a busy parent, a student, or someone who just loves good food, these Cosori air fryer toaster oven recipes will become your new favorites.
From breakfast to dinner and everything in between, you’ll find recipes that are easy to follow and taste amazing.
The best part? Most of these dishes are ready in 30 minutes or less.
Let’s dive into the world of quick, healthy, and mouth-watering meals you can make with your Cosori air fryer toaster oven.

Why Choose a Cosori Air Fryer Toaster Oven?
The Cosori air fryer toaster oven gives you speed and versatility that regular ovens can’t match. It heats up fast and cooks food evenly, which means less waiting time and better results.
You’ll use less oil, less energy, and get food that’s crispy on the outside and juicy on the inside every single time.
This machine is perfect for making healthy versions of your favorite fried foods. You get that crispy texture without all the extra fat and calories. Plus, cleaning up is easy because there’s barely any mess or splatter.
Crispy Bacon Without the Splatter
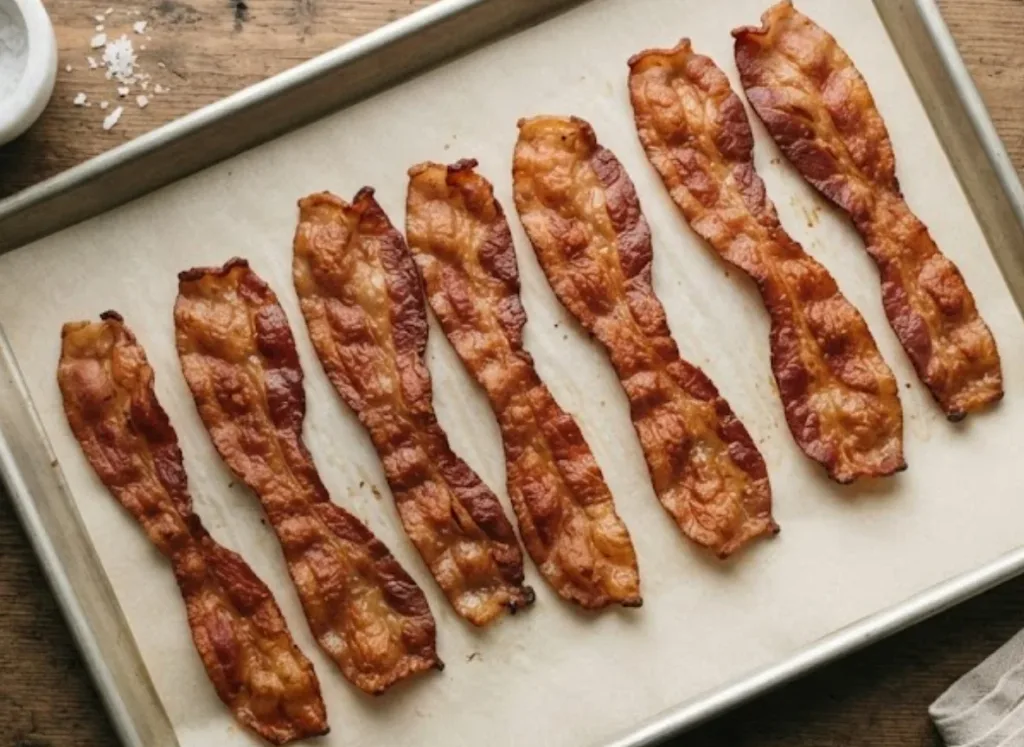
Bacon is a breakfast staple that everyone loves. The Cosori air fryer toaster oven cooks bacon perfectly crispy without all that splashing grease. Your stovetop stays clean and your bacon comes out golden brown every single time. This is the easiest way to make bacon for a crowd.
Serve: 4 | Prep Time: 5 minutes | Cook Time: 12 minutes | Total Time: 17 minutes
Ingredients:
- 12 slices of bacon
- Parchment paper
How To Make
Step 1: Prep Your Pan
Line the air fryer tray with parchment paper. This keeps cleanup super easy and prevents sticking. Cut the parchment to fit your Cosori basket.
Step 2: Arrange the Bacon
Lay bacon slices flat without overlapping. They need space for air to flow around them. Crowding the basket will make them uneven.
Step 3: Set the Temperature
Set your Cosori to 400°F (low option) or 420°F (high option) for crispier bacon. Low heat takes about 12-15 minutes. High heat takes about 10-12 minutes.
Step 4: Cook and Check
Cook on your chosen setting. Check at the midway point and shake the basket. This helps the bacon cook evenly.
Step 5: Remove and Drain
Carefully take out the bacon and place it on a paper towel. It will continue to crisp up as it cools. Serve it hot.
Fluffy French Toast Sticks
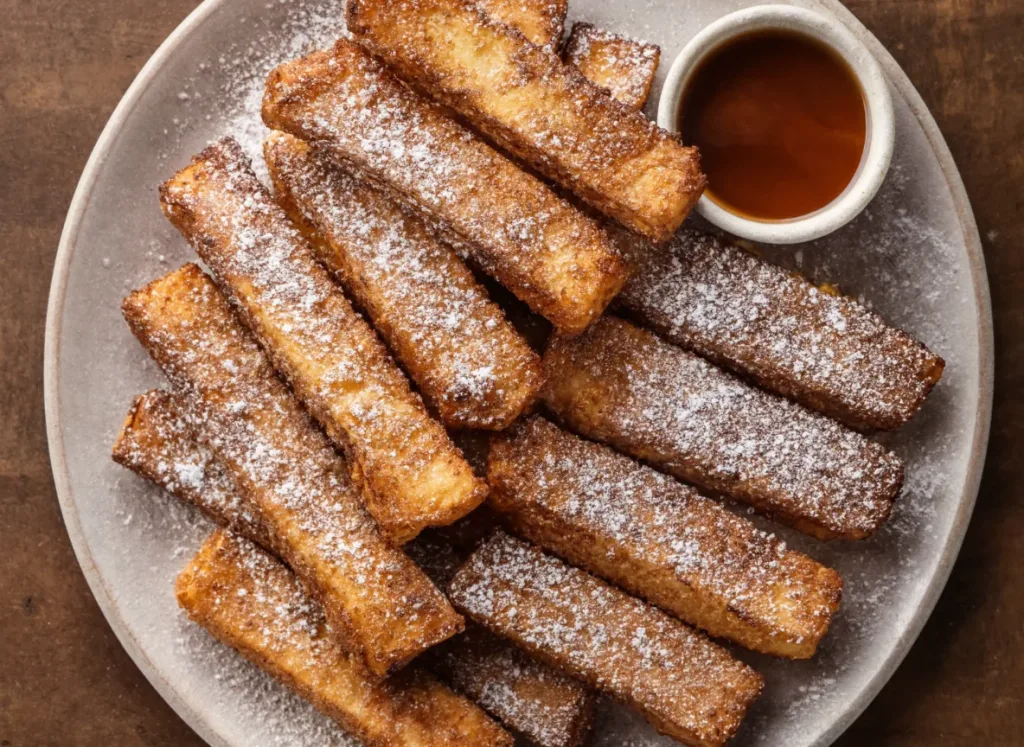
French toast sticks are fun, easy, and so much better than store-bought frozen ones. Your Cosori cooks them golden and fluffy on the inside with crispy edges. Kids love these, and they’re perfect for weekend breakfasts or quick weekday mornings.
Serve: 4 | Prep Time: 10 minutes | Cook Time: 10 minutes | Total Time: 20 minutes
Ingredients:
- 8 slices of thick-cut bread
- 2 eggs
- ½ cup milk
- 1 teaspoon vanilla extract
- 1 teaspoon cinnamon
- 2 tablespoons butter, melted
- Maple syrup for serving
- Powdered sugar (optional)
How To Make
Step 1: Mix Your Custard
Whisk eggs, milk, vanilla, and cinnamon together in a shallow bowl. Make sure everything blends smooth. This is your dipping mixture.
Step 2: Cut Your Bread
Cut each slice of bread into three sticks. Thicker bread works best for this recipe. Thin bread gets too soggy.
Step 3: Dip the Bread
Dip each bread stick into the custard mixture. Make sure both sides get coated. Don’t soak them too long or they fall apart.
Step 4: Arrange in Basket
Place the sticks on the air fryer tray in a single layer. Brush with melted butter. Don’t stack them or they won’t cook right.
Step 5: Cook on Your Setting
Set Cosori to 350°F (low option) for 10-12 minutes or 375°F (high option) for 8-10 minutes. Shake the basket halfway through cooking.
Step 6: Serve
Remove the French toast sticks carefully as they’re hot. Dust with powdered sugar if you want. Serve with maple syrup for dipping.
Cheesy Breakfast Hash Browns

Hash browns are the perfect side dish for any breakfast meal. Making them in your Cosori air fryer toaster oven gets them crispy without deep frying. These golden brown squares stay crispy on the outside and tender inside. Your family will ask for them every morning.
Serve: 3-4 | Prep Time: 8 minutes | Cook Time: 18 minutes | Total Time: 26 minutes
Ingredients:
- 2 medium potatoes, shredded
- ½ cup shredded cheddar cheese
- 2 tablespoons butter, melted
- ½ teaspoon salt
- ¼ teaspoon black pepper
- ½ teaspoon garlic powder
- Green onions for topping (optional)
How To Make
Step 1: Prep the Potatoes
Shred your potatoes and pat them dry with a clean kitchen towel. Getting rid of extra moisture is the key to crispy hash browns. Don’t skip this step.
Step 2: Mix Ingredients
Combine shredded potatoes, cheese, melted butter, salt, pepper, and garlic powder in a bowl. Toss everything together well. Make sure the cheese spreads evenly.
Step 3: Press Into Pan
Press the mixture into an oven-safe skillet that fits your Cosori. Make it about ½ inch thick. Press it down firmly so it holds together.
Step 4: Set Your Heat Level
Use 375°F (low option) for 18-20 minutes or 400°F (high option) for 15-18 minutes. Higher heat makes them crispier faster.
Step 5: Check Halfway
At the halfway point, lift one edge to check the browning. You want golden brown edges. If needed, let them cook a bit longer.
Step 6: Finish and Serve
Cook until the edges are crispy and golden. Top with green onions if you like. Cut into squares and serve hot.
Easy Lunch Recipes for Weekday Meals
Crispy Chicken Tenders That Beat Fast Food
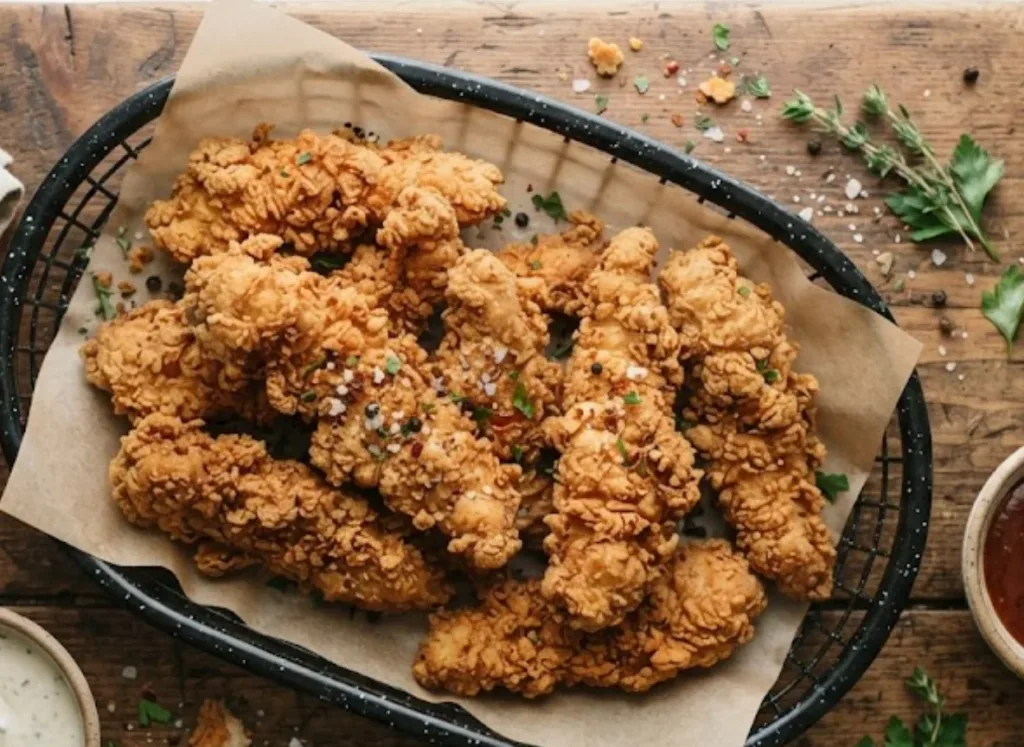
Homemade chicken tenders beat anything from a fast food restaurant. Your Cosori makes them crispy and juicy without any deep frying. They cook up golden brown and stay tender inside every single time. Dip them in your favorite sauce and enjoy.
Serve: 4 | Prep Time: 10 minutes | Cook Time: 15 minutes | Total Time: 25 minutes
Ingredients:
- 1.5 pounds chicken breasts
- ½ cup all-purpose flour
- ½ cup panko breadcrumbs
- 2 eggs
- 1 teaspoon salt
- ½ teaspoon black pepper
- ½ teaspoon garlic powder
- ½ teaspoon paprika
- Cooking spray or 1 tablespoon oil
How To Make
Step 1: Prepare Your Chicken
Cut chicken breasts into strips about 1 inch wide. They should be roughly the same thickness. Even sizing helps them cook at the same speed.
Step 2: Create Three Bowls
Bowl 1: Mix flour, salt, pepper, garlic powder, and paprika. Bowl 2: Beat the eggs. Bowl 3: Pour panko breadcrumbs. This is your breading station.
Step 3: Bread Your Tenders
Coat each chicken tender in flour first. Shake off extra. Then dip in egg, then roll in panko. Press the coating on gently.
Step 4: Spray and Arrange
Spray the air fryer basket lightly with cooking spray. Place tenders in a single layer without touching. Don’t stack them.
Step 5: Cook Low or High
Use 350°F (low option) for 15-17 minutes or 375°F (high option) for 12-14 minutes. Shake the basket at the halfway point.
Step 6: Check for Doneness
The tenders should be golden brown and crispy. Cut the thickest one open to make sure it’s cooked through with no pink. Internal temperature should hit 165°F.
Step 7: Rest and Serve
Let them cool for 2 minutes before serving. This keeps them crispy. Serve with ketchup, ranch, or honey mustard.
Veggie Spring Rolls with a Crispy Bite

Spring rolls are light, healthy, and totally fun to eat. Your Cosori air fryer toaster oven makes them crispy without all the oil. The filling stays warm and fresh while the outside gets perfectly golden and crunchy. Make a big batch and freeze extras for later.
Serve: 4 (8 rolls) | Prep Time: 15 minutes | Cook Time: 10 minutes | Total Time: 25 minutes
Ingredients:
- 8 spring roll wrappers
- 2 cups shredded cabbage
- 1 cup shredded carrots
- ½ cup cucumber, julienned
- ¼ cup fresh mint, chopped
- 2 tablespoons soy sauce
- 1 tablespoon sesame oil
- 1 teaspoon ginger, minced
- 1 clove garlic, minced
- Cooking spray
How To Make
Step 1: Make the Filling
Combine cabbage, carrots, cucumber, and mint in a bowl. Add soy sauce, sesame oil, ginger, and garlic. Mix everything together well. Let it sit for a few minutes so flavors blend.
Step 2: Prepare Your Wrapper
Place a spring roll wrapper on a clean surface in a diamond shape. Keep other wrappers covered with a damp towel so they don’t dry out.
Step 3: Fill and Roll
Put 2-3 tablespoons of filling in the center of each wrapper. Don’t overfill or they’ll burst. Fold the bottom corner over the filling.
Step 4: Fold the Sides
Fold the left and right corners toward the center. Then roll tightly from bottom to top. Wet your finger and seal the last edge with water.
Step 5: Spray Before Cooking
Place rolls seam-side down on the air fryer tray. Space them out so air can flow around them. Spray lightly with cooking spray on all sides.
Step 6: Choose Your Temperature
Use 350°F (low option) for 10-12 minutes or 375°F (high option) for 8-10 minutes. Shake the basket halfway through.
Step 7: Finish and Dip
Remove when golden brown and crispy. Serve hot with sweet chili sauce or peanut sauce for dipping. They’re best eaten right away.
Crispy Fish Tacos with Slaw

Fish tacos are fresh, light, and packed with flavor. Your Cosori cooks the fish perfectly crispy while keeping it tender and flaky inside. The crunchy slaw tops it off with freshness. These come together in less than 30 minutes total.
Serve: 4 (8 tacos) | Prep Time: 12 minutes | Cook Time: 12 minutes | Total Time: 24 minutes
Ingredients:
For the Fish:
- 1.5 pounds white fish fillets
- ½ cup panko breadcrumbs
- ¼ cup all-purpose flour
- 1 egg, beaten
- 1 teaspoon cumin
- ½ teaspoon chili powder
- ½ teaspoon salt
- Cooking spray
For Assembly:
- 8 small tortillas
- 2 cups shredded cabbage
- ¼ cup lime juice
- 2 tablespoons mayo
- ¼ cup fresh cilantro
- Lime wedges for serving
How To Make
Step 1: Prep the Fish
Pat fish fillets dry with paper towels. Cut them into pieces that fit your tortillas. They should be about 2 inches wide and 3-4 inches long.
Step 2: Season Your Breadcrumb Mix
Combine panko, flour, cumin, chili powder, and salt in a bowl. Mix it well. This seasoning mix gives the fish amazing flavor.
Step 3: Bread the Fish
Dip each piece in beaten egg. Then coat with the panko mixture. Press gently so the coating sticks.
Step 4: Prepare the Air Fryer
Spray the basket with cooking spray. Arrange fish in a single layer. Don’t overlap or stack.
Step 5: Cook Your Fish
Set to 375°F (low option) for 12-14 minutes or 395°F (high option) for 10-12 minutes. The fish should flake easily when you test it with a fork.
Step 6: Make the Slaw
While fish cooks, combine cabbage, lime juice, mayo, and cilantro. Toss everything together. Season with a pinch of salt.
Step 7: Assemble Your Tacos
Warm tortillas in the oven or over a flame. Place a piece of crispy fish in each tortilla. Top with fresh slaw.
Step 8: Serve and Enjoy
Add extra cilantro if you want. Squeeze fresh lime on top. Serve with lime wedges on the side.
Dinner Favorites Made Easy
Juicy Steak Bites with Garlic Butter
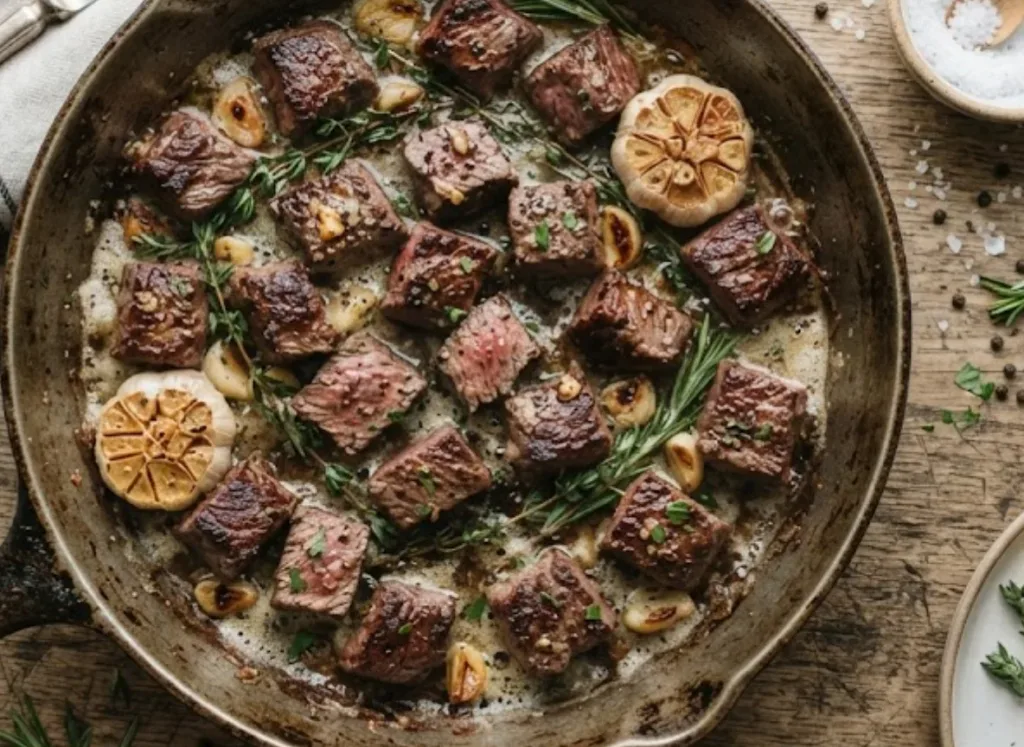
Steak bites are the perfect dinner that feels fancy but takes no time. Your Cosori cooks them perfectly medium rare with a nice crust. The garlic butter melts all over them making every bite delicious. This is impressive enough for guests but easy enough for Tuesday night.
Serve: 4 | Prep Time: 8 minutes | Cook Time: 10 minutes | Total Time: 18 minutes
Ingredients:
- 1.5 pounds sirloin or ribeye steak
- 3 tablespoons butter
- 4 cloves garlic, minced
- 1 teaspoon fresh rosemary
- 1 teaspoon salt
- ½ teaspoon black pepper
- ½ teaspoon garlic powder
How To Make
Step 1: Cut Your Steak
Cut the steak into 1-inch cubes. Try to keep them all about the same size. Even-sized pieces cook evenly.
Step 2: Make Garlic Butter
Melt butter in a small bowl. Add minced garlic, rosemary, salt, pepper, and garlic powder. Mix it together well.
Step 3: Coat the Meat
Toss the steak pieces in the garlic butter mixture. Make sure every piece gets coated. This adds tons of flavor.
Step 4: Thread on Skewers
Use metal or wooden skewers (soak wooden ones for 30 minutes first). Thread the steak pieces on, leaving a tiny space between each one. This lets hot air get around them.
Step 5: Arrange in Basket
Place skewers on the air fryer tray. They should have space around them. Don’t crowd the basket.
Step 6: Cook to Perfection
Use 375°F (low option) for 10-12 minutes for medium rare or 395°F (high option) for 8-10 minutes for medium. Shake the basket once halfway through.
Step 7: Rest and Serve
Remove from the Cosori and let rest for 5 minutes. This keeps the meat juicy. Serve hot with any remaining garlic butter drizzled on top.
Crispy Parmesan Pork Chops
Pork chops are an underrated dinner that cooks super fast. Your Cosori makes them crispy on the outside and juicy on the inside. The parmesan coating gives them incredible flavor. This is a weeknight winner that tastes like restaurant food.
Serve: 4 | Prep Time: 10 minutes | Cook Time: 15 minutes | Total Time: 25 minutes
Ingredients:
- 4 pork chops (1 inch thick)
- ½ cup panko breadcrumbs
- ½ cup grated parmesan cheese
- ¼ cup all-purpose flour
- 1 egg, beaten
- 1 teaspoon Italian seasoning
- ½ teaspoon salt
- ¼ teaspoon black pepper
- Cooking spray
How To Make
Step 1: Prepare Pork Chops
Pat the pork chops dry with paper towels. Pound them gently to even out thickness. This helps them cook evenly.
Step 2: Season the Flour
Mix flour, salt, pepper, and Italian seasoning in a shallow bowl. This is your first coating.
Step 3: Make Breadcrumb Mix
Combine panko, parmesan, and remaining Italian seasoning in another bowl. Mix well. This creates the crispy, cheesy coating.
Step 4: Bread Your Chops
Dip each chop in flour, shake off extra. Then dip in beaten egg. Finally, press into the parmesan breadcrumb mixture. Get the coating on both sides.
Step 5: Spray the Basket
Lightly spray your air fryer tray with cooking spray. Arrange chops in a single layer. Don’t overlap them.
Step 6: Cook Your Chops
Set to 375°F (low option) for 15-17 minutes or 395°F (high option) for 12-14 minutes. Check once at the halfway point.
Step 7: Check Doneness
The internal temperature should reach 145°F. Cut into the thickest part to check for pink. There should be no pink inside.
Step 8: Rest Before Serving
Let the chops rest for 3-5 minutes. This keeps them juicy. Serve hot with your favorite sides.
Garlic Butter Shrimp Skewers
Shrimp cooks so fast it seems almost impossible. Your Cosori makes it even quicker and way easier than stovetop cooking. The garlic butter makes these shrimp absolutely addictive. You can serve them as an appetizer or pair with pasta for dinner.
Serve: 4 | Prep Time: 10 minutes | Cook Time: 8 minutes | Total Time: 18 minutes
Ingredients:
- 1.5 pounds large shrimp, peeled and deveined
- 4 tablespoons butter, melted
- 5 cloves garlic, minced
- ¼ cup fresh lemon juice
- 1 teaspoon Italian seasoning
- ½ teaspoon salt
- ¼ teaspoon red pepper flakes
- Fresh parsley for garnish
How To Make
Step 1: Make Garlic Butter Sauce
Melt butter and mix with minced garlic, lemon juice, Italian seasoning, salt, and red pepper flakes. Let it cool slightly. This is your flavor base.
Step 2: Toss the Shrimp
Place shrimp in a bowl and pour the garlic butter mixture over them. Toss gently to coat. Every shrimp needs the sauce.
Step 3: Thread on Skewers
Thread shrimp on metal or wooden skewers (soak wooden ones first). Put about 4-5 shrimp per skewer. Space them so heat gets around them.
Step 4: Arrange in Basket
Place skewers on the air fryer tray in a single layer. Make sure they have room to cook. Don’t crowd them.
Step 5: Set Your Temperature
Use 375°F (low option) for 8-10 minutes or 395°F (high option) for 6-8 minutes. Shrimp cooks fast so watch carefully.
Step 6: Check for Doneness
Shrimp should be pink and opaque all the way through. No gray color should remain. If any still look gray, cook 1-2 more minutes.
Step 7: Plate and Garnish
Remove from skewers carefully as they’re hot. Garnish with fresh parsley. Serve with lemon wedges.
Homemade Meatballs with Marinara
Meatballs are comfort food that everyone loves. Your Cosori cooks them perfectly without any oil splatters. They turn out evenly cooked and juicy on the inside. Serve them over pasta or as an appetizer with toothpicks.
Serve: 4-6 | Prep Time: 15 minutes | Cook Time: 15 minutes | Total Time: 30 minutes
Ingredients:
- 1 pound ground beef
- ½ cup panko breadcrumbs
- ¼ cup grated parmesan
- 1 egg
- 3 cloves garlic, minced
- ½ teaspoon Italian seasoning
- ½ teaspoon salt
- ¼ teaspoon black pepper
- 1 cup marinara sauce for serving
How To Make
Step 1: Mix the Meatball Ingredients
Combine ground beef, panko, parmesan, egg, minced garlic, Italian seasoning, salt, and pepper in a large bowl. Mix gently with your hands. Don’t overwork it or they’ll be tough.
Step 2: Roll the Meatballs
Using damp hands, roll the mixture into 1-inch balls. You should get about 16-20 meatballs. Place them on a plate.
Step 3: Arrange in Basket
Place meatballs on the air fryer tray in a single layer. They can touch slightly but shouldn’t be packed tight. Space matters for cooking.
Step 4: Choose Your Heat
Use 350°F (low option) for 15-17 minutes or 375°F (high option) for 12-14 minutes. Shake the basket once at the midway point.
Step 5: Check Internal Temp
The internal temperature should reach 160°F. Cut one open to verify it’s cooked through. No pink should remain inside.
Step 6: Warm Your Sauce
While meatballs cook, warm your marinara sauce on the stovetop or in the microwave. Have it ready when meatballs finish.
Step 7: Serve
Toss the hot meatballs with marinara sauce. Serve over pasta, in sub rolls, or with toothpicks as appetizers. Top with extra parmesan if desired.
Snacks and Appetizers Everyone Will Love
Crispy Veggie Chips
Veggie chips are a healthy snack that actually tastes good. Your Cosori turns thin-sliced vegetables into crispy chips. They’re perfect for munching alone or serving at parties. Make a big batch because they disappear fast.
Serve: 4-6 | Prep Time: 10 minutes | Cook Time: 15 minutes | Total Time: 25 minutes
Ingredients:
- 2 medium zucchini
- 2 medium carrots
- 1 large sweet potato
- 2 tablespoons olive oil
- ½ teaspoon salt
- ¼ teaspoon black pepper
- ½ teaspoon garlic powder
- ½ teaspoon paprika
How To Make
Step 1: Slice Your Vegetables
Thinly slice zucchini, carrots, and sweet potato. Use a mandoline slicer if you have one. The thinner they are, the crispier they get. Consistency in thickness is important.
Step 2: Pat Dry
Pat all the slices dry with paper towels. Getting rid of moisture is crucial for crispy chips. Don’t skip this step.
Step 3: Toss with Oil and Seasonings
Place vegetables in a bowl. Drizzle with olive oil. Add salt, pepper, garlic powder, and paprika. Toss gently to coat every piece.
Step 4: Arrange on Tray
Place vegetables in a single layer on the air fryer tray. Don’t stack or overlap. They need heat flowing around them.
Step 5: Cook Your Chips
Use 350°F (low option) for 15-18 minutes or 375°F (high option) for 12-15 minutes. Shake the tray every 5 minutes. Watch carefully as cooking time varies by vegetable thickness.
Step 6: Check and Continue
Some pieces might finish before others. Remove the crispy ones and let others cook. They’re done when golden and completely crispy.
Step 7: Cool and Store
Let chips cool on a paper towel. They continue crisping as they cool. Store in an airtight container for up to 3 days.
Loaded Nachos for Game Day
Nachos are the ultimate party food. Your Cosori makes them with perfectly melted cheese and hot toppings all at once. No more cooking cheese separate from the rest. Everything heats evenly and perfectly.
Serve: 4-6 | Prep Time: 10 minutes | Cook Time: 8 minutes | Total Time: 18 minutes
Ingredients:
- 6 cups tortilla chips
- 2 cups shredded cheddar cheese
- 1 pound ground beef, browned and drained
- ½ cup diced jalapeños
- ½ cup diced red onion
- ½ cup black beans, drained
- ¼ cup fresh cilantro
- Sour cream for serving
- Guacamole for serving
- Salsa for serving
How To Make
Step 1: Layer Your Base
Spread tortilla chips on an oven-safe pan that fits your Cosori. Use about half the chips. Cover the bottom evenly.
Step 2: Add First Layer of Toppings
Sprinkle half the cheese over the chips. Add half the cooked ground beef. Add half the jalapeños and onions.
Step 3: Add More Chips
Layer the remaining chips on top. This creates layers of goodness. You want every chip to have toppings.
Step 4: Top with Remaining Ingredients
Add the remaining cheese on top. Layer the rest of the beef, jalapeños, and onions. Then add the black beans. This makes sure every bite has everything.
Step 5: Cook Your Nachos
Set to 350°F (low option) for 8-10 minutes or 375°F (high option) for 6-8 minutes. You just need the cheese to melt and toppings to get warm.
Step 6: Check the Cheese
The cheese should be completely melted and bubbly. If it’s not quite there, add another minute or two.
Step 7: Finish and Serve
Remove from the Cosori carefully as it’s hot. Top with fresh cilantro. Serve immediately with sour cream, guacamole, and salsa on the side.
Crispy Mozzarella Sticks
Mozzarella sticks are cheesy, gooey perfection. Your Cosori makes them crispy on the outside while the cheese stays melted inside. These cook so fast and taste better than anything frozen. Make them fresh whenever cravings hit.
Serve: 4 | Prep Time: 15 minutes (plus 1 hour freezing) | Cook Time: 8 minutes | Total Time: 1 hour 23 minutes
Ingredients:
- 8 mozzarella sticks (string cheese)
- ½ cup all-purpose flour
- 1 egg, beaten
- ½ cup panko breadcrumbs
- ½ teaspoon Italian seasoning
- ¼ teaspoon garlic powder
- Cooking spray
- Marinara sauce for dipping
How To Make
Step 1: Freeze Your Cheese
Place mozzarella sticks on a plate and freeze for at least 1 hour or up to 4 hours. Cold cheese is critical so it doesn’t leak out during cooking.
Step 2: Prepare Your Breading Station
Bowl 1: Flour. Bowl 2: Beaten egg. Bowl 3: Panko mixed with Italian seasoning and garlic powder.
Step 3: Bread Each Stick
Working quickly, coat each frozen mozzarella stick in flour. Shake off excess. Dip in egg. Roll in panko mixture, pressing gently. Work fast so they don’t thaw.
Step 4: Spray the Tray
Spray the air fryer tray with cooking spray. Place breaded sticks on the tray in a single layer. Leave space between each one.
Step 5: Cook Your Sticks
Set to 350°F (low option) for 8-10 minutes or 370°F (high option) for 6-8 minutes. Don’t shake the basket. You want them still as they cook.
Step 6: Check Doneness
The coating should be golden brown. The cheese will be hot inside. Let them rest for 2 minutes before eating or the cheese will burst.
Step 7: Serve with Sauce
Place on a serving plate. Serve with marinara sauce for dipping. Eat carefully as the cheese is very hot inside.
Desserts That Satisfy Sweet Cravings
Chocolate Chip Cookie Cups
Cookie cups are individual desserts that look fancy but are super easy to make. Your Cosori bakes them perfectly golden and slightly crispy on the edges. Fill them with ice cream or whipped cream for something special. These are showstoppers.
Serve: 6 | Prep Time: 15 minutes | Cook Time: 12 minutes | Total Time: 27 minutes
Ingredients:
- ½ cup butter, softened
- ¼ cup granulated sugar
- ¼ cup brown sugar
- 1 egg yolk
- ½ teaspoon vanilla extract
- ¾ cup all-purpose flour
- ¼ teaspoon baking soda
- Pinch of salt
- ½ cup chocolate chips
- Cooking spray or parchment paper
How To Make
Step 1: Cream Your Butter and Sugar
Beat softened butter and both sugars together until light and fluffy. This takes about 2-3 minutes. Don’t rush this step.
Step 2: Add Egg and Vanilla
Beat in the egg yolk and vanilla extract. Mix until everything is combined. The mixture should be smooth.
Step 3: Mix Dry Ingredients
In a separate bowl, combine flour, baking soda, and salt. Whisk together well. This prevents lumps in your dough.
Step 4: Combine Wet and Dry
Fold the dry ingredients into the butter mixture. Stir gently until just combined. Don’t overmix.
Step 5: Add Chocolate Chips
Fold in the chocolate chips. Make sure they’re spread throughout the dough. Reserve a few extra for pressing on top.
Step 6: Prepare Oven-Safe Cups
You need oven-safe ramekins or muffin cups that fit in your Cosori. Spray them with cooking spray or line with parchment. Press about 2 tablespoons of dough into each cup. Press a few chocolate chips on top.
Step 7: Bake Your Cookies
Set to 350°F (low option) for 12-14 minutes or 375°F (high option) for 10-12 minutes. The edges should be golden while centers are still slightly soft.
Step 8: Cool Slightly
Let the cups cool in the ramekins for 5 minutes. Then gently turn them out onto a plate. They’re still warm and perfect.
Step 9: Fill and Enjoy
Fill with vanilla ice cream, whipped cream, or chocolate mousse. Serve immediately while still warm.
Cinnamon Sugar Donut Holes
Donut holes are bite-sized fun that taste like you spent hours making them. Your Cosori cooks them golden and airy. The cinnamon sugar coating makes them irresistible. These are perfect for breakfast, dessert, or anytime.
Serve: 4 (12 holes) | Prep Time: 20 minutes | Cook Time: 10 minutes | Total Time: 30 minutes
Ingredients:
For Donut Holes:
- 1 can refrigerated biscuit dough (8-count)
- Oil for brushing
For Coating:
- ¼ cup granulated sugar
- 1 tablespoon ground cinnamon
- 2 tablespoons butter, melted
How To Make
Step 1: Cut Your Biscuits
Open the refrigerated biscuit dough. Cut each biscuit into 4 pieces using a knife or pizza cutter. You should have about 12 pieces.
Step 2: Shape into Balls
Roll each piece into a small ball between your palms. Make them as round as possible. Even size helps them cook evenly.
Step 3: Brush with Oil
Lightly brush each donut hole with a tiny bit of oil. This helps them brown and keeps them moist. Don’t oversoak them.
Step 4: Arrange in Basket
Place donut holes on the air fryer tray in a single layer. They can touch slightly. Make sure there’s air space around them.
Step 5: Cook Your Holes
Set to 350°F (low option) for 10-12 minutes or 375°F (high option) for 8-10 minutes. Shake the basket halfway through cooking.
Step 6: Check Doneness
They should be golden brown and cooked through. A toothpick inserted should come out clean.
Step 7: Make Cinnamon Sugar Mixture
Mix granulated sugar and cinnamon in a shallow bowl. Have melted butter ready.
Step 8: Coat Your Holes
While still warm, brush each donut hole lightly with melted butter. Roll in the cinnamon sugar mixture. Get them well coated.
Step 9: Serve
Place on a serving plate. They’re best eaten fresh and warm. Enjoy these homemade treats.
Apple Hand Pies with Caramel Drizzle
Hand pies are like eating warm apple pie with your hands. Your Cosori makes them crispy on the outside with soft, warm apples inside. The caramel drizzle takes them over the top. These taste like they came from a bakery.
Serve: 4 (4 pies) | Prep Time: 15 minutes | Cook Time: 14 minutes | Total Time: 29 minutes
Ingredients:
For Pies:
- 1 package puff pastry sheets (2 sheets)
- 2 cups diced apples
- 2 tablespoons brown sugar
- 1 tablespoon butter, melted
- ½ teaspoon ground cinnamon
- ¼ teaspoon nutmeg
- 1 tablespoon lemon juice
- 1 egg, beaten (for egg wash)
- Cooking spray
For Caramel Drizzle:
- ½ cup caramel sauce
How To Make
Step 1: Prepare the Apples
Peel, core, and dice apples into small pieces. Toss with brown sugar, cinnamon, nutmeg, and lemon juice. Let sit for a few minutes. This softens the apples slightly.
Step 2: Thaw Puff Pastry
If frozen, thaw puff pastry sheets according to package directions. They should be flexible but still cool.
Step 3: Cut Out Pieces
Cut each puff pastry sheet into 4 equal rectangles. You should have 8 rectangles total.
Step 4: Fill the Pies
Place about 3 tablespoons of apple filling on one half of each rectangle. Leave a ½-inch border. The filling should be in the center.
Step 5: Fold and Seal
Fold each rectangle in half over the filling. Press the edges with a fork to seal. The fork pattern also looks nice.
Step 6: Brush with Egg Wash
Brush the top of each hand pie with beaten egg. This makes them golden and shiny. Don’t be shy with the wash.
Step 7: Arrange and Cook
Spray the air fryer tray with cooking spray. Place hand pies on the tray. They can be close but shouldn’t overlap.
Step 8: Bake Your Pies
Set to 375°F (low option) for 14-16 minutes or 395°F (high option) for 12-14 minutes. They should be golden brown.
Step 9: Add Caramel Drizzle
Warm caramel sauce slightly. Drizzle over the warm hand pies. You can do this while they’re still in the basket or on a plate.
Step 10: Serve
Let cool for just 2-3 minutes. The caramel and apples inside are very hot. Serve while warm for the best experience.
Pro Tips for Using Your Cosori Air Fryer Toaster Oven
Getting the most out of your Cosori air fryer toaster oven takes some know-how. These tips will help you cook like a pro. Your results will improve and cooking becomes even easier.
Know Your Temperature Settings
The low option on recipes uses lower heat for more even cooking. It’s perfect for delicate items and when you want precise control. High option uses more heat for faster cooking and crispier results. Not all foods need high heat. Choose based on what you’re cooking.
Don’t Skip the Preheat
Always preheat your Cosori for about 3-5 minutes before cooking. This ensures consistent results and helps food cook evenly. The unit heats up fast so this doesn’t add much time.
Use Parchment Paper or Liners
Parchment paper makes cleanup incredibly easy. It also prevents sticking and helps with even cooking. Cosori sells compatible liners that fit perfectly. Cooking spray works too but parchment is cleaner.
Shake the Basket
Most recipes call for shaking the basket halfway through. This helps food cook evenly and prevents sticking. Don’t open the drawer multiple times though. One or two shakes is usually enough.
Don’t Overcrowd the Basket
This is the biggest mistake people make. Food needs space for hot air to circulate. Crowding the basket leads to uneven cooking. Cook in batches if needed. Better to make two batches perfectly than one batch unevenly.
Adjust Times for Your Preferences
Every Cosori is slightly different. Some run a bit hotter or cooler. Watch your food the first time you make it. Adjust timing for future cooking. It only takes a couple tries to dial it in.
Use a Food Thermometer
For meat and poultry, a food thermometer removes guessing. Check the thickest part for accuracy. This ensures food is cooked safely and perfectly.
Let Food Cool Slightly
Hot food from the Cosori is extremely hot inside. Let it rest for a minute or two before eating. This prevents burning your mouth and keeps food crispy longer.
Final Thoughts on These 16 Cosori Air Fryer Toaster Oven Recipes
These 16 recipes cover everything from breakfast to dessert. You now have options for every meal and occasion. Whether you’re feeding a family or meal prepping for yourself, these recipes deliver. Each one is tested and tasty.
The Cosori air fryer toaster oven is truly a game changer in the kitchen. It saves time, uses less energy, and makes food taste restaurant quality. Once you start using it, you’ll wonder how you ever cooked without it.
Start with the recipe that sounds most appealing to you. Follow the steps carefully and trust the process. Soon you’ll be making these recipes without thinking. You might even start inventing your own variations.
Keep your Cosori on the counter where you can see it. The more you use it, the more you’ll love it. These 16 recipes are just the beginning of all the amazing things you can cook.
Looking for the Right Equipment?
To get the most from these recipes, having the right equipment helps. While you already have your Cosori, a few additions make cooking easier. A good set of oven-safe ramekins works for many recipes. Metal skewers are essential for shrimp and steak. A quality food thermometer takes the guessing out of doneness. Having parchment paper and cooking spray on hand keeps things running smooth.










Leave a Reply