
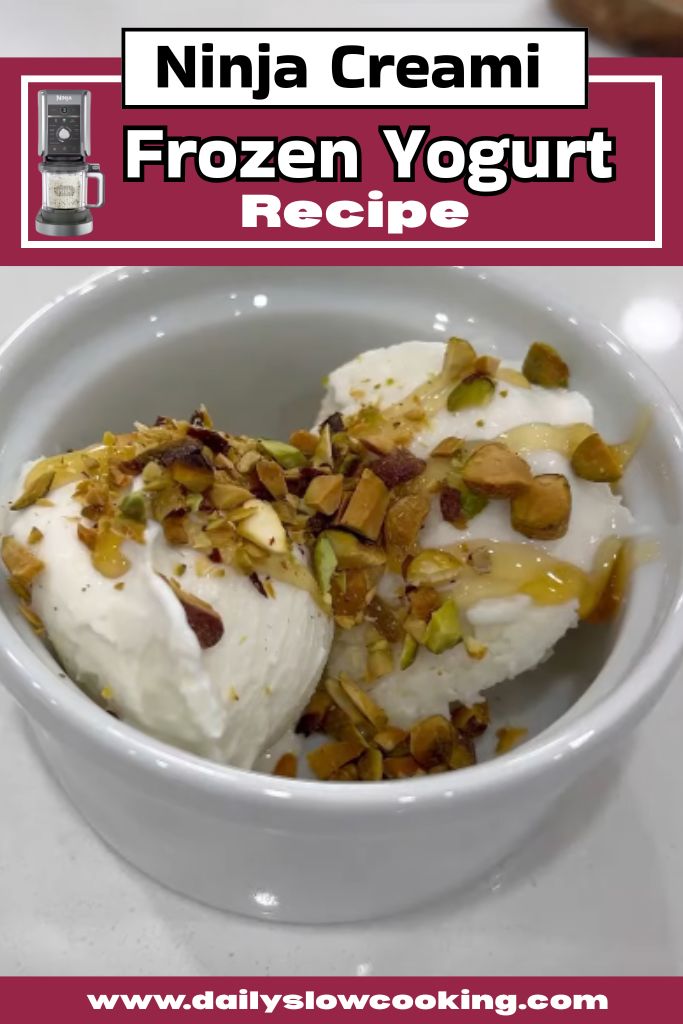
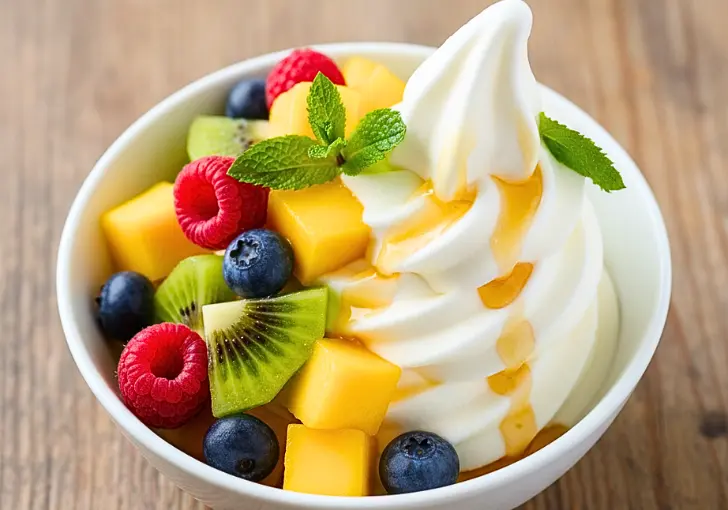
I love a cool, creamy treat on a hot day, and my Ninja Creami Frozen Yogurt Recipe is the perfect way to enjoy one! Imagine scooping into a smooth, tangy dessert that’s super easy to make at home.
With the Ninja Creami, you can whip up this frozen yogurt in just a few steps, using simple ingredients you probably already have. It’s a healthier choice compared to store-bought ice cream, and you’ll love how customizable it is—add your favorite fruits or toppings!
If you’re craving something chocolatey, check out my Ninja Creami Protein Ice Cream Recipe for another tasty treat.
Try this recipe because it’s fun, quick, and tastes amazing—perfect for satisfying your sweet tooth without the guilt!
Why You Love This Ninja Creami Frozen Yogurt
This Ninja Creami Frozen Yogurt Recipe is a game-changer for dessert lovers like me! Here’s why you’ll adore it:
- Super Simple: You only need a couple of ingredients, and the Ninja Creami does most of the work.
- Healthy and Yummy: It’s packed with protein from Greek yogurt, so it’s a treat you can feel good about.
- Customizable: Add fruits, nuts, or chocolate chips to make it your own.
- Creamy Texture: The Ninja Creami turns it into a smooth, scoopable delight every time.
I’m obsessed with how easy and delicious this frozen yogurt is. It’s perfect for a quick snack or a fun dessert after dinner.
Ninja Creami Frozen Yogurt Ingredients
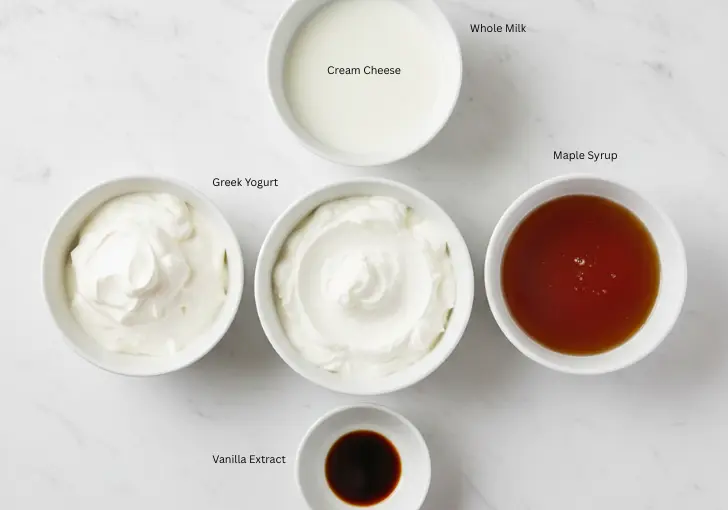
Let’s talk about what you’ll need to make this Ninja Creami Frozen Yogurt Recipe. I keep it simple with just a few ingredients, but each one plays a big role in making this treat tasty and creamy. Here’s the breakdown:
- Greek Yogurt (16 oz): I use plain Greek yogurt because it’s thick, creamy, and packed with protein—about 18 grams per half-pint! It gives the frozen yogurt that tangy kick we all love. Full-fat Greek yogurt makes it extra rich, but you can use 2% or even fat-free if you want a lighter option. Just know that fat-free might need an extra spin to get smooth. My go-to brand is Chobani because it’s reliable and easy to find.
- Milk (¼ cup): A splash of milk helps smooth out the texture. I like whole milk for a richer flavor, but low-fat or nonfat works too. If you’re dairy-free, try almond or oat milk. This small amount makes a big difference in getting that creamy consistency.
- Honey or Maple Syrup (1-2 tbsp): I add a touch of honey or maple syrup to sweeten things up. It blends well and adds a natural sweetness. If you’re using flavored yogurt, you might skip this, but for plain yogurt, it’s a must to balance the tanginess.
- Vanilla Extract (1 tsp): This adds a warm, sweet note that makes the frozen yogurt feel like a dessert. Pure vanilla extract is best for a clean flavor, but imitation works in a pinch. It’s like a little hug for your taste buds!
- Optional Mix-Ins: Think fresh strawberries, blueberries, chocolate chips, or crushed cookies. I love tossing in some chopped fruit for a burst of flavor or mini chocolate chips for a bit of indulgence. Add these after the first spin for the best texture.
Helpful Swaps
If you don’t have the exact ingredients, don’t worry! Here are some swaps that work great for this Ninja Creami Frozen Yogurt Recipe:
- Greek Yogurt: Swap with regular plain yogurt for a lighter texture or use a dairy-free yogurt like coconut or almond for a vegan version.
- Milk: Any milk works—try soy, coconut, or almond milk for dairy-free options. Even a splash of cream can make it extra rich.
- Honey/Maple Syrup: Use agave nectar, stevia, or monk fruit sweetener for a sugar-free treat. Adjust to taste.
- Vanilla Extract: Try almond extract or skip it if you’re using flavored yogurt.
- Mix-Ins: Swap fruit for nuts, granola, or even a swirl of peanut butter for a fun twist.
Kitchen Equipment Needed
To make this Ninja Creami Frozen Yogurt Recipe, you’ll need just a few tools. Don’t worry—nothing fancy! Here’s what I use:
- Ninja Creami Machine: The star of the show! It turns your frozen base into creamy frozen yogurt. Make sure it’s plugged in and ready to go.
- Ninja Creami Pint Container: This comes with the machine and holds your yogurt mix. Don’t fill past the max fill line!
- Mixing Bowl and Whisk: For combining the yogurt, milk, honey, and vanilla. A spoon works too if you don’t have a whisk.
- Measuring Cups and Spoons: To measure your ingredients accurately. I use these to make sure I don’t overdo the sweetener.
- Spatula or Spoon: For smoothing the top of the yogurt before freezing and scooping it out after spinning.
- Freezer: You’ll need space to freeze the pint for 24 hours. Make sure it’s level so the yogurt freezes evenly.
How To Make Ninja Creami Frozen Yogurt
Making this Ninja Creami Frozen Yogurt Recipe is so easy, even if you’re new to cooking. I’ll walk you through each step like I’m right there in your kitchen. Let’s get started!
Step 1 | Mix the Base
Grab a mixing bowl and add 16 ounces of plain Greek yogurt. Pour in ¼ cup of milk, 1-2 tablespoons of honey or maple syrup (taste to see how sweet you want it), and 1 teaspoon of vanilla extract.
Whisk everything together until it’s smooth. I like to give it a quick taste to make sure it’s sweet enough. If you’re using flavored yogurt, you can skip the sweetener and vanilla.
Step 2 | Fill the Pint
Pour your yogurt mixture into the Ninja Creami pint container. Make sure it doesn’t go past the max fill line—this is important so the machine can work its magic. Use a spatula to smooth the top so it’s nice and even.
Step 3 | Freeze It
Pop the lid on the pint container and place it in your freezer on a flat surface. Let it freeze for 24 hours. I know waiting is tough, but it’s key to getting that perfect texture. I usually make a couple of pints at once so I always have one ready!
Step 4 | Set Up the Ninja Creami
After 24 hours, take the pint out of the freezer and remove the lid. Plug in your Ninja Creami and place it on a flat counter. Put the pint into the outer bowl. Attach the Creamerizer Paddle to the outer bowl lid by pressing the latch and inserting the paddle.
Then, lock the lid onto the outer bowl by lining up the tab with the handle and twisting it clockwise.
Step 5 | Lock and Spin
Place the outer bowl onto the Ninja Creami’s motor base, with the handle centered below the control panel. Twist the handle to the right until it clicks—this locks it in place. Turn on the machine by pressing the power button.
Select the “Lite Ice Cream” setting (perfect for this low-fat recipe) and let it spin for about 2 minutes. You’ll hear it working—it’s a bit loud, so don’t be surprised!
Step 6 | Check the Texture
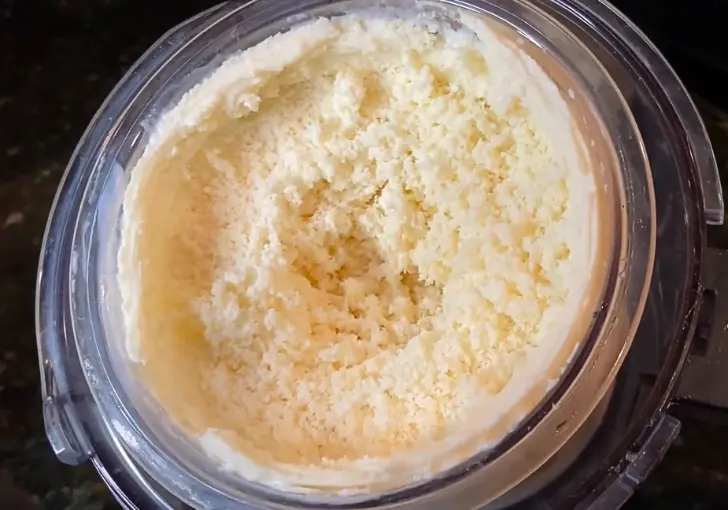
When the spin is done, unlock the outer bowl by pressing the release button and twisting the handle back to the center. Lift off the lid and check your frozen yogurt. It might look a bit crumbly—that’s normal! If it’s not smooth yet, go to the next step.
Step 7 | Re-Spin if Needed
If the yogurt is powdery or crumbly, add a tablespoon of milk to the pint, smooth the top, and put it back in the outer bowl. Lock it in place and press “Re-Spin.” This usually makes it super creamy. I’ve found that lower-fat yogurts often need one or two re-spins. If it’s still not smooth, add another splash of milk and re-spin again.
Step 8 | Add Mix-Ins (Optional)
Want to jazz it up? After the first or second spin, make a small hole in the center of the yogurt with a spoon. Add your mix-ins—like a handful of chopped strawberries, blueberries, or chocolate chips.
Put the lid back on, lock it, and select the “Mix-In” setting. This blends them in perfectly without crushing them too much.
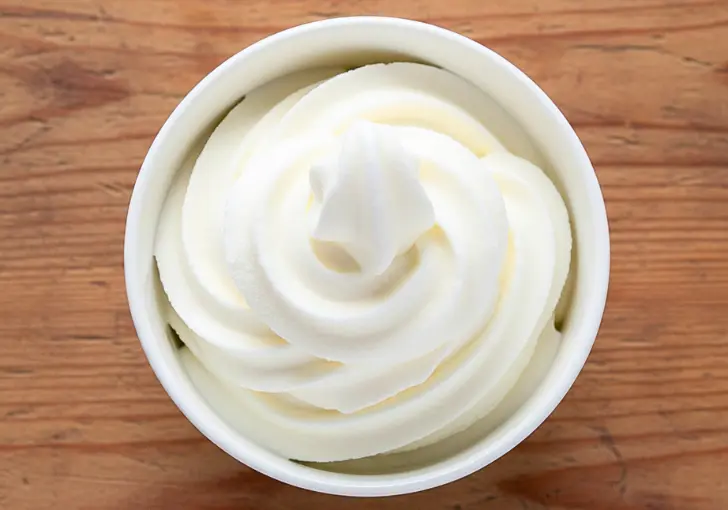
Step 9 | Serve It Up
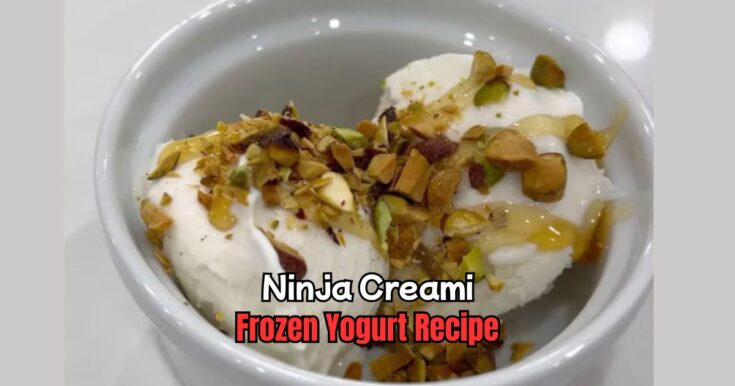
Once it’s creamy and smooth, scoop your frozen yogurt into a bowl or cone. I love eating it right away when it’s soft and scoopable. Add toppings like fresh fruit or a drizzle of honey if you want!
Recipe Tips for Success
Here are some quick tips to make your Ninja Creami Frozen Yogurt Recipe turn out perfect every time. These are little tricks I’ve learned from making it over and over:
- Taste Before Freezing: Always taste your yogurt mix before freezing. Adjust the sweetness if needed—it won’t change much after freezing.
- Level Freezing: Place the pint on a flat surface in the freezer to avoid an uneven top, which can mess with the spinning.
- Don’t Overfill: Stick to the max fill line. Too much mix can jam the machine.
- Warm It Up Slightly: If the pint is rock-hard, let it sit for 5-10 minutes or run warm water over it before spinning to avoid a powdery texture.
- Experiment: Try different yogurt flavors or mix-ins to keep things fun. I once added crushed Oreos, and it was a hit!
- Clean Right Away: Rinse the paddle and bowl immediately to make cleanup easier.
Ninja Creami Frozen Yogurt Serving Suggestion
This Ninja Creami Frozen Yogurt is so versatile, you’ll want to eat it all the time! Here are some fun ways to serve it:
- Fruit Topping: Top with fresh strawberries, blueberries, or sliced peaches for a burst of color and flavor.
- Crunchy Bits: Sprinkle on granola, chopped nuts, or crushed cookies for some texture.
- Sweet Drizzle: Add a drizzle of honey, chocolate syrup, or caramel for extra sweetness.
- Sundae Style: Go all out with whipped cream, sprinkles, and a cherry on top for a fun treat.
How to Store Ninja Creami Frozen Yogurt
Storing your Ninja Creami Frozen Yogurt is super easy! If you have leftovers (which is rare in my house!), use a spoon or spatula to smooth the top of the yogurt in the pint container.
Pop the lid back on and place it in the freezer on a flat surface. It’ll stay good for up to a month. When you’re ready to eat it again, let it sit on the counter for 10-15 minutes to soften slightly, or run it through the “Re-Spin” cycle for that creamy texture.
If you added mix-ins, skip the re-spin to keep them intact—just scoop and enjoy. I love having a pint ready in the freezer for a quick treat!
Ninja Creami Frozen Yogurt Recipe FAQs
Here are some common questions about this Ninja Creami Frozen Yogurt Recipe, with answers to help you nail it every time:
1. Can I use nonfat yogurt for this recipe?
Yes, you can use nonfat Greek yogurt, but it might not be as creamy. The Ninja Creami manual suggests avoiding nonfat yogurt because it can turn out icy. I’ve found that adding a tablespoon of milk or cream during the re-spin helps smooth it out. If you want the best texture, stick with 2% or full-fat yogurt. Experiment and see what works for you!
2. Do I have to freeze it for 24 hours?
Yes, freezing for a full 24 hours is key to getting the right consistency. I’ve tried spinning it after 6-8 hours, and it’s not as creamy. The yogurt needs to be fully frozen for the Ninja Creami to work its magic. I usually prep a couple of pints at once to avoid waiting.
3. Why is my frozen yogurt crumbly after the first spin?
A crumbly texture is normal after the first spin, especially with low-fat or very cold yogurt. I fix this by adding a tablespoon of milk and using the “Re-Spin” function. Sometimes, it needs two re-spins to get super smooth. Make sure your freezer isn’t too cold, as that can make it extra hard.
4. Can I add mix-ins before freezing?
It’s better to add mix-ins after the first or second spin using the “Mix-In” function. If you add them before freezing, they might get too hard or blend unevenly. I like to toss in fresh fruit or chocolate chips after spinning for the best texture and flavor.
5. How long does it take to make this recipe?
The prep takes about 5 minutes, but you’ll need to freeze the mixture for 24 hours. The spinning process takes 2-3 minutes, plus a couple of minutes for re-spins if needed. I love how quick it is once the freezing is done—it’s perfect for a last-minute dessert!
Ninja Creami Frozen Yogurt Recipe
Make creamy, protein-rich Ninja Creami Frozen Yogurt in just 5 minutes (after freezing)! A simple, delicious dessert using Greek yogurt and natural sweeteners.
Ingredients
- Greek Yogurt: 16 oz (plain; full-fat, 2%, or nonfat)
- Milk: ¼ cup (whole, low-fat, or plant-based)
- Honey or Maple Syrup: 1–2 tablespoons (to taste)
- Vanilla Extract: 1 teaspoon
- Optional Mix-Ins: Chopped fruit, chocolate chips, crushed cookies (added after first spin)
Instructions
Step 1 | Mix the Base
Grab a mixing bowl and add 16 ounces of plain Greek yogurt. Pour in ¼ cup of milk, 1-2 tablespoons of honey or maple syrup (taste to see how sweet you want it), and 1 teaspoon of vanilla extract. Whisk everything together until it’s smooth. I like to give it a quick taste to make sure it’s sweet enough. If you’re using flavored yogurt, you can skip the sweetener and vanilla.
Step 2 | Fill the Pint
Pour your yogurt mixture into the Ninja Creami pint container. Make sure it doesn’t go past the max fill line—this is important so the machine can work its magic. Use a spatula to smooth the top so it’s nice and even.
Step 3 | Freeze It
Pop the lid on the pint container and place it in your freezer on a flat surface. Let it freeze for 24 hours. I know waiting is tough, but it’s key to getting that perfect texture. I usually make a couple of pints at once so I always have one ready!
Step 4 | Set Up the Ninja Creami
After 24 hours, take the pint out of the freezer and remove the lid. Plug in your Ninja Creami and place it on a flat counter. Put the pint into the outer bowl. Attach the Creamerizer Paddle to the outer bowl lid by pressing the latch and inserting the paddle. Then, lock the lid onto the outer bowl by lining up the tab with the handle and twisting it clockwise.
Step 5 | Lock and Spin
Place the outer bowl onto the Ninja Creami’s motor base, with the handle centered below the control panel. Twist the handle to the right until it clicks—this locks it in place. Turn on the machine by pressing the power button. Select the “Lite Ice Cream” setting (perfect for this low-fat recipe) and let it spin for about 2 minutes. You’ll hear it working—it’s a bit loud, so don’t be surprised!
Step 6 | Check the Texture
When the spin is done, unlock the outer bowl by pressing the release button and twisting the handle back to the center. Lift off the lid and check your frozen yogurt. It might look a bit crumbly—that’s normal! If it’s not smooth yet, go to the next step.
Step 7 | Re-Spin if Needed
If the yogurt is powdery or crumbly, add a tablespoon of milk to the pint, smooth the top, and put it back in the outer bowl. Lock it in place and press “Re-Spin.” This usually makes it super creamy. I’ve found that lower-fat yogurts often need one or two re-spins. If it’s still not smooth, add another splash of milk and re-spin again.
Step 8 | Add Mix-Ins (Optional)
Want to jazz it up? After the first or second spin, make a small hole in the center of the yogurt with a spoon. Add your mix-ins—like a handful of chopped strawberries, blueberries, or chocolate chips. Put the lid back on, lock it, and select the “Mix-In” setting. This blends them in perfectly without crushing them too much.
Step 9 | Serve It Up
Once it’s creamy and smooth, scoop your frozen yogurt into a bowl or cone. I love eating it right away when it’s soft and scoopable. Add toppings like fresh fruit or a drizzle of honey if you want!
Nutrition Information:
Serving Size:
1Amount Per Serving: Calories: 130Total Fat: 6gSaturated Fat: 3.5gCholesterol: 20mgSodium: 40mgCarbohydrates: 10gSugar: 8gProtein: 10g
Did you make this Ninja Creami Frozen Yogurt Recipe? Please leave a ⭐ rating and review!


Leave a Reply