
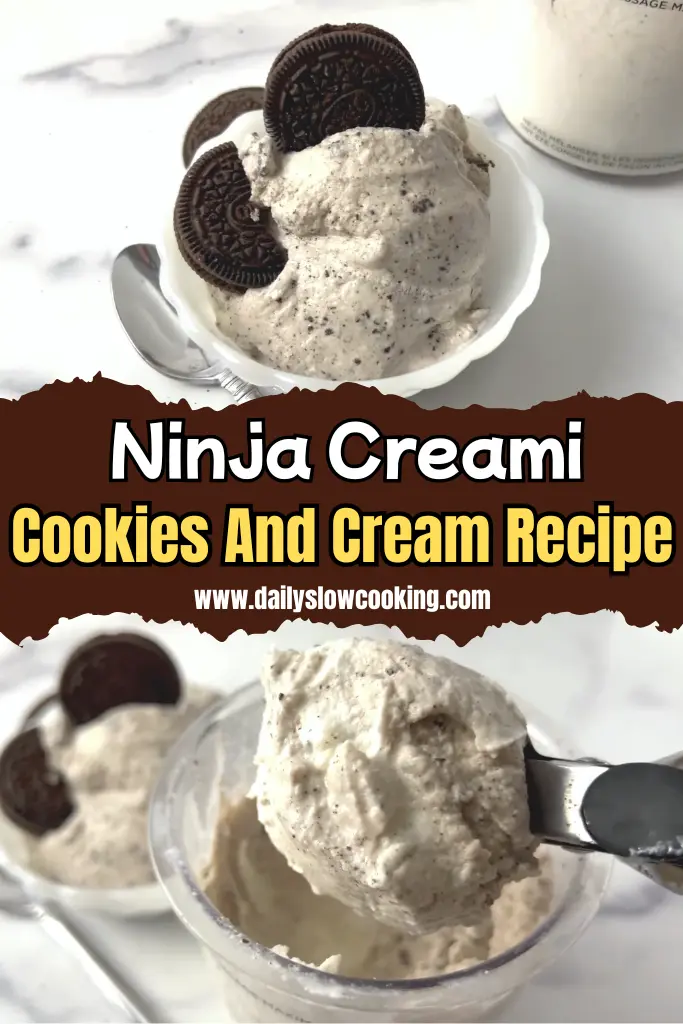
The Ninja Creami Cookies And Cream Recipe is a simple way to make smooth, creamy ice cream with crunchy cookie pieces right at home.
Cookies and cream is a classic flavor loved by many—it mixes sweet, creamy ice cream with crunchy chocolate sandwich cookies. Usually, making ice cream from scratch can take a long time or need special tools.
But with the Ninja Creami, it’s much easier. This machine helps you turn simple ingredients into creamy, scoopable ice cream quickly and without fuss. You will love this recipe because it’s fast, tasty, and gives you that homemade feel.
Plus, it’s a fun treat to enjoy any day. If you like cookies and cream, you should also try my Ninja Creami Fairlife Recipe—it’s another delicious choice!
Why You Love This Ninja Creami Cookies And Cream
This Ninja Creami Cookies And Cream Recipe is a total game-changer, and I’m excited to share why it’s so awesome!
- Super Easy: You don’t need to be a chef to make this. The steps are simple, and the Ninja Creami does most of the work.
- Tastes Amazing: The creamy vanilla base mixed with crunchy cookie bits is a classic combo that never gets old.
- Customizable: You can swap cookies or add extra mix-ins to make it your own.
- Kid-Friendly: My kids go wild for this, and it’s fun to make together.
- Healthier Option: You control the ingredients, so you can cut down on sugar or use dairy-free alternatives.
This recipe is a winner because it’s quick to prep, fun to make, and delivers that perfect cookies-and-cream flavor we all crave.
Ninja Creami Cookies And Cream Ingredients
Let’s talk about what goes into this delicious Ninja Creami Cookies And Cream Recipe. Each ingredient plays a big role in making this ice cream creamy, sweet, and full of that classic cookie crunch. Here’s the lineup with a detailed breakdown:
- Cream Cheese (1 tablespoon, softened): This is my secret weapon for that ultra-creamy texture. Softened cream cheese blends smoothly and adds a rich, slightly tangy flavor that makes the ice cream feel indulgent. I leave it out for about 30 minutes to soften, or I pop it in the microwave for 10 seconds to make it easier to mix.
- Granulated Sugar (⅓ cup): Sugar brings the sweetness to balance the creamy base. I use regular white sugar because it dissolves easily and gives a clean, sweet taste. It’s just enough to make the ice cream sweet without being overpowering.
- Vanilla Extract (1 teaspoon): A splash of vanilla extract adds that warm, classic flavor that pairs perfectly with the cookies. I prefer pure vanilla extract for the best taste, but vanilla bean paste works great if you want little flecks of vanilla in your ice cream.
- Heavy Cream (¾ cup): This is what makes the ice cream rich and smooth. Heavy cream has a high fat content, which gives the ice cream that luscious, velvety feel. I measure it carefully to keep the balance just right.
- Whole Milk (1 cup): Milk thins out the mixture a bit so it’s not too heavy, but it still keeps things creamy. I use whole milk for the best texture, but you can swap it for other types if needed (more on that later). It helps make the ice cream scoopable.
- Chocolate Sandwich Cookies (5 regular-sized, like Oreos): The star of the show! I use classic Oreos or a similar chocolate sandwich cookie for that crunchy, chocolatey goodness. I break them into quarters for the mix-in step to get nice chunks in every bite.
Helpful Swaps
Sometimes you don’t have every ingredient on hand, or you want to tweak this Ninja Creami Cookies And Cream Recipe to fit your needs. Here are some easy swaps that work just as well:
- Cream Cheese: If you don’t have cream cheese, you can use Greek yogurt for a slightly tangier flavor. It still adds creaminess but keeps things a bit lighter.
- Granulated Sugar: Swap sugar for honey, maple syrup, or a sugar-free sweetener like monk fruit for a lower-sugar option. Just use a little less since these can be sweeter.
- Vanilla Extract: Vanilla bean paste is a great alternative for a fancier look. If you’re out of both, a pinch of cinnamon can add a warm flavor twist.
- Heavy Cream: Half-and-half works if you’re out of heavy cream, though it’ll be slightly less rich. For a dairy-free version, try coconut cream.
- Whole Milk: Skim milk, 2% milk, or plant-based options like almond, oat, or coconut milk work well. I love Fairlife milk for extra protein and creaminess.
- Chocolate Sandwich Cookies: Swap Oreos for gluten-free sandwich cookies, Golden Oreos, or even crushed chocolate chip cookies for a different vibe.
Kitchen Equipment Needed
To make this Ninja Creami Cookies And Cream Recipe, you’ll need a few basic tools. Don’t worry, it’s nothing fancy, and most of these are probably already in your kitchen:
- Ninja Creami Machine: The star of the show! This machine turns your frozen mixture into creamy ice cream. Make sure you have the pint container and the Creamerizer Paddle.
- Mixing Bowl: A medium-sized bowl to mix your ingredients. I use a glass one because it’s easy to clean.
- Whisk or Spatula: For blending the ingredients smoothly. A whisk works best to break up the cream cheese and sugar.
- Measuring Cups and Spoons: To measure your cream, milk, sugar, and vanilla accurately.
- Microwave-Safe Bowl (Optional): If you need to soften the cream cheese quickly, a small microwave-safe bowl is handy.
- Knife or Food Processor (Optional): To chop the cookies into quarters. I usually just break them by hand, but a knife or processor makes it quicker.
- Spoon: For scooping out a well in the ice cream for mix-ins and for serving.
How To Make Ninja Creami Cookies And Cream
Making this Ninja Creami Cookies And Cream Recipe is so easy, even if you’ve never made ice cream before. I’ll walk you through each step like I’m right there in your kitchen. Let’s get started!
Step 1 | Soften the Cream Cheese
Take 1 tablespoon of cream cheese and put it in a small bowl. Let it sit out for 30 minutes to soften, or microwave it for 10 seconds. This makes it easier to mix and keeps your ice cream smooth.
Step 2 | Mix the Base
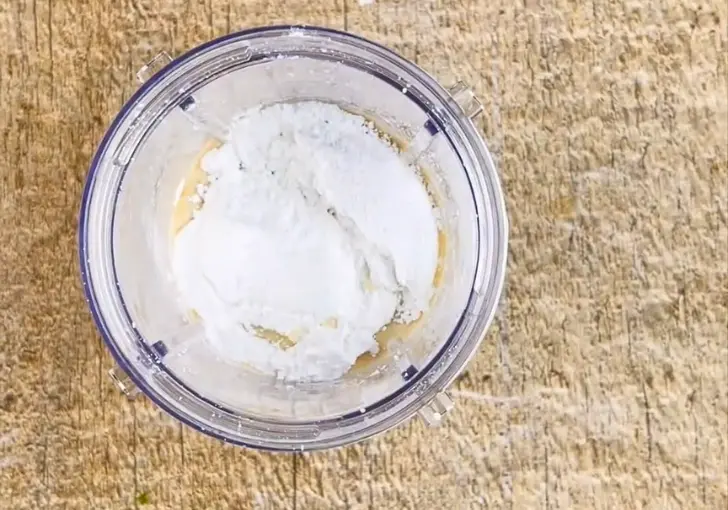
In a medium mixing bowl, add the softened cream cheese, ⅓ cup granulated sugar, and 1 teaspoon vanilla extract. Whisk them together until it looks like a smooth, creamy frosting. It takes about a minute, and I love how it smells so sweet and vanilla-y!
Step 3 | Add the Liquids
Slowly pour in ¾ cup heavy cream and 1 cup whole milk. Whisk everything together until it’s fully combined. You want a smooth, slightly thick mixture. Make sure not to go over the max fill line when you pour it into the Ninja Creami pint later.
Step 4 | Pour into the Pint
Carefully pour the mixture into your Ninja Creami pint container, stopping just below the max fill line. Pop the lid on tightly. I always double-check that the lid is secure to avoid any leaks.
Step 5 | Freeze It
Place the pint on a flat surface in your freezer and let it freeze for at least 24 hours. The Ninja Creami manual says 24 hours ensures the mixture is fully frozen, but I’ve found 20-22 hours works in a pinch if you’re impatient like me!
Step 6 | Prep the Cookies
While the mixture is freezing, take 5 chocolate sandwich cookies (like Oreos) and break or cut them into quarters. I usually do this by hand, but you can use a knife or food processor for smaller pieces. Set them aside for later.
Step 7 | Set Up the Ninja Creami
After 24 hours, take the pint out of the freezer and remove the lid. Place the pint in the outer bowl of the Ninja Creami. Press and hold the paddle latch on the outer bowl lid, then insert the Creamerizer Paddle into the bottom of the lid. Release the latch to lock it in place.
Step 8 | Lock and Load
Position the outer bowl lid so the tab aligns just to the right of the outer bowl handle. Rotate the lid clockwise to lock it. Place the outer bowl onto the motor base, with the handle centered below the control panel. Twist the handle to the right until it clicks—this raises the platform and locks the bowl in place.
Step 9 | Process the Ice Cream
Turn on the Ninja Creami by pressing the power button. Select the “Ice Cream” function. The machine will run for about 2 minutes, blending the frozen mixture into creamy ice cream. It’s loud, but it’s worth it!
Step 10 | Check the Texture
When the cycle finishes, remove the outer bowl by holding the release button and twisting the handle back to the center. Lift off the lid and check the ice cream. If it looks crumbly or powdery, don’t worry! Just add 1 tablespoon of milk, put the lid back on, and run the “Re-Spin” function. This usually makes it super creamy.
Step 11 | Add the Cookies
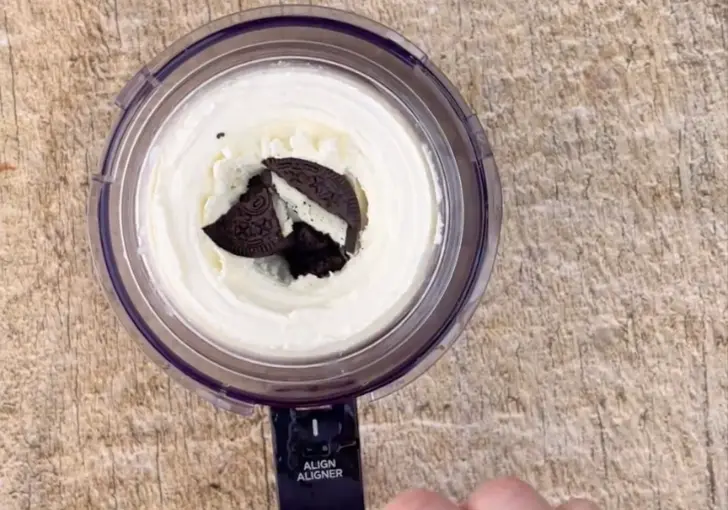
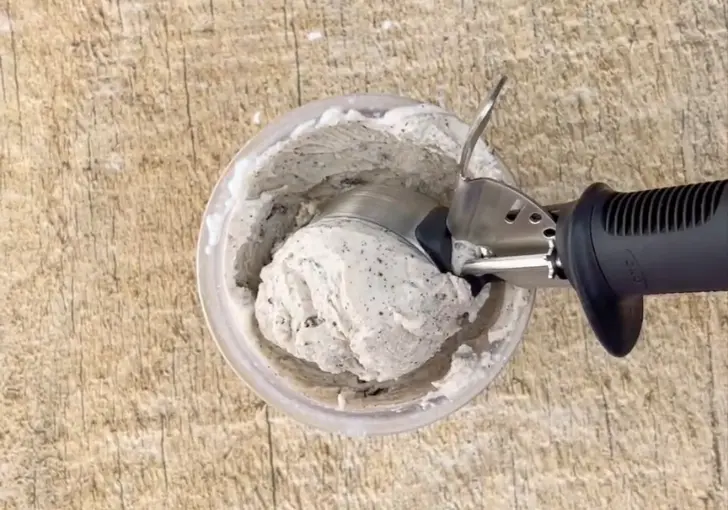
Once the ice cream is smooth, use a spoon to make a 1.5-inch-wide well in the center of the pint, going all the way to the bottom. Add your cookie pieces into the well. Put the lid back on, lock the outer bowl in place, and select the “Mix-In” function to blend the cookies evenly.
Step 12 | Serve It Up
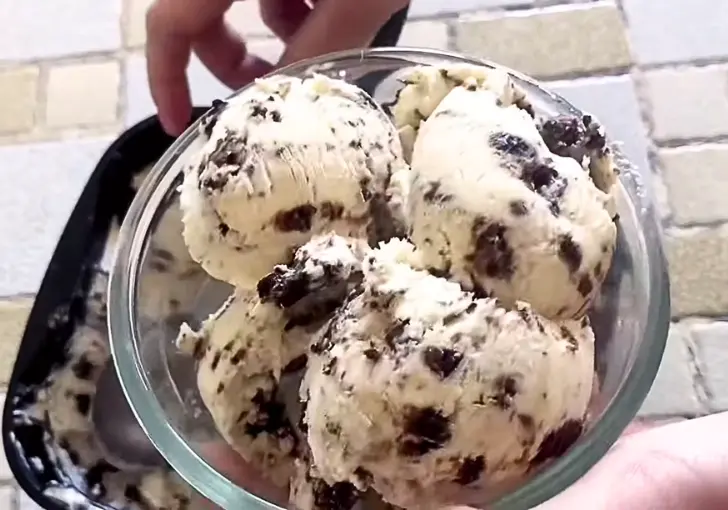
Remove the pint from the machine, grab a spoon, and scoop out your ice cream. You can eat it right away for a soft-serve texture or pop it back in the freezer for 30 minutes for a firmer scoop. I love topping mine with an extra crushed cookie for a little crunch!
Recipe Tips for Success
Here are some quick tips to make your Ninja Creami Cookies And Cream Recipe turn out perfectly every time. These are little tricks I’ve learned from making it over and over:
- Don’t Skip the Freeze Time: Freezing for at least 24 hours ensures the best texture. If you rush it, the ice cream might be too soft or smoothie-like.
- Check Your Freezer Temp: If your ice cream is too hard or crumbly, your freezer might be too cold. Let the pint sit out for 5-10 minutes before processing.
- Use Room-Temp Cream Cheese: Cold cream cheese can leave lumps, so soften it first for a smooth base.
- Don’t Overfill the Pint: Stick to the max fill line to avoid spills and ensure proper blending.
- Re-Spin if Needed: If the texture isn’t creamy after the first spin, add a splash of milk and re-spin. It makes a big difference!
- Add Cookies Last: Mix in the cookies after the base is smooth to get even chunks throughout.
Ninja Creami Cookies And Cream Serving Suggestions
This Ninja Creami Cookies And Cream Recipe is so versatile, and I love finding fun ways to serve it! Here are some ideas to make it even more special:
- In a Cone: Scoop it into a waffle cone for a classic ice cream shop vibe.
- With Toppings: Sprinkle extra crushed Oreos, whipped cream, or chocolate syrup on top for a decadent treat.
- As a Milkshake: Blend a scoop with some milk using the Ninja Creami’s “Milkshake” function for a creamy shake.
- With Brownies: Serve a scoop over a warm brownie for an extra indulgent dessert.
- In a Sundae: Layer it with hot fudge and caramel sauce for a fun sundae bar.
How to Store Ninja Creami Cookies And Cream
Storing your Ninja Creami Cookies And Cream is super easy, and you can keep it fresh for later. After you’ve made the ice cream, smooth out the top with a spoon or spatula to make it level.
Pop the lid back on the Ninja Creami pint and place it in the freezer. It’s best to eat it within 2-3 days for the freshest flavor, but it can last up to a month in an airtight container.
If it gets too hard, let it sit at room temperature for 10 minutes before scooping, or reprocess it using the “Re-Spin” function for a creamy texture.
Freezing it properly keeps the cookie chunks crunchy and the ice cream smooth, so you can enjoy it whenever a craving hits.
Ninja Creami Cookies And Cream Recipe FAQs
1. Can I use a different type of milk for this recipe?
Yes, you can! I’ve tried whole milk for the creamiest texture, but 2%, skim, or plant-based milks like almond, oat, or coconut work too. Fairlife milk is my go-to for extra protein. Just know that lower-fat milks might need an extra re-spin for creaminess. If you use a thinner milk like almond, add a little less to keep the base thick. Experiment to find what you like best!
2. What if I don’t have a Ninja Creami?
No Ninja Creami? No problem! You can make this with a traditional ice cream maker, but it’ll take more steps. Mix the base, churn it in your ice cream maker per its instructions, and add the cookies toward the end of churning. If you don’t have an ice cream maker, freeze the mixture in a shallow dish and stir every 30 minutes until it’s creamy, then mix in the cookies.
3. Why is my ice cream crumbly after processing?
If your ice cream is crumbly, it’s likely too cold or has too much fat. Let the pint sit out for 5-10 minutes before processing, or add 1 tablespoon of milk and use the “Re-Spin” function. I’ve found that re-spinning always fixes the texture. Also, check that your freezer isn’t set too low, as that can make the base too hard.
4. Can I make this recipe dairy-free?
Absolutely! Swap the cream cheese for vegan cream cheese, use coconut cream instead of heavy cream, and choose a plant-based milk like oat or almond. Oreos are naturally dairy-free, so they’re perfect for this. I’ve made it this way, and it’s just as creamy and delicious. Adjust the sugar slightly if your milk is sweetened.
5. How do I get the cookies to mix in evenly?
To get those cookie chunks evenly spread, make a deep well in the center of the ice cream before adding them. I use a spoon to scoop out a 1.5-inch-wide hole all the way to the bottom. This helps the Ninja Creami’s “Mix-In” function distribute the cookies throughout. Don’t add them too early, or they’ll get too fine.
6. Can I use different cookies instead of Oreos?
Yes, you can switch things up! I’ve tried Golden Oreos, gluten-free sandwich cookies, or even crushed chocolate chip cookies, and they all work great. Just make sure to break them into small pieces so they mix well. You can also try wafer cookies or graham crackers for a fun twist. Have fun experimenting!
Ninja Creami Cookies And Cream Recipe
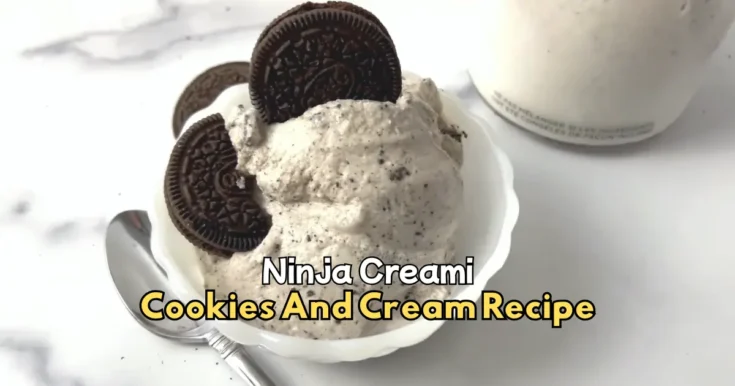
Ninja Creami Cookies and Cream ice cream is ready in just 24 hours! Creamy, sweet, and full of Oreo crunch—your perfect homemade frozen treat.
Ingredients
- Cream Cheese: 1 tablespoon, softened
- Granulated Sugar: ⅓ cup
- Vanilla Extract: 1 teaspoon
- Heavy Cream: ¾ cup
- Whole Milk: 1 cup
- Chocolate Sandwich Cookies (like Oreos): 5 regular-sized, quartered
Instructions
Step 1 | Soften the Cream Cheese
Take 1 tablespoon of cream cheese and put it in a small bowl. Let it sit out for 30 minutes to soften, or microwave it for 10 seconds. This makes it easier to mix and keeps your ice cream smooth.
Step 2 | Mix the Base
In a medium mixing bowl, add the softened cream cheese, ⅓ cup granulated sugar, and 1 teaspoon vanilla extract. Whisk them together until it looks like a smooth, creamy frosting. It takes about a minute, and I love how it smells so sweet and vanilla-y!
Step 3 | Add the Liquids
Slowly pour in ¾ cup heavy cream and 1 cup whole milk. Whisk everything together until it’s fully combined. You want a smooth, slightly thick mixture. Make sure not to go over the max fill line when you pour it into the Ninja Creami pint later.
Step 4 | Pour into the Pint
Carefully pour the mixture into your Ninja Creami pint container, stopping just below the max fill line. Pop the lid on tightly. I always double-check that the lid is secure to avoid any leaks.
Step 5 | Freeze It
Place the pint on a flat surface in your freezer and let it freeze for at least 24 hours. The Ninja Creami manual says 24 hours ensures the mixture is fully frozen, but I’ve found 20-22 hours works in a pinch if you’re impatient like me!
Step 6 | Prep the Cookies
While the mixture is freezing, take 5 chocolate sandwich cookies (like Oreos) and break or cut them into quarters. I usually do this by hand, but you can use a knife or food processor for smaller pieces. Set them aside for later.
Step 7 | Set Up the Ninja Creami
After 24 hours, take the pint out of the freezer and remove the lid. Place the pint in the outer bowl of the Ninja Creami. Press and hold the paddle latch on the outer bowl lid, then insert the Creamerizer Paddle into the bottom of the lid. Release the latch to lock it in place.
Step 8 | Lock and Load
Position the outer bowl lid so the tab aligns just to the right of the outer bowl handle. Rotate the lid clockwise to lock it. Place the outer bowl onto the motor base, with the handle centered below the control panel. Twist the handle to the right until it clicks—this raises the platform and locks the bowl in place.
Step 9 | Process the Ice Cream
Turn on the Ninja Creami by pressing the power button. Select the “Ice Cream” function. The machine will run for about 2 minutes, blending the frozen mixture into creamy ice cream. It’s loud, but it’s worth it!
Step 10 | Check the Texture
When the cycle finishes, remove the outer bowl by holding the release button and twisting the handle back to the center. Lift off the lid and check the ice cream. If it looks crumbly or powdery, don’t worry! Just add 1 tablespoon of milk, put the lid back on, and run the “Re-Spin” function. This usually makes it super creamy.
Step 11 | Add the Cookies
Once the ice cream is smooth, use a spoon to make a 1.5-inch-wide well in the center of the pint, going all the way to the bottom. Add your cookie pieces into the well. Put the lid back on, lock the outer bowl in place, and select the “Mix-In” function to blend the cookies evenly.
Step 12 | Serve It Up
Remove the pint from the machine, grab a spoon, and scoop out your ice cream. You can eat it right away for a soft-serve texture or pop it back in the freezer for 30 minutes for a firmer scoop. I love topping mine with an extra crushed cookie for a little crunch!
Nutrition Information:
Serving Size:
1Amount Per Serving: Calories: 380Total Fat: 26gSaturated Fat: 15gCholesterol: 85mgSodium: 160mgCarbohydrates: 32gFiber: 1gSugar: 26gProtein: 5g
Did you make this Ninja Creami Cookies And Cream Recipe? Please leave a ⭐ rating and review!


Leave a Reply