
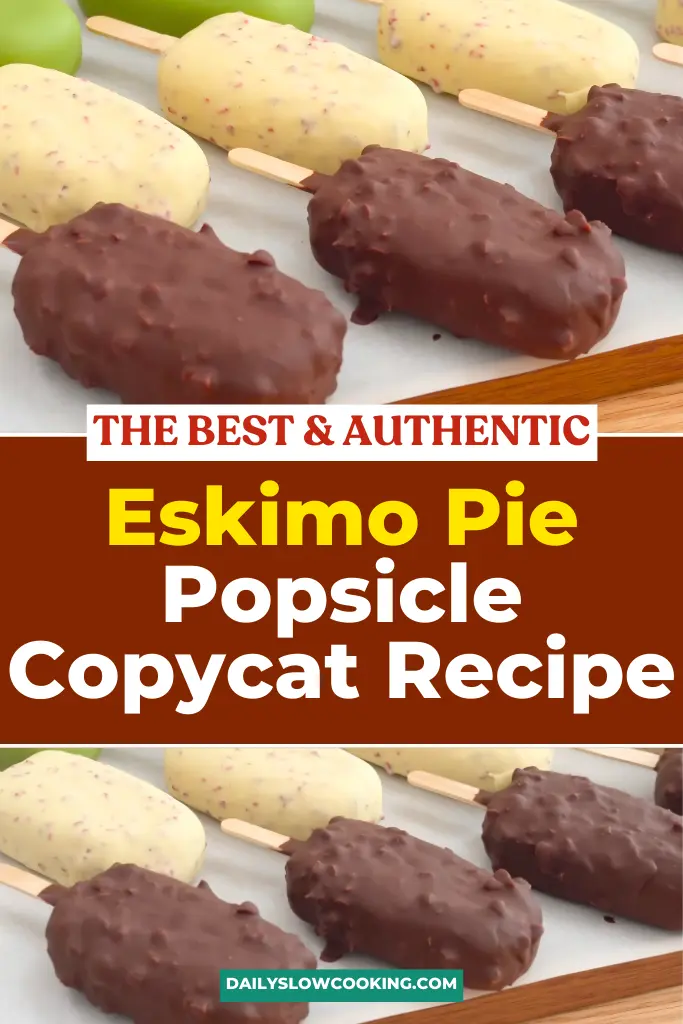
Do you remember the pure joy of biting into an Eskimo Pie, now known as Edy’s Pie? That perfect mix of creamy vanilla ice cream encased in a crunchy chocolate shell feels like a sweet taste of nostalgia.
The Eskimo Pie has a fascinating history—it was invented in 1921 by Christian K. Nelson, a Danish immigrant and candy store owner. The story goes that a boy in his store couldn’t decide between ice cream or a chocolate bar, and with just one nickel in his pocket, Nelson had an idea.
After weeks of experimenting, he discovered how to coat ice cream with chocolate using cocoa butter. And just like that, the “I-Scream Bar” was born, later becoming the iconic Eskimo Pie.
Now, imagine recreating that iconic treat right at home—with a fun, customizable twist!
These homemade Eskimo Pie popsicles are easy to make, endlessly adaptable, and perfect for any time you want a cool, chocolate-dipped treat.
Why You’ll Love This Homemade Eskimo Pie Popsicle
There’s something magical about making your own treats at home. With this homemade Eskimo Pie popsicle recipe, you get to enjoy a classic dessert while adding your personal touch. Plus, it’s simple enough for beginners to try and fun for everyone.
Reasons You’ll Love It:
- Customizable: Choose your favorite ice cream flavor—vanilla, chocolate, or even mint! Add crushed nuts, sprinkles, or candy for extra flair.
- Healthier Options: Use better-quality ingredients, like organic ice cream or dark chocolate, for a guilt-free indulgence.
- Fun for Kids: A hands-on treat that’s perfect for family fun or teaching little ones how to make something special.
- Easy to Store: Make a batch, and you’ll have a sweet snack ready to enjoy anytime.
Ingredients for Homemade Eskimo Pie Popsicle
Ice Cream (Choose Your Flavor):
- Vanilla Ice Cream (2 cups): The classic base for Eskimo Pie. Feel free to substitute with chocolate, strawberry, or mint for a creative spin.
- Optional Add-Ins: Add crushed nuts, sprinkles, or mini chocolate chips to the ice cream for extra texture and fun.
Chocolate Coating:
- Semi-Sweet Chocolate Chips (1 cup): Melts smoothly for a rich, chocolatey shell. You can also use dark chocolate if you prefer a deeper flavor.
- Coconut Oil (2 tablespoons): Helps the chocolate melt evenly and gives it a shiny finish.
Optional Flavor Extract for Chocolate:
- Vanilla, Mint, or Almond Extract (1 teaspoon): Adds a subtle twist to the chocolate coating, perfect for experimenting with different tastes.
Tools Needed:
- Popsicle molds or small paper cups
- Popsicle sticks
- A microwave-safe bowl
- A spoon for mixing
- A parchment-lined baking sheet
How to Make Eskimo Pie Like Popsicles
Step 1: Soften the Ice Cream
Take your ice cream out of the freezer and let it sit for 5-10 minutes until it softens slightly. If you’re adding mix-ins (like nuts, crushed cookies, or sprinkles), gently stir them into the softened ice cream.
Step 2: Fill the Popsicle Molds
- Spoon the softened ice cream into your popsicle molds.
- Smooth the surface with the back of a spoon or spatula.
- Insert popsicle sticks into the molds.
- Place the molds in the freezer and freeze for 4-6 hours or overnight for the best results.
Step 3: Prepare the Chocolate Coating
Add 1 cup of semi-sweet chocolate chips and 2 tablespoons of coconut oil to a microwave-safe bowl. Microwave in 20-second intervals, stirring well after each round, until the chocolate is completely melted and smooth. For extra flavor, stir in ½ teaspoon of your favorite extract (optional).
Step 4: Unmold the Popsicles
Once the popsicles are fully frozen, carefully remove them from the molds. If they’re stuck, run warm water over the outside of the molds for a few seconds to loosen them.
Step 5: Dip in Chocolate Coating
Hold the popsicle stick and dip each popsicle into the melted chocolate. Gently rotate the popsicle to coat it evenly with chocolate. The chocolate will harden quickly because the popsicles are cold.
Step 6: Freeze Again
Place the chocolate-coated popsicles on a baking sheet lined with parchment paper. Put the tray back in the freezer for 30 minutes to 1 hour to ensure the chocolate sets properly.
Step 7: Store or Serve
Once the popsicles are completely set, wrap each one in parchment paper to prevent sticking and store them in an airtight container. These popsicles will stay fresh in the freezer for up to 2 weeks.
Tips for Creativity
- Let the ice cream soften just enough for easy scooping—don’t let it melt completely.
- Use high-quality chocolate for the best flavor.
- Work quickly when coating popsicles since the chocolate hardens fast.
- Add a pinch of salt to the chocolate for a deeper, richer taste.
- For easier storage, place popsicles in a single layer in the freezer before stacking.
How to Make Your Eskimo Pie Popsicles Extra Special
Pairing Ideas:
- Roll the chocolate-dipped popsicles in crushed nuts, sprinkles, or cookie crumbs for added texture.
- Serve alongside fresh fruit or a drizzle of caramel sauce for a fancy twist.
How to Store
- Short-Term: Wrap popsicles in parchment paper to prevent sticking and store them in an airtight container.
- Long-Term: Place them in the freezer for up to 2 weeks for freshness.
- Pro Tip: Store in a single layer to avoid damaging the chocolate coating.
FAQs
Can I use dairy-free ice cream?
Yes, you can use any dairy-free ice cream like coconut milk-based or almond milk-based options.
What if I don’t have popsicle molds?
Small paper cups work just as well! Simply insert sticks into the ice cream before freezing.
Can I use white chocolate instead of dark?
Absolutely! White chocolate creates a sweeter coating that’s equally delicious.
How do I keep the chocolate from cracking?
Adding coconut oil to the chocolate helps prevent cracking and ensures a smooth coating.
What toppings work best?
Crushed nuts, sprinkles, shredded coconut, and cookie crumbs are all great options.
How do I make them extra creamy?
Use premium ice cream with higher fat content for a creamier texture.
Homemade Eskimo Pie Popsicle Recipe

This Homemade Eskimo Pie Popsicle Recipe brings back the classic chocolate-covered ice cream treat we all love. It’s easy to make, customizable with your favorite flavors, and perfect for a quick sweet fix. You’ll love how simple and fun it is to recreate this nostalgic dessert at home!
Ingredients
- Ice Cream: 2 cups (vanilla, chocolate, strawberry, mint, or any flavor of your choice)
- Semi-Sweet Chocolate Chips: 1 cup
- Coconut Oil: 2 tablespoons
Optional Add-Ins:
- Nuts (chopped)
- Crushed cookies
- Sprinkles
- Candy bits
- Optional Flavor Extract: ½ teaspoon (like mint, orange, or almond)
Instructions
- Take your ice cream out of the freezer and let it sit for 5-10 minutes until it softens slightly. If you’re adding mix-ins (like nuts, crushed cookies, or sprinkles), gently stir them into the softened ice cream.
- Spoon the softened ice cream into your popsicle molds. Smooth the surface with the back of a spoon or spatula. Insert popsicle sticks into the molds.
- Place the molds in the freezer and freeze for 4-6 hours or overnight for the best results.
- Add 1 cup of semi-sweet chocolate chips and 2 tablespoons of coconut oil to a microwave-safe bowl. Microwave in 20-second intervals, stirring well after each round, until the chocolate is completely melted and smooth. For extra flavor, stir in ½ teaspoon of your favorite extract (optional).
- Once the popsicles are fully frozen, carefully remove them from the molds. If they’re stuck, run warm water over the outside of the molds for a few seconds to loosen them.
- Hold the popsicle stick and dip each popsicle into the melted chocolate. Gently rotate the popsicle to coat it evenly with chocolate. The chocolate will harden quickly because the popsicles are cold.
- Place the chocolate-coated popsicles on a baking sheet lined with parchment paper. Put the tray back in the freezer for 30 minutes to 1 hour to ensure the chocolate sets properly.
- Once the popsicles are completely set, wrap each one in parchment paper to prevent sticking and store them in an airtight container. These popsicles will stay fresh in the freezer for up to 2 weeks.
Nutrition Information:
Serving Size:
6 popsiclesAmount Per Serving: Calories: 250Total Fat: 15gSaturated Fat: 10gCholesterol: 20mgSodium: 35mgCarbohydrates: 28gSugar: 23g
The nutritional information provided is an estimate and may vary based on ingredients used and portion sizes. Always consult a nutritionist for specific dietary needs.
There you have it—your very own homemade Eskimo Pie popsicle recipe! This simple, delicious treat combines nostalgia with the joy of creating something from scratch.
I hope you give this recipe a try and share your experience with us.
Let’s keep the sweet tradition alive! Don’t forget to follow us on Pinterest for more delightful recipes.


Leave a Reply