
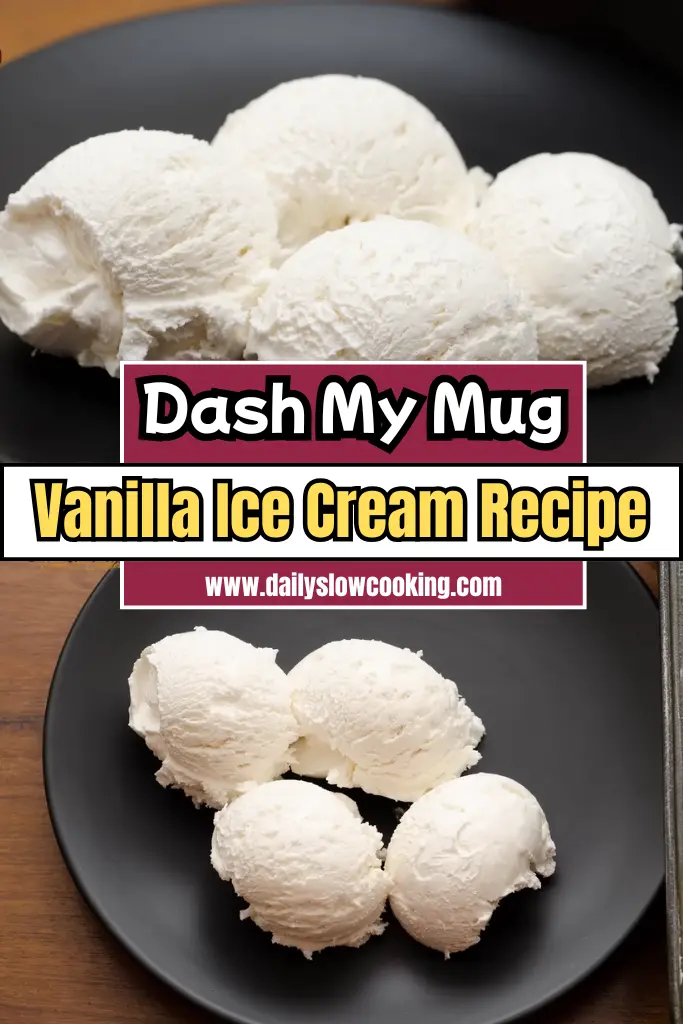
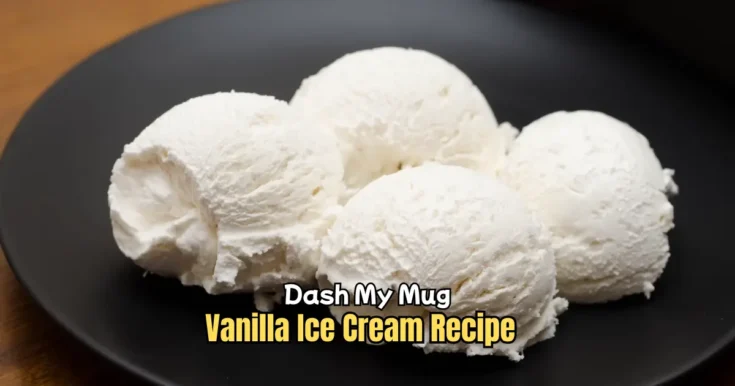
Making ice cream at home used to sound hard, right? But with Dash My Mug Vanilla Ice Cream, it’s now super simple and fun.
I tried this at home and wow—it really works! This is a smooth, creamy vanilla ice cream you can make in one mug. You don’t need a big machine, just a Dash My Mug Ice Cream Maker.
Trust me, once you try this, you’ll want to make it again and again. It’s cool, sweet, and perfect for a hot day or just when you’re craving something homemade.
This recipe is easy for beginners, and even if English isn’t your strong point, don’t worry—I’ve kept it simple.
If you’re also curious about other fun ways to make ice cream, check out my Ninja Creami Vanilla Ice Cream Recipe Without Cream Cheese too. Now, let’s get into this creamy delight!
Why You Love This Dash My Mug Vanilla Ice Cream
- Super Easy: No fancy skills needed. Just mix, pour, and churn!
- Quick Treat: Ready in about 20 minutes. Perfect for sudden cravings.
- Small Batch: Makes just enough for one or two, so no leftovers go to waste.
- Yummy Flavor: Rich vanilla taste that’s creamy and smooth.
- Fun to Make: The Dash My Mug is like a toy that makes dessert!
I love how this recipe comes together so fast. It’s perfect for a cozy night in or when I want a sweet treat without much work. The small size means I can enjoy it fresh, and the vanilla flavor is always a hit.
Dash My Mug Vanilla Ice Cream Ingredients
Here’s what you need to make this tasty ice cream. Each ingredient is simple and does something special:
- ½ cup whole milk (120 ml): This gives the ice cream a creamy base. Whole milk has just the right amount of fat to make it smooth without being too heavy. I use fresh milk from the fridge for the best taste.
- ¼ cup granulated sugar (50 g): Sugar sweetens the ice cream and helps it stay soft when frozen. I use regular white sugar because it dissolves easily in the milk.
- ½ cup heavy cream (120 ml): This makes the ice cream rich and velvety. Heavy cream has more fat than milk, so it gives that luxurious texture we all love.
- 1 tsp pure vanilla extract (5 ml): Vanilla is the star! I use pure vanilla extract for a strong, natural flavor. It smells amazing and makes the ice cream taste like a classic treat.
Helpful Swaps
If you’re missing something or want to mix it up, try these swaps:
- Milk: Use 2% milk if you don’t have whole milk. It’s a bit lighter but still works.
- Sugar: Swap with monk fruit sweetener for a low-sugar option. Use the same amount.
- Heavy Cream: Half-and-half can work in a pinch, but the ice cream won’t be as rich.
- Vanilla Extract: Vanilla bean paste (1 tsp) gives cute little specks and bold flavor.
Kitchen Equipment Needed
You don’t need a ton of stuff to make this ice cream. Here’s what I use:
- Dash My Mug Ice Cream Maker: The star of the show! It comes with a mug (cooling bowl), lid, motor, and paddle.
- Liquid measuring cup: For measuring milk and cream accurately.
- Dry measuring cup: To measure sugar.
- Measuring spoons: For the vanilla extract.
- Whisk or spoon: To mix the ingredients smoothly.
- Spatula (optional): Helps scrape the ice cream out of the mug.
- Freezer: To freeze the mug bowl for 24 hours before churning.
How To Make Dash My Mug Vanilla Ice Cream
Making this ice cream is so easy, even if you’re new to cooking. I’ll walk you through each step like I’m right there with you. Let’s do this!
Step 1 | Freeze the Mug
Put the Dash My Mug bowl in your freezer for at least 24 hours. Keep it upright, not sideways. I pop mine in the back of the freezer where it’s coldest. This step makes sure your ice cream freezes properly.
Step 2 | Mix the Base
Grab a liquid measuring cup. Pour in ½ cup whole milk and ¼ cup sugar. Whisk them together until the sugar completely dissolves. It takes about a minute. Then, add ½ cup heavy cream and 1 tsp vanilla extract. Stir gently until everything is mixed. The mixture smells so good already!
Step 3 | Set Up the Machine
Take the frozen mug out of the freezer and place it on a flat surface, like your kitchen counter. Attach the motor to the lid by sliding it into the slots. Click the paddle into the motor’s base. Lower the lid onto the mug, lining up the pins with the notches. Twist it clockwise to lock it in place.
Step 4 | Start Churning
Plug in the ice cream maker and press the power button. The paddle will start spinning. Slowly pour your ice cream mixture through the food chute (the hole in the lid). I pour it in a steady stream to avoid spills. Let it churn for 20 minutes. You’ll see it turn into soft-serve ice cream!
Step 5 | Add Mix-Ins (Optional)
If you want extras like chocolate chips or cookie crumbs, add them in the last 2-3 minutes. Drop them through the food chute, and the paddle will mix them in. I sometimes toss in a few sprinkles for fun!
Step 6 | Check the Texture
After 20 minutes, check if the ice cream looks thick and creamy. If it’s too soft, churn for 5 more minutes. When it’s ready, turn off the machine and unplug it. Twist the lid counterclockwise to unlock it.
Step 7 | Enjoy or Freeze
Pull out the paddle and grab a spoon. You can eat the ice cream right from the mug—it’s soft and yummy! If you want it firmer, scoop it into a freezer-safe container and freeze for 1-2 hours. I love it both ways!
Recipe Tips for Success
These quick tips make your ice cream even better:
- Chill Ingredients: Cold milk and cream help the ice cream freeze faster.
- Don’t Overfill: Stick to ¾ cup of liquid to avoid spills in the mug.
- Clean Right Away: Rinse the paddle and lid after use to keep them ready.
- Mix Well: Make sure sugar dissolves fully for a smooth texture.
- Try Mix-Ins: Add small bits like nuts or fruit at the end for extra fun.
Dash My Mug Vanilla Ice Cream Serving Suggestions
Here are some fun ways to enjoy your ice cream:
- Scoop and Top: Serve with chocolate syrup and a cherry for a sundae vibe.
- With Cookies: Pair with oatmeal or chocolate chip cookies for a sweet combo.
- Fruit Twist: Add sliced bananas or berries for a fresh, juicy bite.
- In a Bowl: Sprinkle with crushed nuts for a crunchy treat.
How to Store Dash My Mug Vanilla Ice Cream
If you have leftovers (which is rare!), here’s how to store it:
Scoop the ice cream into a freezer-safe container with a tight lid. I use a small plastic tub. Press a piece of plastic wrap on the surface to keep air out.
Pop it in the freezer for up to 2 weeks. When you’re ready to eat, let it sit at room temperature for 5 minutes to soften.
I love having a little stash for late-night cravings. Freezing it this way keeps the texture creamy and prevents icy bits from forming.
Dash My Mug Vanilla Ice Cream FAQs
1. Can I make this without a Dash My Mug Ice Cream Maker?
You need the Dash My Mug for this recipe because it churns and freezes the ice cream at the same time. Without it, the mixture won’t freeze properly and might turn icy. If you don’t have one, try a no-churn recipe or check out my Ninja Creami Vanilla Ice Cream for another fun option. The Dash My Mug is worth it for quick, small batches!
2. How long does the mug need to freeze?
The mug needs to freeze for at least 24 hours at 0°F or colder. I keep mine in the freezer all the time so it’s ready whenever I want ice cream. Make sure it’s upright in the freezer to work properly. A cold mug is key for creamy ice cream.
3. Can I use almond milk instead of whole milk?
Yes, but the ice cream won’t be as creamy. Almond milk has less fat, so the texture might be icier. If you try it, use unsweetened almond milk and maybe add an extra tablespoon of cream. I tested it once, and it was okay but not as rich as with whole milk.
4. Why is my ice cream too soft?
If your ice cream is too soft, the mug might not be cold enough, or the ingredients weren’t chilled. Freeze the mug for a full 24 hours and use cold milk and cream. You can also churn for an extra 5 minutes or freeze the ice cream for 1-2 hours after churning for a firmer texture.
5. Can I add other flavors to this recipe?
Totally! You can mix in things like cocoa powder (1 tbsp) for chocolate or fruit puree (¼ cup) for a fruity twist. Add these when you mix the base. I’ve tried adding a swirl of strawberry jam, and it was so good! Just don’t add too much liquid, or it might not freeze well.
6. How do I clean the Dash My Mug Ice Cream Maker?
Wash the paddle, lid, and mug with warm, soapy water after each use. Don’t put them in the dishwasher because it can damage the parts. Dry everything well before storing. I rinse mine right after eating to make cleanup easy. Keep the motor dry and wipe it with a damp cloth if needed.
Dash My Mug Vanilla Ice Cream Recipe
Make creamy Dash My Mug Vanilla Ice Cream in just 25 minutes! A quick, rich treat using real vanilla, milk, and cream. No eggs, no fuss—just freeze & churn.
Ingredients
- ½ cup whole milk (120 ml) – for a creamy base
- ¼ cup granulated sugar (50 g) – to sweeten and soften texture
- ½ cup heavy cream (120 ml) – adds rich, velvety texture
- 1 tsp pure vanilla extract (5 ml) – delivers classic vanilla flavor
Instructions
Step 1 | Freeze the Mug
Put the Dash My Mug bowl in your freezer for at least 24 hours. Keep it upright, not sideways. I pop mine in the back of the freezer where it’s coldest. This step makes sure your ice cream freezes properly.
Step 2 | Mix the Base
Grab a liquid measuring cup. Pour in ½ cup whole milk and ¼ cup sugar. Whisk them together until the sugar completely dissolves. It takes about a minute. Then, add ½ cup heavy cream and 1 tsp vanilla extract. Stir gently until everything is mixed. The mixture smells so good already!
Step 3 | Set Up the Machine
Take the frozen mug out of the freezer and place it on a flat surface, like your kitchen counter. Attach the motor to the lid by sliding it into the slots. Click the paddle into the motor’s base. Lower the lid onto the mug, lining up the pins with the notches. Twist it clockwise to lock it in place.
Step 4 | Start Churning
Plug in the ice cream maker and press the power button. The paddle will start spinning. Slowly pour your ice cream mixture through the food chute (the hole in the lid). I pour it in a steady stream to avoid spills. Let it churn for 20 minutes. You’ll see it turn into soft-serve ice cream!
Step 5 | Add Mix-Ins (Optional)
If you want extras like chocolate chips or cookie crumbs, add them in the last 2-3 minutes. Drop them through the food chute, and the paddle will mix them in. I sometimes toss in a few sprinkles for fun!
Step 6 | Check the Texture
After 20 minutes, check if the ice cream looks thick and creamy. If it’s too soft, churn for 5 more minutes. When it’s ready, turn off the machine and unplug it. Twist the lid counterclockwise to unlock it.
Step 7 | Enjoy or Freeze
Pull out the paddle and grab a spoon. You can eat the ice cream right from the mug—it’s soft and yummy! If you want it firmer, scoop it into a freezer-safe container and freeze for 1-2 hours. I love it both ways!
Nutrition Information:
Serving Size:
1Amount Per Serving: Calories: 360Total Fat: 26gSaturated Fat: 16gCholesterol: 90mgSodium: 40mgCarbohydrates: 28gSugar: 26gProtein: 3g
Did you make this Dash My Mug Vanilla Ice Cream Recipe? Please leave a ⭐ rating and review!


Leave a Reply