
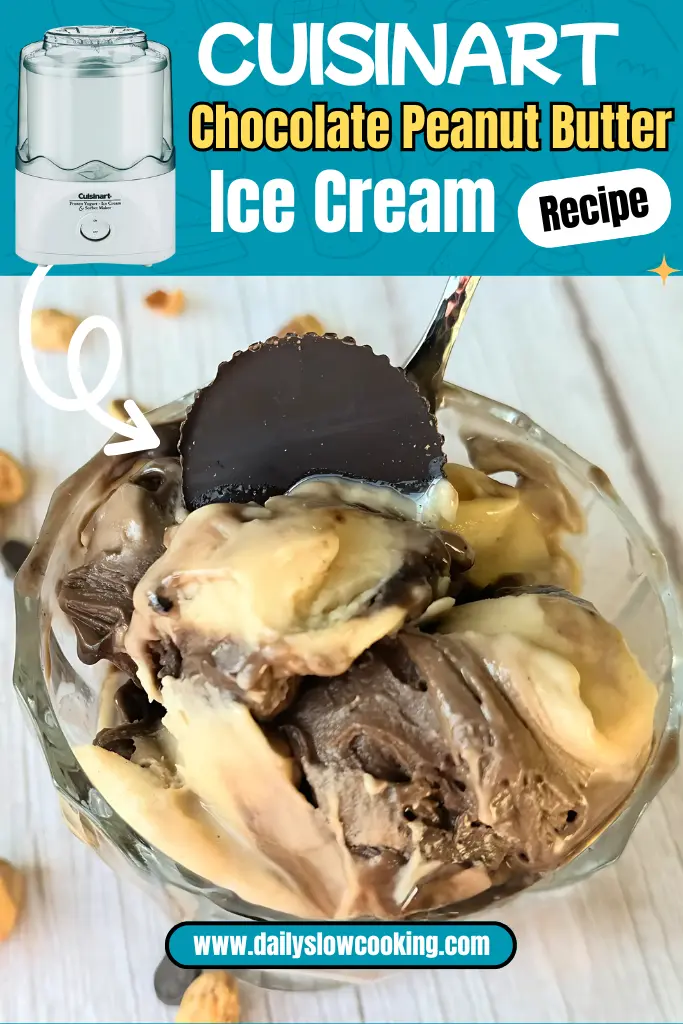
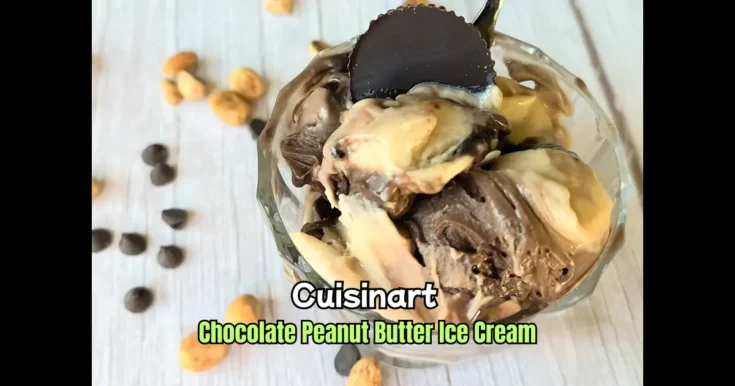
When I crave a sweet treat, my Cuisinart Chocolate Peanut Butter Ice Cream never lets me down.
If you’ve ever wondered what is chocolate peanut butter ice cream, it’s simple — creamy chocolate ice cream mixed with rich swirls of peanut butter.
With my trusty Cuisinart Ice Cream Maker, making it is so easy. You don’t need to stand by the stove for hours or worry about fancy tools.
All you need is a few simple things and a little time. Trust me, you’ll fall in love with every bite. So grab your Cuisinart and let’s make this tasty, cold treat together!
Why You Love This Cuisinart Chocolate Peanut Butter Ice Cream
This Cuisinart Chocolate Peanut Butter Ice Cream is a total winner! Here’s why you’ll fall in love with it:
- Creamy and Dreamy: The mix of chocolate and peanut butter is smooth and rich.
- Easy to Make: With a Cuisinart ice cream maker, it’s a breeze to whip up.
- Kid-Friendly: Even picky eaters will beg for more of this sweet treat.
- Perfect for Any Time: Great for summer days or cozy movie nights.
This ice cream is a hit because it combines two classic flavors—chocolate and peanut butter—into one creamy dessert. My Cuisinart machine makes it so simple, even if you’re new to making ice cream.
Cuisinart Chocolate Peanut Butter Ice Cream Ingredients
Here’s everything you need to make this yummy ice cream. I’ve included details about each ingredient so you know exactly what to grab.
- Heavy Cream (2 cups): This makes the ice cream super creamy and rich. Look for heavy whipping cream in the dairy section. It’s thick and gives that smooth texture we all love.
- Whole Milk (1 cup): Whole milk adds a bit of lightness to balance the heavy cream. It keeps the ice cream from being too heavy while still keeping it rich.
- Granulated Sugar (¾ cup): This sweetens the ice cream. Regular white sugar works perfectly to bring out the chocolate and peanut butter flavors.
- Cocoa Powder (½ cup, unsweetened): Cocoa powder gives that deep chocolate taste. Use unsweetened to control the sweetness. I like Dutch-processed cocoa for a smoother flavor.
- Peanut Butter (½ cup, creamy): Creamy peanut butter adds a nutty, rich swirl. Use a natural one if you like, but regular works great too. Avoid crunchy for a smooth texture.
- Vanilla Extract (1 teaspoon): This adds a warm, sweet note that makes the chocolate pop. Pure vanilla extract is best for a clean flavor.
- Salt (¼ teaspoon): A tiny pinch of salt brings all the flavors together. It makes the chocolate and peanut butter taste even better.
Helpful Swaps
If you’re missing something or want to mix it up, here are some easy swaps:
- Heavy Cream: Swap with half-and-half for a lighter texture, but it won’t be as rich.
- Whole Milk: Use 2% milk if you don’t have whole milk, but the ice cream might be less creamy.
- Granulated Sugar: Try coconut sugar for a slightly different flavor. Use the same amount.
- Cocoa Powder: If you don’t have Dutch-processed, regular unsweetened cocoa works fine.
- Peanut Butter: Almond butter or cashew butter can work for a different nutty taste.
- Vanilla Extract: If you’re out, skip it or use a tiny bit of almond extract for a twist.
Kitchen Equipment Needed
To make this Cuisinart Chocolate Peanut Butter Ice Cream, you’ll need a few tools. Don’t worry—they’re simple and easy to use!
- Cuisinart Ice Cream Maker: This is the star of the show! It freezes and churns the ice cream for you. Make sure the freezer bowl is frozen solid (16-24 hours in the freezer at 0°F).
- Mixing Bowls: You’ll need a couple of bowls to mix the ingredients. Medium-sized ones work best.
- Whisk: A whisk helps mix everything smoothly, especially the cocoa powder and sugar.
- Measuring Cups and Spoons: For getting the right amounts of cream, milk, sugar, and more.
- Spatula: A rubber spatula is great for scraping the mixture into the ice cream maker.
- Airtight Container: To store the ice cream in the freezer after churning for a firmer texture.
How to Make Cuisinart Chocolate Peanut Butter Ice Cream
Let’s make this delicious ice cream! I’ll walk you through each step so even beginners can follow along. It’s super fun and easy.
Step 1 | Freeze the Bowl
Put your Cuisinart freezer bowl in the back of your freezer at 0°F for 16-24 hours. Shake it to check if it’s frozen—no liquid should slosh inside.
Step 2 | Mix the Base
In a medium bowl, whisk together 2 cups heavy cream, 1 cup whole milk, ¾ cup sugar, ½ cup cocoa powder, and ¼ teaspoon salt. Keep whisking until the sugar and cocoa dissolve completely. It should look smooth and chocolatey.
Step 3 | Add Vanilla
Stir in 1 teaspoon vanilla extract. Give it a good mix to spread the flavor evenly.
Step 4 | Chill the Mixture
Cover the bowl with plastic wrap and pop it in the fridge for 1-2 hours. This helps the flavors blend and keeps the mixture cold for churning.
Step 5 | Set Up the Machine
Take the frozen bowl out of the freezer and place it on the Cuisinart base. Add the mixing paddle and lock the lid in place.
Step 6 | Start Churning
Turn on the machine by flipping the On/Off switch. Pour the chilled mixture through the ingredient spout right away. Don’t wait—the bowl starts defrosting fast!
Step 7 | Add Peanut Butter
After about 10 minutes of churning, when the mixture starts to thicken, slowly drizzle in ½ cup creamy peanut butter through the spout. This creates those yummy swirls.
Step 8 | Churn Until Done
Let the machine run for 15-20 minutes total. The ice cream is ready when it’s thick and creamy, like soft-serve. If you want it firmer, move to the next step.
Step 9 | Freeze for Firmness
Use a spatula to scoop the ice cream into an airtight container. Freeze it for 2-4 hours for a harder, scoopable texture.
Step 10 | Serve and Enjoy
Scoop your ice cream into bowls or cones and dig in! You just made homemade Cuisinart Chocolate Peanut Butter Ice Cream!
Recipe Tips for Success
Here are some quick tips to make your ice cream perfect. These aren’t in the steps but will help you nail it:
- Freeze the Bowl Well: Make sure the freezer bowl is rock-solid frozen. I learned the hard way that a half-frozen bowl makes soupy ice cream!
- Don’t Skip Chilling: Cooling the mixture in the fridge before churning makes the texture smoother.
- Use Room-Temperature Peanut Butter: It pours easier and swirls better.
- Don’t Overfill: Stick to 1½ quarts or less of mixture to avoid spills in the machine.
- Clean the Bowl Right Away: Rinse the freezer bowl after use to keep it in great shape.
- Taste the Mixture: Before churning, taste the base to adjust sugar or vanilla if needed.
Cuisinart Chocolate Peanut Butter Ice Cream Serving Suggestion
This ice cream is so versatile, you’ll want to serve it all the time! Here are some fun ways to enjoy it:
- Classic Bowl: Scoop it into a bowl with a sprinkle of chopped peanuts for crunch.
- Waffle Cone: Serve in a crispy waffle cone for a classic ice cream shop vibe.
- Dessert Topping: Add a scoop on warm brownies for a melty, gooey treat.
- Milkshake: Blend with milk for a thick, chocolatey peanut butter shake.
How to Store Cuisinart Chocolate Peanut Butter Ice Cream
Storing this ice cream is easy, so you can enjoy it for days! After churning, scoop it into an airtight container. I use a plastic container with a tight lid to keep air out.
Pop it in the freezer at 0°F, and it’ll stay good for about 2 weeks. To avoid ice crystals, press plastic wrap right on the ice cream’s surface before sealing the container.
When you’re ready to eat, let it sit at room temperature for 5 minutes to soften for easy scooping.
Don’t store it in the Cuisinart freezer bowl—it can stick and damage the bowl. Just scoop, seal, and freeze, and you’ll have delicious ice cream ready whenever you want!
Cuisinart Chocolate Peanut Butter Ice Cream FAQs
1. Do I need a Cuisinart ice cream maker to make this?
You don’t need a Cuisinart, but it makes things easier! Other ice cream makers work too—just follow their instructions for freezing and churning.
If you don’t have one, you can try a no-churn method by mixing the ingredients, pouring into a container, and stirring every 30 minutes while it freezes. It’s more work, but it’ll still taste great!
2. How long does it take to churn the ice cream?
Churning usually takes 15-20 minutes in the Cuisinart ice cream maker. It depends on your recipe and how cold the freezer bowl is.
When it looks thick and creamy, like soft-serve, it’s done. If you want it firmer, pop it in the freezer for a few hours after churning. Don’t let it churn too long, or it might get grainy.
3. Can I add mix-ins like chocolate chips?
Absolutely! Add about ½ cup of chocolate chips or other mix-ins like chopped nuts through the ingredient spout in the last 5 minutes of churning.
This keeps them evenly mixed without sinking. I love adding mini chocolate chips for extra chocolatey bites. Just don’t add too much, or it might overwhelm the peanut butter flavor.
4. What if my ice cream is too hard to scoop?
If your ice cream is too hard after freezing, let it sit at room temperature for 5-10 minutes before scooping. This softens it just enough to make it easy to serve.
You can also microwave the container for 10-15 seconds, but be careful not to melt it. Store it properly with plastic wrap to avoid it getting too hard in the first place.
Cuisinart Chocolate Peanut Butter Ice Cream
Homemade Cuisinart Chocolate Peanut Butter Ice Cream in just 6 hours! Rich, creamy treat with real cocoa and peanut butter. Easy, delicious summer dessert.
Ingredients
- Heavy Cream: 2 cups
- Whole Milk: 1 cup
- Granulated Sugar: ¾ cup
- Cocoa Powder (unsweetened): ½ cup
- Peanut Butter (creamy): ½ cup
- Vanilla Extract: 1 teaspoon
- Salt: ¼ teaspoon
Instructions
Step 1 | Freeze the Bowl
Put your Cuisinart freezer bowl in the back of your freezer at 0°F for 16-24 hours. Shake it to check if it’s frozen—no liquid should slosh inside.
Step 2 | Mix the Base
In a medium bowl, whisk together 2 cups heavy cream, 1 cup whole milk, ¾ cup sugar, ½ cup cocoa powder, and ¼ teaspoon salt. Keep whisking until the sugar and cocoa dissolve completely. It should look smooth and chocolatey.
Step 3 | Add Vanilla
Stir in 1 teaspoon vanilla extract. Give it a good mix to spread the flavor evenly.
Step 4 | Chill the Mixture
Cover the bowl with plastic wrap and pop it in the fridge for 1-2 hours. This helps the flavors blend and keeps the mixture cold for churning.
Step 5 | Set Up the Machine
Take the frozen bowl out of the freezer and place it on the Cuisinart base. Add the mixing paddle and lock the lid in place.
Step 6 | Start Churning
Turn on the machine by flipping the On/Off switch. Pour the chilled mixture through the ingredient spout right away. Don’t wait—the bowl starts defrosting fast!
Step 7 | Add Peanut Butter
After about 10 minutes of churning, when the mixture starts to thicken, slowly drizzle in ½ cup creamy peanut butter through the spout. This creates those yummy swirls.
Step 8 | Churn Until Done
Let the machine run for 15-20 minutes total. The ice cream is ready when it’s thick and creamy, like soft-serve. If you want it firmer, move to the next step.
Step 9 | Freeze for Firmness
Use a spatula to scoop the ice cream into an airtight container. Freeze it for 2-4 hours for a harder, scoopable texture.
Step 10 | Serve and Enjoy
Scoop your ice cream into bowls or cones and dig in! You just made homemade Cuisinart Chocolate Peanut Butter Ice Cream!
Nutrition Information:
Serving Size:
1Amount Per Serving: Calories: 500Total Fat: 38gSaturated Fat: 23gCholesterol: 130mgSodium: 120mgCarbohydrates: 33gFiber: 2gSugar: 29gProtein: 7g
Did you make this Cuisinart Chocolate Peanut Butter Ice Cream? Please leave a ⭐ rating and review!


Leave a Reply