
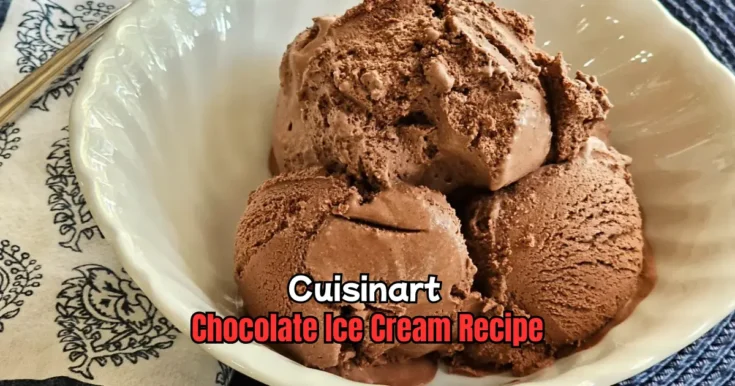
There’s nothing quite like a cold, creamy bowl of chocolate ice cream on a warm day—or honestly, any day. I’m going to show you how to make Cuisinart Chocolate Ice Cream right at home.
It’s rich, smooth, and super easy to make, thanks to my Cuisinart ice cream maker. You don’t need to be a pro to make this—just a love for chocolate and a few simple steps.
This recipe is my go-to when I want something sweet but homemade. The deep chocolate flavor makes every bite feel like a treat.
Plus, it’s a lot better than store-bought. If you’ve tried my Ninja Creami Frosty Recipe before, you’ll enjoy this one just as much—but even creamier. So, grab your Cuisinart and let’s get started!

Why You Love This Cuisinart Chocolate Ice Cream
This Cuisinart Chocolate Ice Cream is a game-changer! Here’s why it’s so special:
- Super Creamy: It’s smooth and melts perfectly in your mouth.
- Rich Chocolate Flavor: The cocoa and chocolate chips make every bite a chocolate lover’s dream.
- Easy to Make: My Cuisinart ice cream maker does most of the work!
- Fun for Everyone: Kids and adults both go crazy for it.
- Customizable: Add your favorite mix-ins like nuts or sprinkles.
I love how this ice cream brings everyone together. It’s so creamy and chocolatey, you’ll want seconds! The Cuisinart machine makes it quick and easy, so you don’t need to be a pro to get great results.
Cuisinart Chocolate Ice Cream Ingredients
Here’s what you need to make this yummy ice cream. Each ingredient plays a big role in making it taste amazing:
- Heavy Cream (2 cups): This gives the ice cream its rich, creamy texture. It’s the star for that smooth, melt-in-your-mouth feel. Make sure it’s cold before using!
- Whole Milk (1 cup): This adds a bit of lightness so the ice cream isn’t too heavy. It balances the cream perfectly.
- Granulated Sugar (¾ cup): Sugar sweetens the ice cream and helps it stay soft when frozen. It’s just the right amount for a sweet but not overwhelming taste.
- Unsweetened Cocoa Powder (½ cup): This brings the deep chocolate flavor. Use good-quality cocoa for the best taste—it makes a big difference!
- Semi-Sweet Chocolate Chips (½ cup, melted): These add extra chocolatey goodness. Melting them makes the ice cream extra rich and smooth.
- Vanilla Extract (1 teaspoon): A splash of vanilla boosts the chocolate flavor and adds a warm, cozy note.
- Salt (pinch): Just a tiny bit of salt makes all the flavors pop. Don’t skip it—it’s like a secret ingredient!
Helpful Swaps
Don’t have everything on hand? No worries! Here are some easy swaps:
- Heavy Cream: Use half-and-half if you want a lighter ice cream, but it won’t be as creamy.
- Whole Milk: You can use 2% milk, but the texture might be a little less rich.
- Granulated Sugar: Try coconut sugar for a different flavor, but use the same amount.
- Cocoa Powder: Dutch-processed cocoa works too, but it’ll taste a bit darker.
- Chocolate Chips: Swap with dark chocolate or milk chocolate, depending on what you like.
- Vanilla Extract: Almond extract can work for a fun twist, but use half the amount.
Kitchen Equipment Needed
To make this Cuisinart Chocolate Ice Cream, you’ll need these tools:
- Cuisinart Ice Cream Maker: The star of the show! It churns the mix into creamy ice cream.
- Freezer Bowl: Comes with the Cuisinart machine. Freeze it for 16–24 hours before starting.
- Mixing Paddle: This goes in the freezer bowl to mix and aerate the ice cream.
- Medium Saucepan: For heating the milk and cream mixture.
- Whisk: To mix everything smoothly and avoid lumps.
- Measuring Cups and Spoons: To get the ingredient amounts just right.
- Mixing Bowl: For combining all the ingredients.
- Spatula: To scrape the mixture into the ice cream maker.
- Airtight Container: For storing the ice cream in the freezer after churning.
How to Make Cuisinart Chocolate Ice Cream
Now, let’s get to the fun part—making the ice cream! I’ll walk you through each step so even if you’re new to this, you’ll nail it. Here’s how I make my Cuisinart Chocolate Ice Cream:
Step 1 | Freeze the Bowl
Put the Cuisinart freezer bowl in your freezer the night before (16–24 hours). Shake it to check if it’s frozen—you shouldn’t hear any liquid sloshing inside.
Step 2 | Mix the Dry Ingredients
In a medium bowl, whisk together the sugar, cocoa powder, and a pinch of salt. This makes sure there are no lumps and everything blends well.
Step 3 | Heat the Cream and Milk
In a saucepan, pour in the heavy cream and whole milk. Heat it over medium heat until it’s warm but not boiling—about 3–4 minutes. Stir gently so it doesn’t burn.
Step 4 | Combine Wet and Dry
Slowly pour the warm cream and milk into the bowl with the sugar and cocoa. Whisk until it’s smooth and the sugar is fully dissolved.
Step 5 | Add Chocolate and Vanilla
Melt the chocolate chips in a microwave (30-second bursts, stirring in between). Stir the melted chocolate and vanilla extract into the mixture. Mix well.
Step 6 | Chill the Mixture
Cover the bowl and put it in the fridge for 1–2 hours to cool completely. This helps the ice cream churn better.
Step 7 | Set Up the Cuisinart
Take the frozen bowl out of the freezer and place it on the Cuisinart base. Put the mixing paddle in the bowl and lock the lid on top.
Step 8 | Start Churning
Turn on the ice cream maker (hit the On/Off switch). Pour the chilled mixture through the ingredient spout right away.
Step 9 | Churn the Ice Cream
Let it churn for 15–20 minutes. You’ll see it get thicker and creamier. When it looks like soft-serve ice cream, it’s done!
Step 10 | Check the Texture
If you want it firmer, scoop the ice cream into an airtight container and freeze it for 2–3 hours.
Step 11 | Serve or Store
Scoop it into bowls or cones, or store it in the freezer. Enjoy!
Recipe Tips for Success
Here are some quick tips to make your Cuisinart Chocolate Ice Cream turn out perfect:
- Freeze the Bowl Well: Make sure the freezer bowl is super cold. I keep mine in the freezer all the time so it’s always ready.
- Don’t Skip Chilling: Cooling the mixture in the fridge before churning helps it freeze faster and smoother.
- Taste Before Churning: Try a spoonful of the mix to check if it’s sweet enough. Add a bit more sugar or vanilla if needed.
- Work Fast: The freezer bowl starts to defrost quickly, so pour in the mixture as soon as you turn on the machine.
- Add Mix-Ins Late: If you want nuts or sprinkles, add them in the last 5 minutes of churning so they mix evenly.
Cuisinart Chocolate Ice Cream Serving Suggestion
How you serve this Cuisinart Chocolate Ice Cream makes it even more fun! Here are some ideas:
- Classic Cone: Scoop it into a waffle cone for a nostalgic treat.
- Bowl with Toppings: Add whipped cream, sprinkles, or hot fudge for extra yum.
- With Dessert: Serve it with brownies or cake for a super sweet combo.
- Milkshake Style: Blend it with milk for a thick, chocolatey shake.
- Fruit Pairing: Add fresh strawberries or bananas for a fresh twist.
How to Store Cuisinart Chocolate Ice Cream
Storing your Cuisinart Chocolate Ice Cream is easy and keeps it fresh for later. After churning, scoop it into an airtight container—don’t leave it in the freezer bowl, as it can stick and damage it.
Pop the container in the freezer, and it’ll stay good for about 2 weeks. For the best texture, eat it within a week, as it’s creamiest then.
When you’re ready to serve, let it sit at room temperature for 5–10 minutes to soften a bit. This makes scooping easier and brings back that smooth texture.
If you’re freezing it for longer, press plastic wrap on the surface before sealing the container to prevent ice crystals. Now you can enjoy your ice cream whenever you want!
Cuisinart Chocolate Ice Cream Recipe FAQs
1. Can I make this without a Cuisinart ice cream maker?
Yes, you can! Mix the ingredients and pour them into a shallow dish. Freeze it for 3–4 hours, stirring every 30 minutes to break up ice crystals. It won’t be as creamy, but it still tastes great. The Cuisinart just makes it faster and smoother, but this no-machine method works if you’re patient.
2. How long does it take to churn the ice cream?
It usually takes 15–20 minutes in the Cuisinart ice cream maker. The mixture will look like soft-serve when it’s done. If you want it firmer, freeze it in an airtight container for 2–3 hours after churning. Keep an eye on it while it churns to get the texture you like.
3. Can I use milk chocolate instead of semi-sweet chips?
Absolutely! Milk chocolate chips will make the ice cream sweeter and a bit milder. Melt them the same way, in 30-second bursts in the microwave. You can even try dark chocolate for a richer flavor. Just use the same amount (½ cup) to keep the recipe balanced.
4. Why is my ice cream not freezing properly?
The freezer bowl might not be cold enough. Make sure it’s frozen for 16–24 hours before using. Also, check that your freezer is set to 0°F. If the mixture is too warm when you pour it in, it can slow freezing, so always chill it in the fridge first.
5. Can I add mix-ins like nuts or candy?
Yes, mix-ins are awesome! Add them in the last 5 minutes of churning so they spread evenly. Try ½ cup of chopped nuts, sprinkles, or cookie bits. Just don’t add too much, or it might mess with the freezing. Experiment with your favorites to make it fun!
6. How do I clean the Cuisinart freezer bowl?
Wash the freezer bowl by hand with warm water and mild dish soap. Don’t put it in the dishwasher, as it can damage the cooling liquid inside. Dry it completely before putting it back in the freezer. This keeps it ready for your next batch of ice cream.
Cuisinart Chocolate Ice Cream Recipe
Make creamy, rich Cuisinart Chocolate Ice Cream in just 90 minutes! This homemade dessert recipe blends cocoa and chocolate for an irresistible treat.
Ingredients
- Heavy Cream: 2 cups (cold)
- Whole Milk: 1 cup
- Granulated Sugar: ¾ cup
- Unsweetened Cocoa Powder: ½ cup
- Semi-Sweet Chocolate Chips: ½ cup, melted
- Vanilla Extract: 1 teaspoon
- Salt: Pinch
Instructions
Step 1 | Freeze the Bowl
Put the Cuisinart freezer bowl in your freezer the night before (16–24 hours). Shake it to check if it’s frozen—you shouldn’t hear any liquid sloshing inside.
Step 2 | Mix the Dry Ingredients
In a medium bowl, whisk together the sugar, cocoa powder, and a pinch of salt. This makes sure there are no lumps and everything blends well.
Step 3 | Heat the Cream and Milk
In a saucepan, pour in the heavy cream and whole milk. Heat it over medium heat until it’s warm but not boiling—about 3–4 minutes. Stir gently so it doesn’t burn.
Step 4 | Combine Wet and Dry
Slowly pour the warm cream and milk into the bowl with the sugar and cocoa. Whisk until it’s smooth and the sugar is fully dissolved.
Step 5 | Add Chocolate and Vanilla
Melt the chocolate chips in a microwave (30-second bursts, stirring in between). Stir the melted chocolate and vanilla extract into the mixture. Mix well.
Step 6 | Chill the Mixture
Cover the bowl and put it in the fridge for 1–2 hours to cool completely. This helps the ice cream churn better.
Step 7 | Set Up the Cuisinart
Take the frozen bowl out of the freezer and place it on the Cuisinart base. Put the mixing paddle in the bowl and lock the lid on top.
Step 8 | Start Churning
Turn on the ice cream maker (hit the On/Off switch). Pour the chilled mixture through the ingredient spout right away.
Step 9 | Churn the Ice Cream
Let it churn for 15–20 minutes. You’ll see it get thicker and creamier. When it looks like soft-serve ice cream, it’s done!
Step 10 | Check the Texture
If you want it firmer, scoop the ice cream into an airtight container and freeze it for 2–3 hours.
Step 11 | Serve or Store
Scoop it into bowls or cones, or store it in the freezer. Enjoy!
Nutrition Information:
Serving Size:
1Amount Per Serving: Calories: 340Total Fat: 26gSaturated Fat: 16gTrans Fat: 0.5gCholesterol: 80mgSodium: 50mgCarbohydrates: 26gFiber: 2gSugar: 22gProtein: 4g
Did you make this Cuisinart Chocolate Ice Cream Recipe? Please leave a ⭐ rating and review!


Leave a Reply