
If you own a West Bend electric wok, you already know how amazing it is.
It heats up fast, holds heat well, and makes cooking so much easier.
These West Bend electric wok recipes are perfect for busy weeknights or lazy weekends.
I’ve pulled together most request west bend electric wok recipes that work great in your wok.
From stir-fries to noodles to fried rice, there’s something for everyone here.

Why the West Bend Electric Wok Is a Kitchen Game-Changer
The West Bend electric wok is one of those tools that once you use it, you can’t go back.
It reaches high heat quickly and cooks food evenly without any hot spots.
You don’t need a gas stove or special setup. Just plug it in and go.
It’s great for families, college students, and anyone who loves Asian-inspired food at home.
If you don’t have one yet, this West Bend Electric Wok is the one most home cooks love and use daily.
Tips Before You Start Cooking With Your Electric Wok
Always preheat your wok for 2-3 minutes before adding oil. This helps food cook fast and not stick.
Use high smoke-point oils like vegetable oil, peanut oil, or avocado oil.
Cut your ingredients into similar-sized pieces so they cook at the same time.
Don’t overcrowd the wok.
Cook in batches if needed.
And always have everything prepped before you start because electric wok cooking moves fast.
Best West Bend Electric Wok Recipes to Try Right Now
Classic Chicken Fried Rice
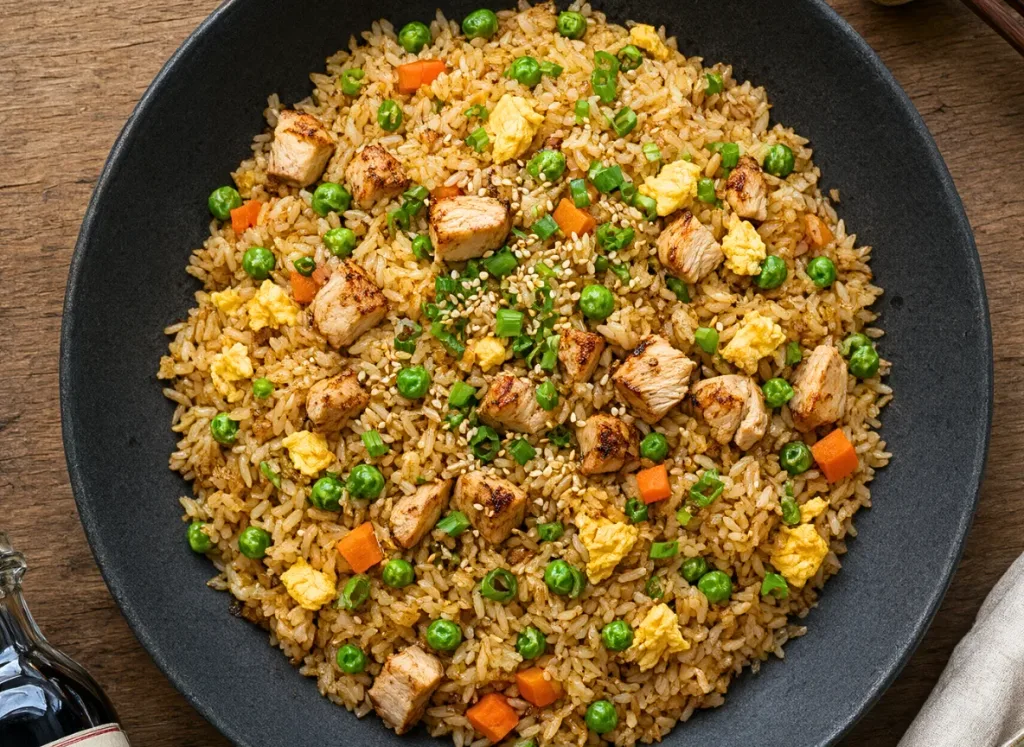
This classic chicken fried rice is the ultimate weeknight dinner. It’s made with simple pantry staples like soy sauce, eggs, frozen peas, and leftover rice.
I love it because it comes together in under 20 minutes and tastes better than takeout.
It’s also a great way to use up leftover chicken and rice sitting in your fridge.
Serve: 4 | Prep Time: 10 mins | Cook Time: 15 mins | Total Time: 25 mins
Ingredients:
- 2 cups cooked white rice (day-old works best)
- 1 cup cooked chicken, diced
- 2 eggs, beaten
- 1 cup frozen peas and carrots
- 3 tablespoons soy sauce
- 1 tablespoon sesame oil
- 2 cloves garlic, minced
- 2 tablespoons vegetable oil
- 2 green onions, sliced
- Salt and pepper to taste
How To Make:
Preheat the Wok – Set your West Bend electric wok to high (around 350°F). Let it heat for 2-3 minutes. Add vegetable oil.
Cook the Eggs – Pour in beaten eggs. Scramble them quickly. Remove and set aside.
Sauté the Garlic – Add a little more oil if needed. Toss in garlic and cook for 30 seconds.
Add Veggies and Chicken – Toss in peas, carrots, and chicken. Stir-fry for 3-4 minutes on high heat.
Add the Rice – Break up any clumps. Add rice to the wok. Stir everything together.
Season It – Add soy sauce and sesame oil. Stir-fry for another 3-4 minutes until hot and slightly crispy.
Finish It Off – Toss in scrambled eggs and green onions. Mix well. Serve hot.
Low Heat Option (300°F): Cook each step a bit longer. Add 5-7 extra minutes total.
High Heat Option (375°F): Faster cook time. Gets a nice crispy texture on the rice.
Beef and Broccoli Stir-Fry
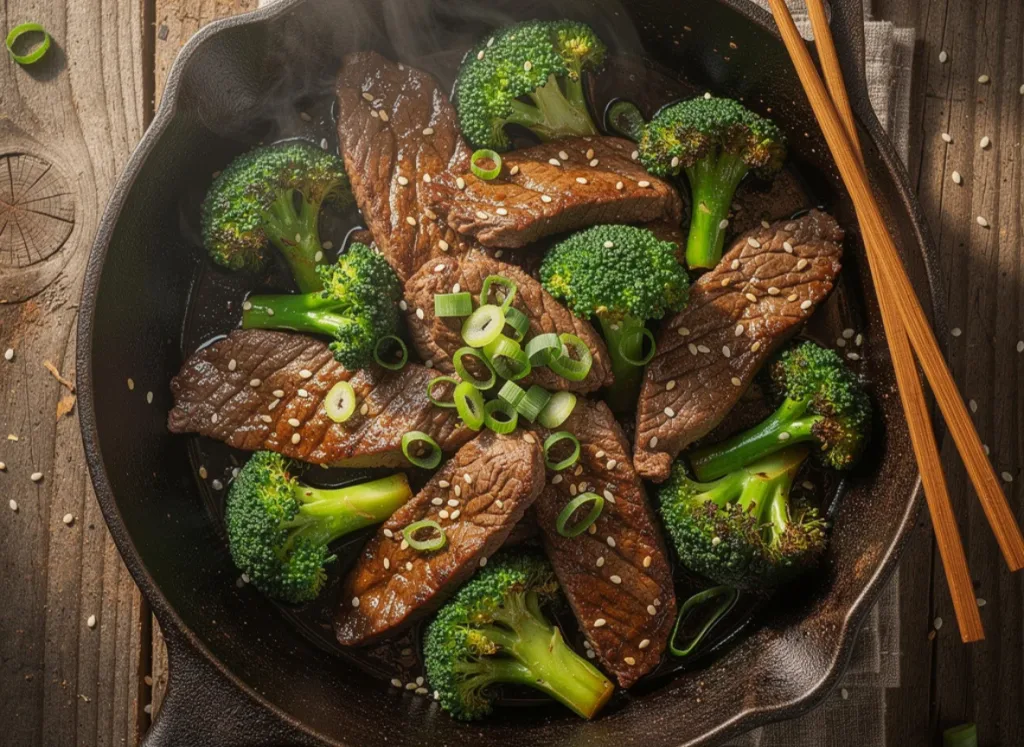
This beef and broccoli stir-fry is the kind of dish that looks fancy but is so simple to make. Tender strips of beef cooked with fresh broccoli in a savory brown sauce.
I love this recipe because it tastes just like your favorite Chinese restaurant but costs way less. It’s best served over steamed white rice.
Serve: 4 | Prep Time: 15 mins | Cook Time: 12 mins | Total Time: 27 mins
Ingredients:
- 1 lb flank steak, thinly sliced
- 2 cups broccoli florets
- 3 tablespoons soy sauce
- 2 tablespoons oyster sauce
- 1 tablespoon cornstarch
- 1 tablespoon brown sugar
- 2 cloves garlic, minced
- 1 teaspoon ginger, grated
- 2 tablespoons vegetable oil
- ½ cup beef broth
How To Make:
Marinate the Beef – Mix soy sauce, cornstarch, and brown sugar in a bowl. Add beef slices. Let sit for 10 minutes.
Preheat the Wok – Heat your electric wok to 375°F. Add vegetable oil.
Sear the Beef – Add beef in a single layer. Cook for 2 minutes per side. Remove and set aside.
Cook the Aromatics – Add garlic and ginger. Stir for 30 seconds until fragrant.
Add Broccoli – Toss in broccoli. Stir-fry for 3-4 minutes.
Make the Sauce – Pour in oyster sauce and beef broth. Stir well.
Combine Everything – Add beef back in. Toss to coat. Cook for 2 more minutes. Serve over rice.
Low Heat Option (300°F): Cook beef in longer batches. Total extra time: 8 minutes.
High Heat Option (375°F+): Quick sear gives great texture. Best for this recipe.
Shrimp Lo Mein
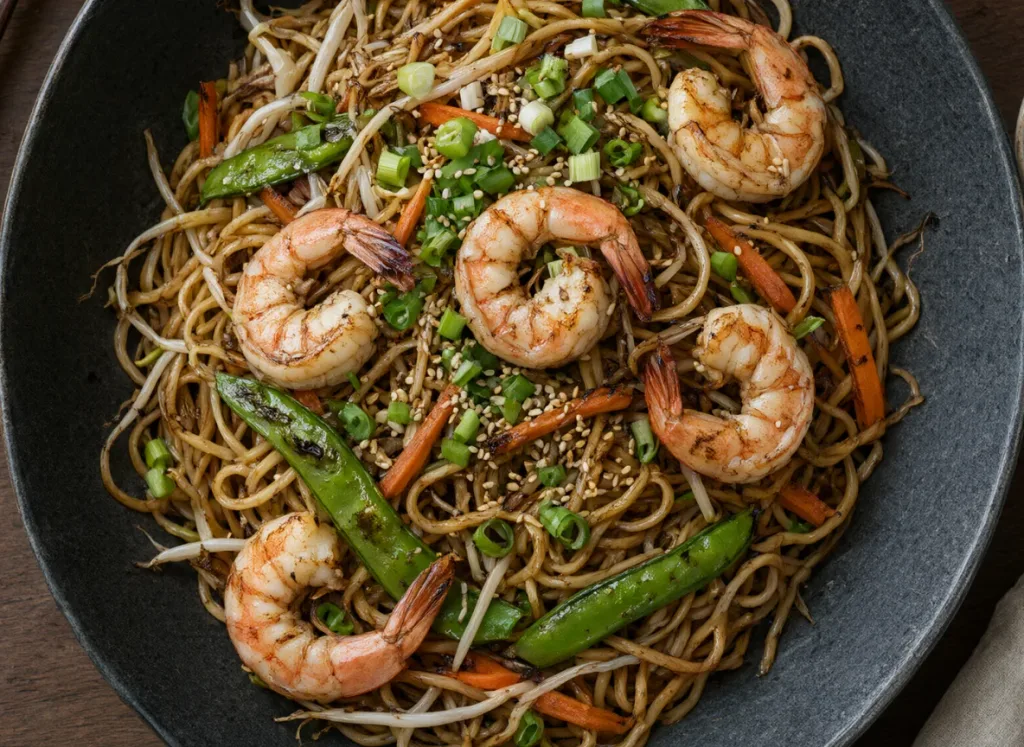
Shrimp lo mein is one of those noodle dishes everyone in my house goes crazy for. Soft egg noodles, juicy shrimp, and colorful veggies all tossed in a savory sauce.
It’s ready in about 25 minutes and makes a complete meal on its own. This is perfect for busy nights when you want something filling but not heavy.
Serve: 4 | Prep Time: 10 mins | Cook Time: 15 mins | Total Time: 25 mins
Ingredients:
- 8 oz lo mein noodles, cooked
- 1 lb shrimp, peeled and deveined
- 1 cup bell peppers, sliced
- 1 cup cabbage, shredded
- 3 tablespoons soy sauce
- 1 tablespoon oyster sauce
- 1 teaspoon sesame oil
- 2 cloves garlic, minced
- 2 tablespoons vegetable oil
- 2 green onions, chopped
How To Make:
Heat the Wok – Set wok to 350°F. Add vegetable oil. Let it heat up.
Cook the Shrimp – Add shrimp in a single layer. Cook 1-2 minutes per side until pink. Remove and set aside.
Stir-Fry the Veggies – Add garlic, bell peppers, and cabbage. Stir-fry for 3-4 minutes.
Add the Noodles – Toss in cooked lo mein noodles. Mix everything well.
Season the Dish – Add soy sauce, oyster sauce, and sesame oil. Toss to coat.
Add Shrimp Back – Return shrimp to the wok. Stir for 1-2 more minutes.
Garnish and Serve – Top with green onions. Serve hot right from the wok.
Low Heat Option (300°F): Works fine. Add 5 more minutes total.
High Heat Option (375°F): Better texture on noodles. Slight char makes it great.
Mongolian Beef
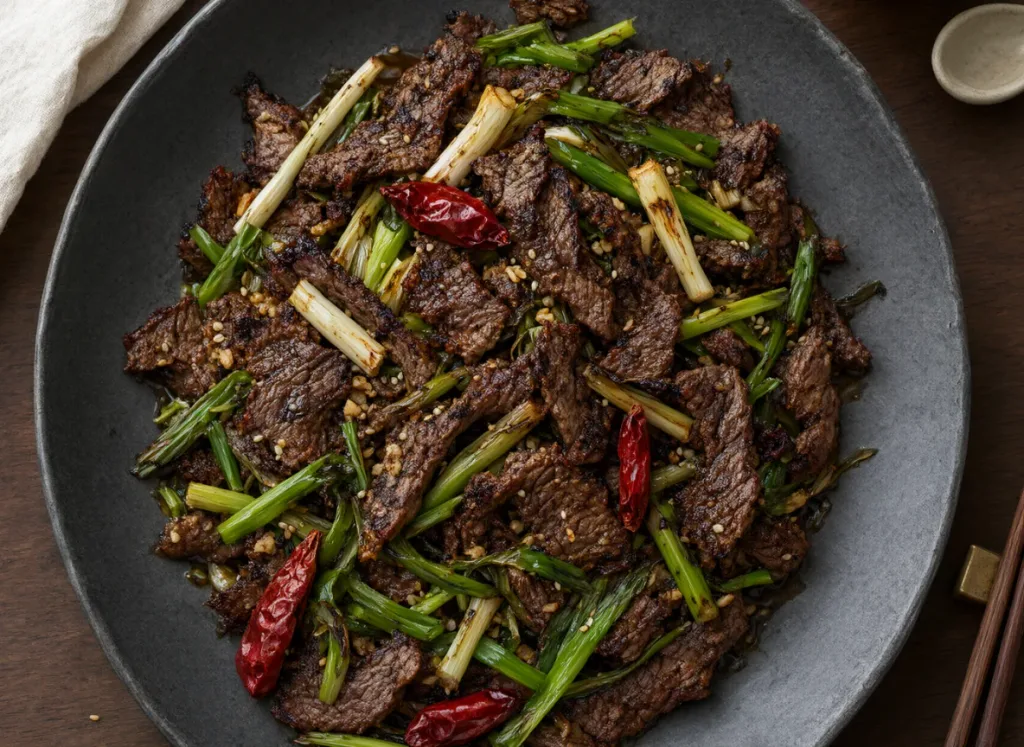
Mongolian beef is bold, saucy, and a total crowd-pleaser. Thin slices of beef coated in a sweet and salty sauce made with brown sugar, soy sauce, and garlic.
I love this because it takes only about 20 minutes but feels like a restaurant meal. Serve it over steamed jasmine rice for the full experience.
Serve: 4 | Prep Time: 10 mins | Cook Time: 12 mins | Total Time: 22 mins
Ingredients:
- 1 lb flank steak, thinly sliced
- ¼ cup soy sauce
- ¼ cup brown sugar
- 3 cloves garlic, minced
- 1 teaspoon ginger, grated
- ¼ cup water
- 2 tablespoons cornstarch
- 3 tablespoons vegetable oil
- 4 green onions, chopped
How To Make:
Coat the Beef – Toss beef slices in cornstarch. Make sure all pieces are coated evenly.
Make the Sauce – Mix soy sauce, brown sugar, water, garlic, and ginger in a bowl. Set aside.
Heat the Wok – Set to 375°F. Add oil. Let it get hot.
Sear the Beef – Cook beef in batches. About 2 minutes per side. Remove and set aside.
Add the Sauce – Pour sauce into the wok. Let it bubble and thicken for 2-3 minutes.
Combine – Add beef back in. Toss to coat well. Cook 1 more minute.
Serve – Top with green onions. Serve over rice right away.
Low Heat Option (300°F): Sauce takes longer to thicken. Add 5 minutes.
High Heat Option (375°F): Sauce caramelizes fast. Watch so it doesn’t burn.
Vegetable Fried Rice
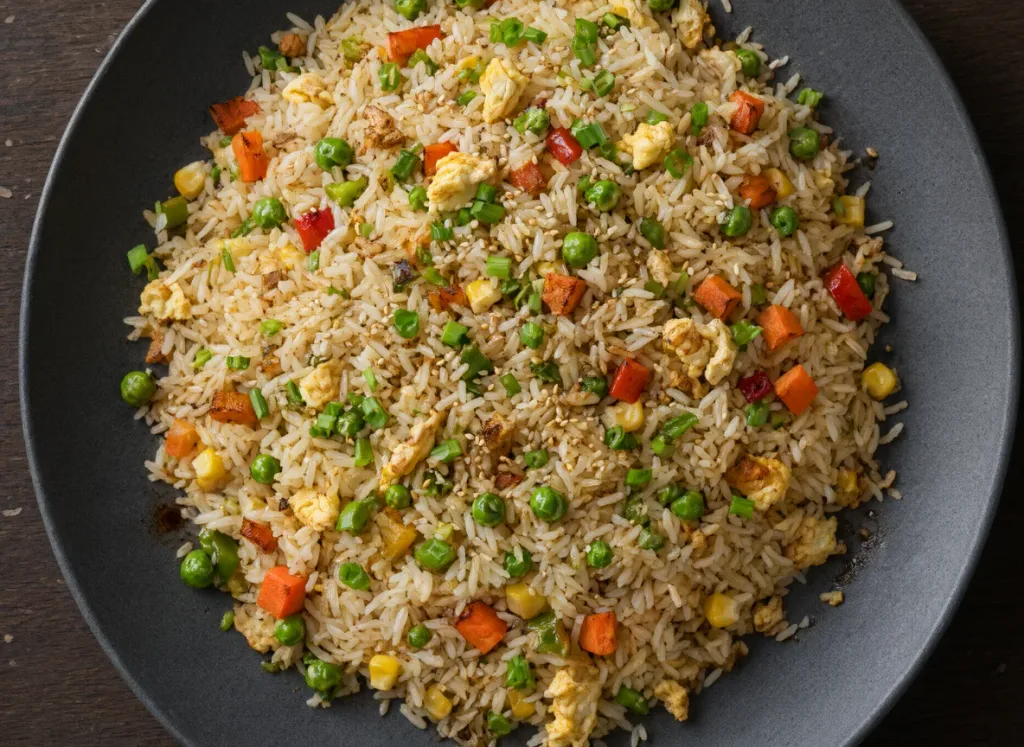
Vegetable fried rice is simple, healthy, and so satisfying. This version is packed with colorful veggies like carrots, peas, corn, and bell peppers.
It’s a great meatless meal that even picky eaters enjoy. I love making this on days when I want something light but still want that classic fried rice flavor.
Serve: 4 | Prep Time: 10 mins | Cook Time: 12 mins | Total Time: 22 mins
Ingredients:
- 2 cups day-old cooked rice
- 1 cup frozen mixed veggies
- ½ cup corn kernels
- 2 eggs, beaten
- 3 tablespoons soy sauce
- 1 tablespoon sesame oil
- 2 cloves garlic, minced
- 2 tablespoons vegetable oil
- Salt and pepper to taste
- 2 green onions, sliced
How To Make:
Preheat the Wok – Heat wok to 350°F. Add oil and let it warm up.
Scramble the Eggs – Pour in beaten eggs. Cook and scramble quickly. Remove and set aside.
Cook Garlic – Add garlic. Stir for 30 seconds.
Add Veggies – Toss in mixed veggies and corn. Stir-fry for 3-4 minutes.
Add the Rice – Add rice. Break up any clumps. Stir everything together well.
Season It – Add soy sauce and sesame oil. Toss and cook for 3 more minutes.
Finish – Fold in scrambled eggs and green onions. Serve hot.
Low Heat (300°F): Softer texture. Adds about 5 minutes total.
High Heat (375°F): Crispier rice with better color and flavor.
Pork and Snap Pea Stir-Fry
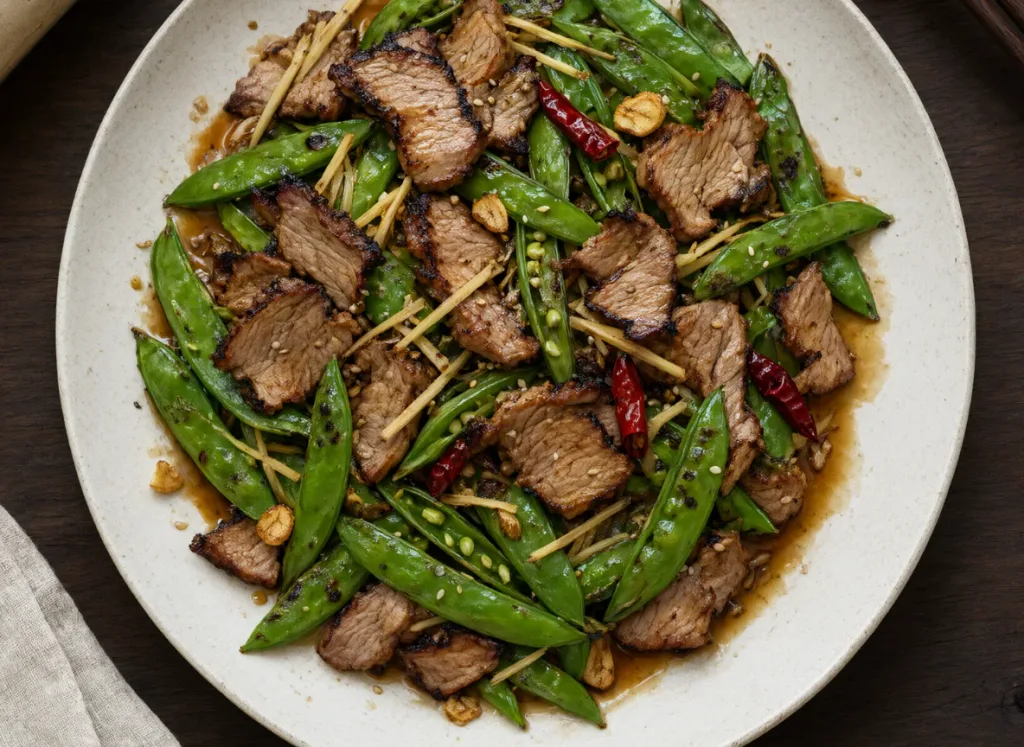
This pork and snap pea stir-fry is quick, fresh, and delicious. The snap peas stay crisp, and the pork gets nicely browned with a savory sauce. I love it because it’s light but filling at the same time. It’s the best option when you want something healthy that doesn’t take long to make.
Serve: 4 | Prep Time: 10 mins | Cook Time: 12 mins | Total Time: 22 mins
Ingredients:
- 1 lb pork tenderloin, thinly sliced
- 2 cups snap peas
- 3 tablespoons soy sauce
- 1 tablespoon hoisin sauce
- 1 teaspoon sesame oil
- 2 cloves garlic, minced
- 1 teaspoon fresh ginger
- 2 tablespoons vegetable oil
- 1 tablespoon cornstarch
- ¼ cup chicken broth
How To Make:
Marinate the Pork – Mix pork with soy sauce and cornstarch. Let sit 10 minutes.
Heat the Wok – Set to 375°F. Add vegetable oil.
Cook the Pork – Stir-fry pork for 3-4 minutes until browned. Remove and set aside.
Sauté Aromatics – Add garlic and ginger. Stir for 30 seconds.
Add Snap Peas – Toss in snap peas. Stir-fry 2-3 minutes to keep them crisp.
Add Sauce – Pour in hoisin sauce and chicken broth. Stir well.
Combine – Add pork back in. Toss everything together. Cook 2 more minutes. Serve hot.
Low Heat (300°F): Peas soften more. Adds about 5 minutes.
High Heat (375°F): Snap peas stay crunchy. Best option for texture.
General Tso’s Chicken
General Tso’s chicken is crispy, sweet, and just a little spicy. It’s one of the most popular Chinese-American dishes for a reason. I love making this at home because the sauce is so good and it tastes just like takeout. It’s best served with steamed rice and a side of broccoli.
Serve: 4 | Prep Time: 15 mins | Cook Time: 15 mins | Total Time: 30 mins
Ingredients:
- 1 lb chicken thighs, cut into chunks
- ¼ cup cornstarch
- 3 tablespoons soy sauce
- 2 tablespoons rice vinegar
- 2 tablespoons hoisin sauce
- 2 tablespoons sugar
- 3 dried red chilies
- 3 cloves garlic, minced
- 1 teaspoon ginger
- 3 tablespoons vegetable oil
- Sesame seeds for garnish
How To Make:
Coat the Chicken – Toss chicken in cornstarch. Coat evenly. Set aside.
Make the Sauce – Mix soy sauce, rice vinegar, hoisin sauce, and sugar. Stir well.
Heat the Wok – Set to 375°F. Add oil. Let it get very hot.
Fry the Chicken – Cook chicken in batches. About 4-5 minutes until crispy. Remove and drain.
Cook Aromatics – Add garlic, ginger, and dried chilies. Stir for 30 seconds.
Add the Sauce – Pour in sauce. Let bubble for 1-2 minutes.
Combine – Toss in chicken. Coat well. Cook 2 more minutes.
Serve – Garnish with sesame seeds. Serve over rice right away.
Low Heat (300°F): Chicken won’t get as crispy. Works but adds 8-10 minutes.
High Heat (375°F): Best option. Gets that crispy exterior everyone loves.
Egg Drop Soup
Egg drop soup is silky, warm, and so comforting. It’s made with a simple chicken broth base with ribbons of beaten egg throughout. I love this recipe because it takes less than 15 minutes and uses almost no ingredients. It’s the perfect starter or light meal when you’re feeling under the weather.
Serve: 4 | Prep Time: 5 mins | Cook Time: 10 mins | Total Time: 15 mins
Ingredients:
- 4 cups chicken broth
- 3 eggs, beaten
- 1 tablespoon cornstarch mixed with 2 tablespoons water
- 1 teaspoon soy sauce
- ½ teaspoon sesame oil
- Salt and white pepper to taste
- 2 green onions, sliced
How To Make:
Heat the Broth – Set wok to 300°F. Pour in chicken broth. Let it come to a simmer.
Add Cornstarch – Stir in cornstarch slurry. Stir until broth thickens slightly.
Season It – Add soy sauce, sesame oil, salt, and white pepper.
Add the Eggs – Slowly pour beaten eggs into the simmering broth while stirring gently. Ribbons will form.
Finish – Turn off the heat. Top with green onions. Serve immediately.
Low Heat (250-275°F): Perfect for soup. Keeps it at a gentle simmer.
High Heat (350°F): Broth heats faster. Lower heat before adding eggs.
Teriyaki Salmon
Teriyaki salmon in your electric wok is a game-changer. The salmon gets a beautiful glaze that’s sweet and savory at the same time. I love this recipe because salmon cooks so fast and the teriyaki sauce pairs perfectly with its rich flavor. It’s best served over rice with steamed edamame on the side.
Serve: 4 | Prep Time: 10 mins | Cook Time: 10 mins | Total Time: 20 mins
Ingredients:
- 4 salmon fillets
- 3 tablespoons soy sauce
- 2 tablespoons honey
- 1 tablespoon mirin
- 1 teaspoon sesame oil
- 2 cloves garlic, minced
- 1 tablespoon vegetable oil
- Sesame seeds and green onions for garnish
How To Make:
Make the Teriyaki Sauce – Mix soy sauce, honey, mirin, sesame oil, and garlic together.
Heat the Wok – Set to 350°F. Add vegetable oil.
Sear the Salmon – Place salmon skin-side up. Cook 3-4 minutes until golden. Flip carefully.
Add the Sauce – Pour teriyaki sauce over salmon. Let it bubble and coat the fish.
Glaze It – Spoon sauce over the salmon while it cooks for 3-4 more minutes.
Serve – Plate the salmon. Pour remaining sauce on top. Garnish and serve over rice.
Low Heat (300°F): Salmon cooks slower. Adds about 4-5 minutes. Works well.
High Heat (375°F): Great sear on the outside. Watch closely so sauce doesn’t burn.
Pad Thai
Homemade pad thai is easier than you think. Rice noodles, eggs, shrimp or tofu, and that tangy tamarind-based sauce all come together in your wok. I love this dish because it tastes just like your favorite Thai restaurant but costs a fraction of the price. It’s best topped with crushed peanuts, lime, and fresh bean sprouts.
Serve: 4 | Prep Time: 15 mins | Cook Time: 15 mins | Total Time: 30 mins
Ingredients:
- 8 oz rice noodles, soaked in water 30 minutes
- 1 cup shrimp or tofu
- 3 eggs
- 1 cup bean sprouts
- 3 tablespoons tamarind paste
- 2 tablespoons fish sauce
- 1 tablespoon sugar
- 2 cloves garlic, minced
- 2 tablespoons vegetable oil
- ¼ cup crushed peanuts
- Lime wedges and green onions for serving
How To Make:
Make the Sauce – Mix tamarind paste, fish sauce, and sugar. Stir well. Set aside.
Heat the Wok – Set to 375°F. Add vegetable oil.
Cook the Protein – Stir-fry shrimp or tofu for 2-3 minutes. Remove and set aside.
Sauté Garlic – Add garlic. Stir 30 seconds.
Add Noodles – Add soaked noodles. Stir-fry for 2-3 minutes.
Add Sauce – Pour in pad thai sauce. Toss noodles to coat well.
Scramble the Eggs – Push noodles to the side. Crack eggs in. Scramble and mix everything together.
Add Protein Back – Return shrimp or tofu. Toss with bean sprouts.
Serve – Top with crushed peanuts, green onions, and lime wedges.
Low Heat (300°F): Noodles may stick more. Add a splash of water to help.
High Heat (375°F): Best option. Gives noodles that smoky wok flavor.
Sweet and Sour Pork
Sweet and sour pork is a classic for a reason. Crispy pork chunks with pineapple, bell peppers, and that signature sweet and tangy sauce. I love this recipe because it’s colorful, fun to make, and the whole family always loves it. It works best over fluffy white rice with extra sauce drizzled on top.
Serve: 4 | Prep Time: 15 mins | Cook Time: 15 mins | Total Time: 30 mins
Ingredients:
- 1 lb pork shoulder, cut into chunks
- ½ cup pineapple chunks
- 1 red bell pepper, chopped
- 1 green bell pepper, chopped
- 3 tablespoons cornstarch
- 2 tablespoons soy sauce
- 3 tablespoons ketchup
- 2 tablespoons rice vinegar
- 2 tablespoons sugar
- 3 tablespoons vegetable oil
How To Make:
Coat the Pork – Toss pork pieces in cornstarch until well coated.
Make the Sauce – Mix ketchup, rice vinegar, soy sauce, and sugar together. Set aside.
Heat the Wok – Set to 375°F. Add oil. Let it get very hot.
Fry the Pork – Cook pork in batches until crispy on all sides. About 5-6 minutes total. Remove.
Cook the Veggies – Add bell peppers. Stir-fry for 2-3 minutes.
Add Pineapple – Toss in pineapple. Stir for 1 minute.
Add Sauce – Pour in sauce. Let it bubble and thicken for 1-2 minutes.
Combine – Add pork back. Toss to coat. Serve over rice.
Low Heat (300°F): Pork won’t get as crispy. Adds 8 minutes total.
High Heat (375°F): Crispy pork with great caramelization. Best option.
Spicy Thai Basil Chicken
Thai basil chicken is bold, spicy, and packed with flavor. Ground chicken cooked with fresh basil, chilies, and a savory sauce that’s absolutely addictive. I love this recipe because it takes only 15 minutes and tastes incredible over a fried egg and rice. It’s a go-to weeknight meal that never gets old.
Serve: 4 | Prep Time: 10 mins | Cook Time: 12 mins | Total Time: 22 mins
Ingredients:
- 1 lb ground chicken
- 1 cup fresh Thai basil leaves
- 3 cloves garlic, minced
- 2 Thai red chilies, sliced
- 2 tablespoons oyster sauce
- 1 tablespoon soy sauce
- 1 teaspoon fish sauce
- 1 teaspoon sugar
- 2 tablespoons vegetable oil
How To Make:
Heat the Wok – Set to 375°F. Add vegetable oil. Heat it up.
Cook Garlic and Chilies – Add garlic and chilies. Stir-fry for 30 seconds.
Add Ground Chicken – Break up chicken as it cooks. Stir-fry 4-5 minutes until fully cooked.
Season It – Add oyster sauce, soy sauce, fish sauce, and sugar. Toss well.
Add the Basil – Remove from heat. Toss in fresh basil leaves. Stir until wilted.
Serve – Plate over rice with a fried egg on top if you like.
Low Heat (300°F): Works fine. Takes about 5 extra minutes.
High Heat (375°F): Best option. Gives the dish a smoky, intense flavor.
Garlic Butter Noodles
Garlic butter noodles are simple, cozy, and seriously delicious. Just noodles tossed in a rich garlic butter sauce with a splash of soy sauce and parmesan cheese. I love this because it’s ready in under 15 minutes and needs very few ingredients. It’s the best comfort food when you want something quick and satisfying.
Serve: 4 | Prep Time: 5 mins | Cook Time: 10 mins | Total Time: 15 mins
Ingredients:
- 8 oz spaghetti or egg noodles, cooked
- 4 tablespoons butter
- 5 cloves garlic, minced
- 2 tablespoons soy sauce
- 1 tablespoon oyster sauce
- ¼ cup parmesan cheese, grated
- Salt and pepper to taste
- Parsley or green onions to garnish
How To Make:
Heat the Wok – Set to 300°F. Add butter. Let it melt.
Cook the Garlic – Add garlic. Stir for 1-2 minutes until fragrant and golden.
Add the Noodles – Toss in cooked noodles. Mix well with the garlic butter.
Season It – Add soy sauce and oyster sauce. Toss to coat evenly.
Add Parmesan – Turn off heat. Sprinkle in parmesan. Toss well.
Serve – Garnish with parsley or green onions. Serve right away.
Low Heat (275°F): Perfect for this recipe. Butter won’t burn. Best option.
High Heat (350°F): Faster but be careful not to burn the garlic.
Kung Pao Chicken
Kung pao chicken is spicy, nutty, and so flavorful. Tender chicken with peanuts, bell peppers, and dried chilies all in a glossy sauce. I love this recipe because it has that perfect mix of sweet, spicy, and savory. It’s the dish I make when I want something that really impresses people at the dinner table.
Serve: 4 | Prep Time: 15 mins | Cook Time: 12 mins | Total Time: 27 mins
Ingredients:
- 1 lb chicken breast, cubed
- ½ cup roasted peanuts
- 1 red bell pepper, diced
- 4 dried red chilies
- 3 cloves garlic, minced
- 1 teaspoon ginger, grated
- 2 tablespoons soy sauce
- 1 tablespoon rice vinegar
- 1 tablespoon hoisin sauce
- 1 teaspoon cornstarch
- 2 tablespoons vegetable oil
- 1 teaspoon sesame oil
How To Make:
Marinate the Chicken – Toss chicken with soy sauce and cornstarch. Let sit 10 minutes.
Make the Sauce – Mix rice vinegar, hoisin sauce, and sesame oil. Set aside.
Heat the Wok – Set to 375°F. Add vegetable oil.
Cook the Chicken – Stir-fry chicken until browned. About 4-5 minutes. Remove.
Cook Aromatics – Add garlic, ginger, and dried chilies. Stir 30 seconds.
Add Peppers – Toss in bell pepper. Stir-fry 2 minutes.
Add Sauce and Peanuts – Pour in sauce. Add peanuts. Stir well.
Combine – Return chicken. Toss everything. Cook 2 more minutes. Serve over rice.
Low Heat (300°F): Works but adds 5-6 minutes to cooking time.
High Heat (375°F): Gives the best sear and flavor. Highly recommended.
Fried Dumplings (Potstickers)
Fried dumplings in an electric wok are crispy on the bottom and soft on top. They’re filled with pork and cabbage and served with a soy dipping sauce. I love this recipe because it feels like a real restaurant appetizer you can make right at home. They’re best enjoyed fresh out of the wok with a good dipping sauce on the side.
Serve: 4 | Prep Time: 20 mins | Cook Time: 15 mins | Total Time: 35 mins
Ingredients:
- 20 dumpling wrappers (store-bought is fine)
- ½ lb ground pork
- 1 cup cabbage, finely chopped
- 2 cloves garlic, minced
- 1 tablespoon soy sauce
- 1 teaspoon sesame oil
- 1 teaspoon ginger, grated
- 2 tablespoons vegetable oil
- ½ cup water (for steaming)
- Soy sauce and rice vinegar for dipping
How To Make:
Make the Filling – Mix pork, cabbage, garlic, soy sauce, sesame oil, and ginger together.
Fill the Dumplings – Place a spoonful of filling in each wrapper. Fold and seal the edges tightly.
Heat the Wok – Set to 350°F. Add vegetable oil.
Pan-Fry the Bottoms – Place dumplings flat-side down. Cook until golden brown. About 3-4 minutes.
Steam Them – Add water to the wok carefully. Cover with a lid. Steam for 5-6 minutes.
Remove the Lid – Let water evaporate. Cook 1-2 more minutes until crispy again.
Serve – Plate the dumplings with dipping sauce on the side.
Low Heat (300°F): Works but bottoms take longer to brown. Add 4 minutes.
High Heat (375°F): Great crispy bottoms. Be ready when you add water as it will splatter.
Honey Garlic Shrimp
Honey garlic shrimp is sticky, sweet, and incredibly fast to make. Juicy shrimp coated in a honey garlic glaze that’s finger-licking good. I love this recipe because it takes less than 15 minutes and goes with almost everything. It’s best over rice or noodles or even in a lettuce wrap for something lighter.
Serve: 4 | Prep Time: 5 mins | Cook Time: 8 mins | Total Time: 13 mins
Ingredients:
- 1 lb large shrimp, peeled and deveined
- 3 tablespoons honey
- 3 cloves garlic, minced
- 2 tablespoons soy sauce
- 1 tablespoon butter
- 1 teaspoon red pepper flakes (optional)
- 2 tablespoons vegetable oil
- Lemon juice for finishing
How To Make:
Make the Sauce – Mix honey, soy sauce, and garlic together. Set aside.
Heat the Wok – Set to 375°F. Add oil and butter.
Cook the Shrimp – Add shrimp in a single layer. Cook 1-2 minutes per side until pink.
Add the Sauce – Pour honey garlic sauce over shrimp. Toss to coat.
Glaze It – Cook for 2 more minutes until sauce thickens and coats the shrimp.
Finish – Squeeze lemon juice over the top. Add red pepper flakes if you like heat.
Serve – Plate over rice or noodles. Serve immediately.
Low Heat (300°F): Sauce takes longer to thicken. Adds 3-4 minutes.
High Heat (375°F): Quick cook. Sauce caramelizes fast. Best option for this dish.
Vegetable Lo Mein
Vegetable lo mein is a hearty meatless noodle dish that never disappoints. It’s loaded with mushrooms, zucchini, carrots, and cabbage all tossed in a savory sauce. I love this because it’s a great option for vegetarians and is just as satisfying as any meat dish. It’s also super easy to customize with whatever veggies you have on hand.
Serve: 4 | Prep Time: 10 mins | Cook Time: 12 mins | Total Time: 22 mins
Ingredients:
- 8 oz lo mein noodles, cooked
- 1 cup mushrooms, sliced
- 1 zucchini, julienned
- 1 cup carrots, julienned
- 1 cup cabbage, shredded
- 3 tablespoons soy sauce
- 1 tablespoon oyster sauce (or hoisin for vegetarian)
- 1 teaspoon sesame oil
- 2 cloves garlic, minced
- 2 tablespoons vegetable oil
- 2 green onions, sliced
How To Make:
Heat the Wok – Set to 350°F. Add vegetable oil. Let it heat up.
Cook the Garlic – Add garlic. Stir for 30 seconds.
Stir-Fry the Veggies – Add mushrooms, carrots, zucchini, and cabbage. Stir-fry for 4-5 minutes.
Add the Noodles – Toss in cooked lo mein noodles. Mix everything well.
Season It – Add soy sauce, oyster sauce, and sesame oil. Toss to coat evenly.
Finish – Cook 2-3 more minutes. Top with green onions.
Serve – Plate and serve hot right from the wok.
Low Heat (300°F): Veggies soften more. Adds about 5 minutes.
High Heat (375°F): Veggies stay crisp. Noodles get a slight char. Delicious.
Final Thoughts on Cooking With Your West Bend Electric Wok
These West Bend electric wok recipes prove that you don’t need a fancy restaurant kitchen to eat amazing food. All you need is your wok, some basic ingredients, and about 30 minutes. Whether you’re cooking for yourself or a crowd, these dishes are easy, fast, and full of real flavor. Start with your favorite recipe from this list. Then work your way through all 17. You’ll be surprised how good home cooking can be when you have the right tool. And if you’re still looking for a reliable electric wok, this one is the one I personally love and reach for every single week.










Leave a Reply