
Remember those forgotten 10-minute recipes? The ones tucked away in old cookbooks that nobody talks about anymore?
I do. And I miss them.
Back then, these quick dishes meant hot lunches before school. Supper in a flash. A warm plate ready before dad got home. They were simple, fast, and filled with heart.
Why did the easiest meals disappear first? That’s what I keep asking myself.
These weren’t fancy recipes. They didn’t need exotic ingredients or special equipment. Just a few pantry staples and ten minutes of your time. But somehow, they vanished from our tables.
Today, I’m bringing forgotten 10 min recipes you could only find in old cookbooks back.

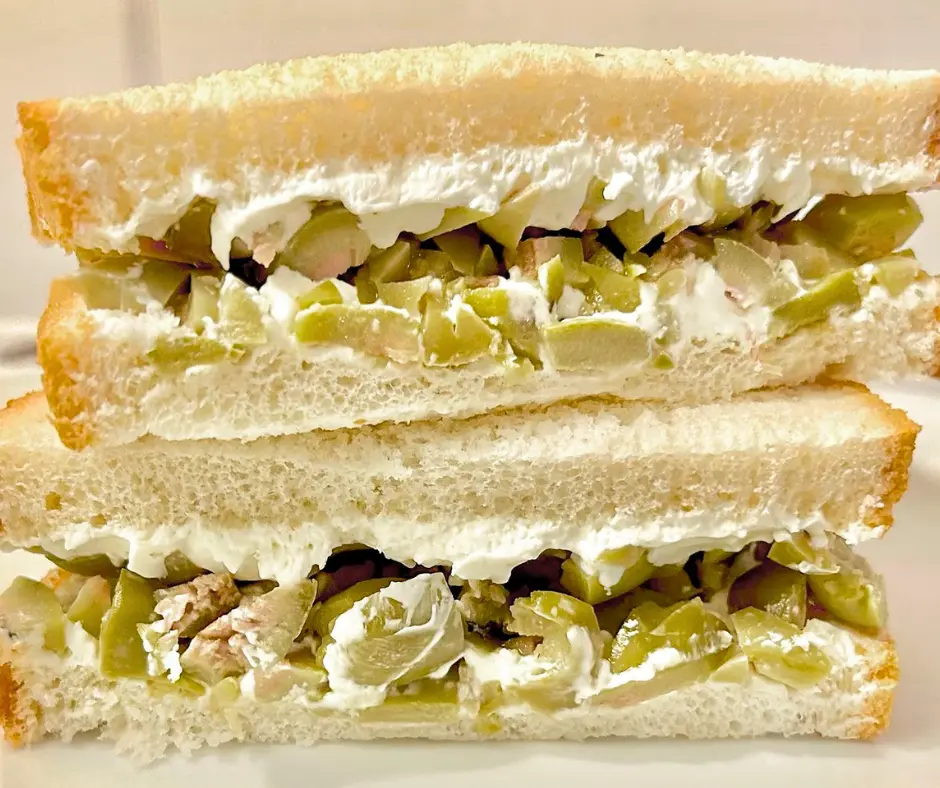
Quick and Easy Cream Cheese Olive Sandwiches
These open-faced tangy bites were party food. They told you something special was about to happen. Or that someone had stopped by with a story to share.
I love how simple they are. Smooth cream cheese meets the briny bite of green olives. It feels grown up. A little fancy, even. The combination just works. You get creamy and salty in every bite.
And the best part? No cooking needed.
Just a butter knife and steady hands. These are perfect for bridge clubs, church luncheons, or a quiet afternoon treat.
Serve: 4 | Prep Time: 5 min | Cook Time: 0 min | Total Time: 5 min
Ingredients:
- 8 oz cream cheese, softened
- 8 slices white bread
- 1/2 cup green olives, sliced
- Paprika for garnish (optional)
- Fresh parsley or chives (optional)
How To Make:
Step 1 – Prep the Cheese: Let cream cheese sit at room temperature for 10 minutes until spreadable.
Step 2 – Spread: Spread cream cheese thick on each bread slice. Don’t be shy about it.
Step 3 – Top: Arrange olive slices neatly on top of the cheese.
Step 4 – Garnish: Sprinkle with paprika, parsley, or chives if using.
Step 5 – Cut and Serve: Cut into triangles or pinwheels for serving.
Budget-Friendly Mock Chicken Legs (City Chicken)
This clever trick came straight from the Great Depression. You’d skewer cubes of pork or veal and bread them just like fried chicken. A quick sear and suddenly you had something golden and crisp.
What I love about this recipe is how it made families feel like they had a proper meal, even when times were tight. It’s comfort, dignity, and a hot dinner all in one. The breading gets wonderfully crispy.
The meat stays juicy inside. Kids who loved fried chicken never knew the difference. This is budget cooking made glamorous.

Serve: 4 | Prep Time: 5 min | Cook Time: 10 min | Total Time: 15 min
Ingredients:
- 1 lb pork cubes (or veal)
- 1 cup breadcrumbs
- 2 eggs, beaten
- 1/2 cup flour
- Salt and pepper to taste
- 2 tbsp oil for frying
- Wooden skewers
How To Make:
Step 1 – Skewer: Thread 3-4 pork cubes onto each skewer.
Step 2 – Season: Season meat with salt and pepper.
Step 3 – Bread: Dip in flour, then egg, then breadcrumbs.
Step 4 – Sear: Heat oil in skillet over high heat. Sear skewers 2-3 minutes per side.
Step 5 – Finish: Turn carefully until golden all over, about 10 minutes total.
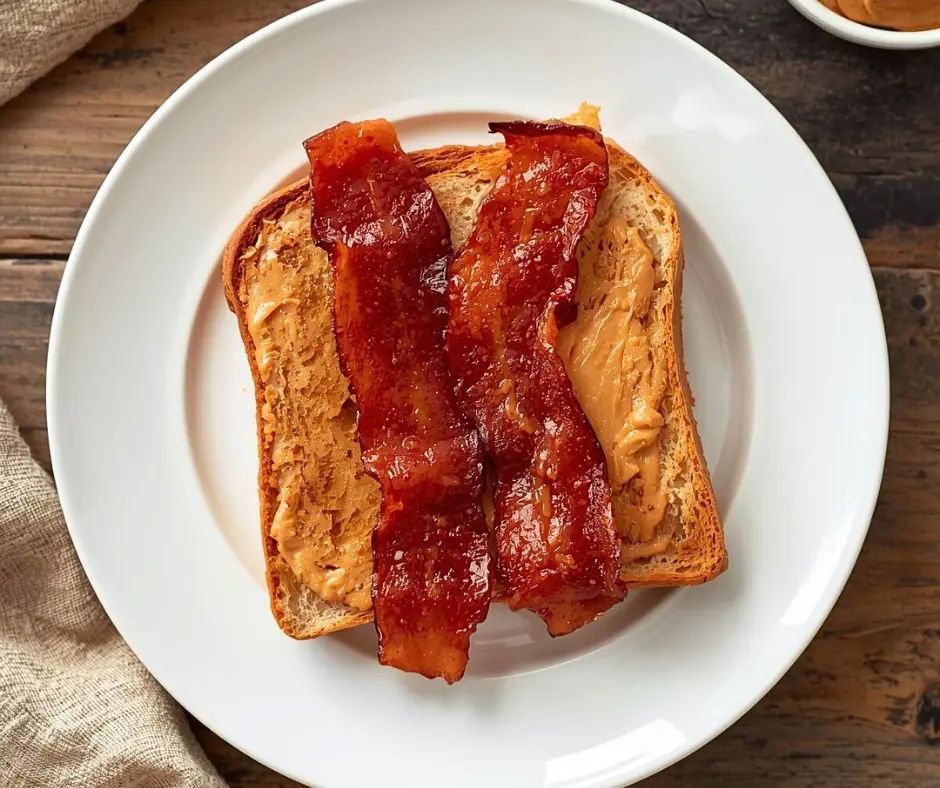
Old-School Peanut Butter and Bacon Toast
This sounds like a dare. But it was real snack food that fed hungry kids and late-night workers.
Trust me on this one. Toast your bread golden. Spread on thick peanut butter. Add crispy bacon fresh from the pan. The result? Salty, sweet, nutty, and rich. Wartime cookbooks featured this as a protein-packed pick-me-up. It used what was shelf-stable and made it taste indulgent.
Some families added banana slices or sprinkled cinnamon on top. But even plain, it does the job. This is survival food with a sweet aftertaste.
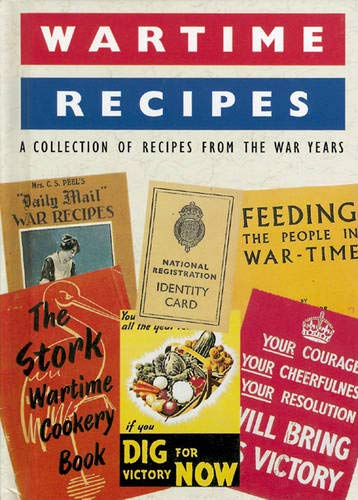
Rediscover the ingenuity of the past with this fascinating collection. Perfect for history buffs and cooks alike, featuring authentic survival recipes that defined a generation.
Serve: 2 | Prep Time: 3 min | Cook Time: 7 min | Total Time: 10 min
Ingredients:
- 4 slices white bread
- 1/2 cup peanut butter
- 6 strips bacon
- Optional: 1 banana, sliced
- Optional: cinnamon or sugar
How To Make:
Step 1 – Cook Bacon: Fry bacon until crispy, about 5-6 minutes. Drain on paper towels.
Step 2 – Toast: Toast bread until golden.
Step 3 – Spread: Spread peanut butter thick on each toast slice.
Step 4 – Top: Place bacon strips on top while still warm.
Step 5 – Optional Add-Ins: Add banana slices or sprinkle with cinnamon if desired.
Fancy Jellied Tomato Juice Cocktail
This dish told guests you were hosting a proper gathering. Pour tomato juice in a bowl. Mix in gelatin. Add lemon, worcestershire sauce, and celery salt. Let it set.
I know it sounds strange now. But mid-century homemakers believed it looked refined. And honestly? It was refreshing and surprisingly flavorful. Clean, cold, and made you feel stylish.
The preparation takes less than 10 minutes before chilling. Served in cocktail glasses with a celery stick garnish, it was the edible centerpiece. This was impressive food made quickly and cheaply. A status symbol in 10 minutes flat.

Serve: 6 | Prep Time: 8 min | Cook Time: 0 min | Total Time: 8 min + 2 hours chilling
Ingredients:
- 3 cups tomato juice
- 2 packets unflavored gelatin
- 2 tbsp lemon juice
- 1 tsp worcestershire sauce
- 1/2 tsp celery salt
- Celery sticks for garnish
How To Make:
Step 1 – Bloom Gelatin: Sprinkle gelatin over 1/2 cup cold tomato juice. Let sit 2 minutes.
Step 2 – Heat: Warm remaining tomato juice slightly, then add bloomed gelatin. Stir until dissolved.
Step 3 – Season: Add lemon juice, worcestershire, and celery salt. Mix well.
Step 4 – Pour: Pour into cocktail glasses or molds.
Step 5 – Chill: Refrigerate until set, about 2 hours. Garnish with celery sticks.
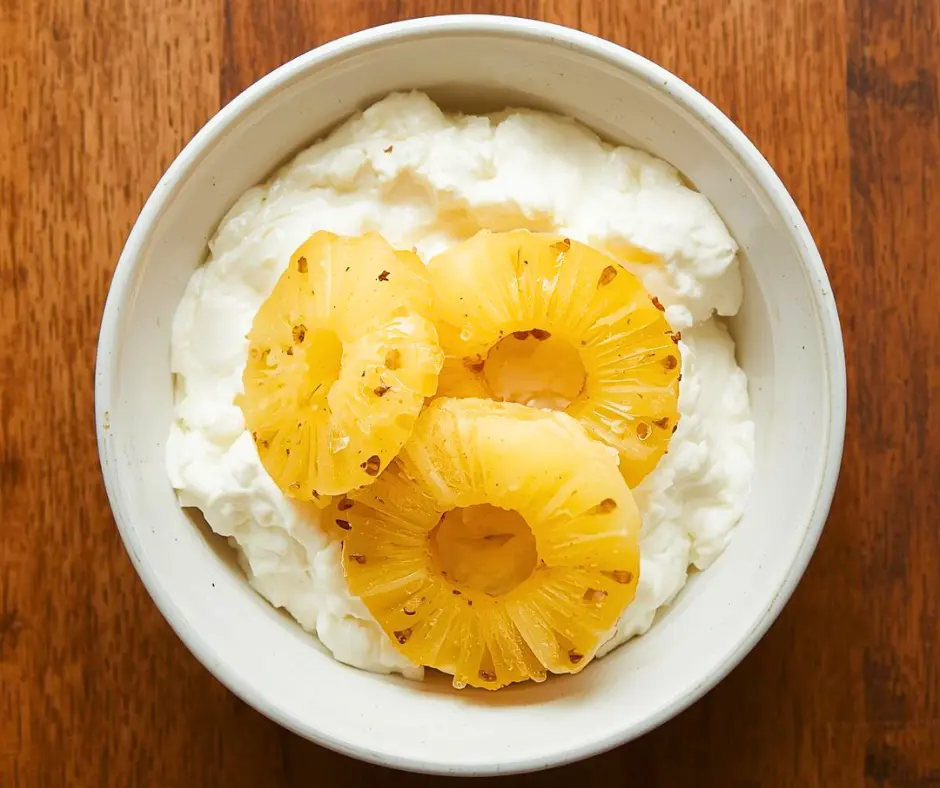
Classic Cottage Cheese with Pineapple Rings
This was everywhere in the 1960s and 70s. Sweet and salty. Creamy and sharp. Every diet menu had it.
All you need is cottage cheese and canned pineapple arranged on lettuce. Sometimes a cherry on top. It looks like sunshine on a plate. And it’s fast. No cooking, no prep, no fuss. Just open, spoon, and stack. This worked for busy parents, students, and office workers. Just enough protein to hold you over.
Enough sweetness to feel like a treat. It’s vanished from our plates, but not from memory. A salad, a snack, and nostalgia in under 10 minutes.
Serve: 2 | Prep Time: 3 min | Cook Time: 0 min | Total Time: 3 min
Ingredients:
- 1 cup cottage cheese
- 4 pineapple rings (canned)
- Lettuce leaves
- 4 maraschino cherries (optional)
- Paprika for garnish (optional)
How To Make:
Step 1 – Arrange Lettuce: Place lettuce leaves on plates.
Step 2 – Add Pineapple: Set pineapple rings on lettuce.
Step 3 – Scoop Cheese: Place cottage cheese in center of each ring.
Step 4 – Garnish: Top with cherry and sprinkle paprika if desired.
Step 5 – Serve: Serve immediately, cold from the fridge.
Simple Hot Dog Roll-Ups with Cheese
These weren’t just for kids. They were for moments when money was tight and hunger was loud.
Take bread, roll it flat, place a hot dog inside, sprinkle cheese, and roll like a cigar. Bake until the cheese bubbles. Ten minutes tops. These appeared in postwar cookbooks and budget flyers.
Cheap, cheerful, and adaptable. Use mustard or relish. Swap in whatever cheese you have. Some moms brushed the outside with butter. This was lunch or dinner when the fridge was nearly bare. But don’t be fooled. These are crunchy, melty, and satisfying.

Serve: 4 | Prep Time: 5 min | Cook Time: 8 min | Total Time: 13 min
Ingredients:
- 8 slices white bread
- 8 hot dogs
- 1 cup shredded cheese
- 2 tbsp butter, melted
- Mustard or relish (optional)
How To Make:
Step 1 – Flatten: Roll bread slices flat with rolling pin.
Step 2 – Assemble: Place hot dog on bread, sprinkle with cheese. Add mustard if using.
Step 3 – Roll: Roll bread around hot dog like a cigar.
Step 4 – Brush: Brush outside with melted butter.
Step 5 – Bake: Place seam-side down on baking sheet. Broil at 400°F for 6-8 minutes until golden and cheese melts.
Elegant Egg Curry in Cream Sauce
This 10-minute dinner tastes like it took hours. Start with hard-boiled eggs already cooked. Make a quick sauce from cream, butter, and curry powder.
I love how rich and warming this is. Full of flavor without being complicated. Mid-century cookbooks borrowed this from Anglo-Indian dishes and adjusted for pantry staples. No exotic spices needed. It showed up during Lent or when meat was off the table. Made you feel elegant. Works great over toast or rice.
Best of all, it uses up eggs about to expire. Fast food used to mean creamy, seasoned, and homemade. This is proof.
Step back in time to the golden age of dinner parties. This collection features the authentic styling, classic cocktails, and hearty comfort foods that defined the 50s and 60s kitchen.

Serve: 4 | Prep Time: 2 min | Cook Time: 8 min | Total Time: 10 min
Ingredients:
- 6 hard-boiled eggs, peeled and halved
- 1 cup heavy cream
- 2 tbsp butter
- 2 tsp curry powder
- 1/4 cup chicken broth
- Salt to taste
- Toast or rice for serving
How To Make:
Step 1 – Make Sauce: Melt butter in saucepan over medium heat.
Step 2 – Add Curry: Stir in curry powder, cook 30 seconds until fragrant.
Step 3 – Pour Cream: Add cream and broth. Whisk until smooth.
Step 4 – Simmer: Let sauce heat through, about 5 minutes. Season with salt.
Step 5 – Add Eggs: Pour sauce over halved eggs. Serve over toast or rice.
Fun Celery Logs with Cheese Whiz and Paprika
This might sound like a joke today. But it was a lifesaver at last-minute parties and school lunches.
Clean celery stalks. Fill with bright orange cheese spread. Sprinkle paprika like fairy dust. That’s it. You can make 10 in under 10 minutes. They add crunch, color, and creaminess to any gathering. Kids loved them. Adults pretended they were just for kids. Hosts relied on them when guests were already at the door.
These showed up in homemaker magazines and recipe swaps. Healthy enough if you ignore the cheese. They had enough bite to hold attention. Fast, fun, and frugal.

Serve: 6 | Prep Time: 5 min | Cook Time: 0 min | Total Time: 5 min
Ingredients:
- 12 celery stalks, cleaned and trimmed
- 1 cup Cheese Whiz or pimento cheese
- Paprika for garnish
- Optional: peanut butter instead of cheese
How To Make:
Step 1 – Clean: Wash and trim celery stalks.
Step 2 – Fill: Spread cheese spread generously inside each celery stalk.
Step 3 – Sprinkle: Dust with paprika.
Step 4 – Chill: Optional – refrigerate 10 minutes for firmer texture.
Step 5 – Serve: Arrange on platter and serve immediately.
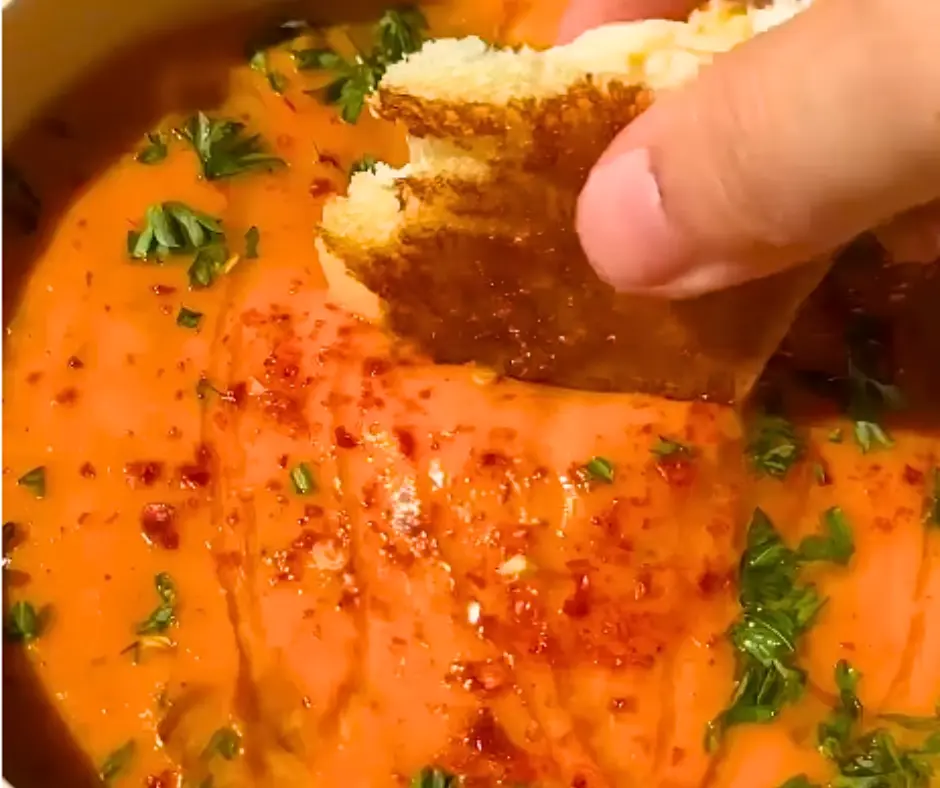
Comforting Tomato Soup with Crushed Saltines and Butter
This sounds simple because it is. And that was the point.
Heat canned tomato soup. Crumble in saltines. Drop in a pad of butter before serving. The butter melts into the red surface, swirling like cream. It adds richness and makes it feel homemade. This was the working person’s soup. Done in 10 minutes. It fed kids on snow days and college students in basement apartments.
The crackers add crunch, then soften just enough to thicken the soup. Eat it with grilled cheese or just a spoon in a blanket. Cheap, reliable, and tastes like care.
Serve: 2 | Prep Time: 2 min | Cook Time: 5 min | Total Time: 7 min
Ingredients:
- 1 can (10.75 oz) tomato soup
- 1 1/2 cups water or milk
- 1/2 cup saltine crackers, crushed
- 2 tbsp butter
- Black pepper to taste
How To Make:
Step 1 – Heat Soup: Pour soup and liquid into pot. Heat over medium heat.
Step 2 – Stir: Stir until hot and smooth, about 4 minutes.
Step 3 – Add Crackers: Crumble saltines into soup.
Step 4 – Add Butter: Drop butter pad on top. Let it melt and swirl.
Step 5 – Season: Add pepper to taste and serve hot.
Creative Bologna Cups with Peas and Cheese
This is what happens when creativity meets desperation in a good way.
Cut bologna around the edges. Drop into muffin tin. The edges curl into little cups when heated. Inside goes canned peas and shredded cheese. Ten minutes later, dinner is served. This lived in 1970s cookbooks. Colorful, quick, and surprisingly filling. Kids found it funny. Parents found it easy.
No thawing, chopping, or much stirring. The result? A salty, creamy, savory bundle. You could eat it with a fork or your hands. When time was tight and money tighter, this meant everything.

Serve: 4 | Prep Time: 3 min | Cook Time: 8 min | Total Time: 11 min
Ingredients:
- 8 slices bologna
- 1 cup canned peas, drained
- 1 cup shredded cheddar cheese
- Black pepper to taste
How To Make:
Step 1 – Prepare: Make small cuts around edges of each bologna slice.
Step 2 – Form Cups: Press bologna into muffin tin cups.
Step 3 – Fill: Spoon peas into each bologna cup.
Step 4 – Top: Sprinkle cheese over peas. Add pepper.
Step 5 – Bake: Bake at 375°F for 8-10 minutes until edges curl and cheese melts.
Crispy Salmon Patties with Cornmeal Crust
These were the queens of the 10-minute dinner rotation.
Open canned salmon. Drain it. Mash with egg, onion, and seasoning. Then comes the cornmeal. A generous dusting that gives these patties a crunchy edge in the skillet. You can mix and fry a batch in under 10 minutes. Every church cookbook had its own version.
These were made for Fridays during Lent and evenings when groceries were low. Salmon patties had dignity. They sizzled. They smelled wonderful. Sometimes ketchup or tartar sauce went on top. Sometimes just lemon. But they always worked.

From potluck casseroles to heavenly desserts, rediscover the simple joy of community cooking. This collection features time-tested recipes that have brought families together for generations.
Serve: 4 | Prep Time: 5 min | Cook Time: 10 min | Total Time: 15 min
Ingredients:
- 1 can (14.75 oz) salmon, drained
- 1 egg, beaten
- 1/4 cup onion, minced
- 1/2 cup cornmeal
- 1/4 tsp black pepper
- 2 tbsp oil for frying
- Lemon wedges for serving
How To Make:
Step 1 – Mix: Mash salmon in bowl. Add egg, onion, and pepper. Mix well.
Step 2 – Form: Shape into 4 patties.
Step 3 – Coat: Press both sides of each patty into cornmeal.
Step 4 – Fry: Heat oil in skillet. Fry patties 4-5 minutes per side.
Step 5 – Serve: Drain on paper towels. Serve with lemon wedges.
Clever Spaghetti Spoon Pie
This brilliant idea sounds strange until you try it. Take leftover spaghetti. Mix with beaten egg and shredded cheese. Press into a pie pan.
Pop it in the oven for 10 minutes and suddenly spaghetti is no longer just spaghetti. It’s a crispy-bottomed pie you can cut into wedges. This dish was born from thrift but became a staple for busy households.
You don’t need anything fancy. Just pasta, something to bind it, and heat. The egg firms up during baking. The cheese melts through it all. Add herbs if you have them. Or a spoonful of tomato sauce for flair.
It proves that with creativity and a hot oven, you can make a second act out of anything. Today we throw away leftovers. Back then, they became pies.
Serve: 4 | Prep Time: 5 min | Cook Time: 10 min | Total Time: 15 min
Ingredients:
- 3 cups cooked spaghetti (leftover)
- 2 eggs, beaten
- 1 cup shredded cheese
- 1/4 cup parmesan cheese
- 1/2 tsp Italian herbs (optional)
- 2 tbsp butter for greasing
How To Make:
Step 1 – Mix: Combine spaghetti, eggs, and half the cheese in bowl.
Step 2 – Grease: Butter a pie pan generously.
Step 3 – Press: Press spaghetti mixture into pan firmly.
Step 4 – Top: Sprinkle remaining cheese and herbs on top.
Step 5 – Bake: Bake at 375°F for 10 minutes until edges crisp and cheese melts.
Wartime Canned Spinach with Vinegar and Sugar
This wasn’t glamorous. But it was fast. And more importantly, it worked.
During World War II, canned vegetables were one of the few things you could count on. Spinach needed help with its metallic tang. Enter vinegar for sharpness and sugar for balance. Open the can, heat the spinach, stir in white vinegar and just enough sugar to make it sing.
Served as a side dish in thousands of homes. You could make it in 10 minutes, even five. Sometimes chopped onion went in. The result was sweet, sour, and soft. An acquired taste maybe, but one people relied on. Not meant to impress. Meant to fill the plate.
Serve: 4 | Prep Time: 2 min | Cook Time: 5 min | Total Time: 7 min
Ingredients:
- 2 cans (14 oz each) spinach, drained
- 2 tbsp white vinegar
- 1 tbsp sugar
- 1 tbsp butter
- 1/4 cup onion, chopped (optional)
- Salt and pepper to taste
How To Make:
Step 1 – Heat: Place drained spinach in saucepan over medium heat.
Step 2 – Season: Add vinegar, sugar, and butter. Stir well.
Step 3 – Cook: Heat through, about 3-4 minutes.
Step 4 – Optional Onion: Add chopped onion if using. Cook 1 minute more.
Step 5 – Serve: Season with salt and pepper. Serve hot.
Golden Corn Fritters with Syrup Drizzle
These were a roadside dream and a pantry staple. Mix canned corn with flour, an egg, baking powder, and just enough milk.
Drop spoonfuls into a hot skillet. Let them puff and brown until edges crisp up golden. They can be savory with salt and pepper. Or sweet topped with syrup or honey. Either way, they take 10 minutes. Diners all over America served them as sides. At home, they were flexible.
No cornmeal? Use flour. No syrup? Try jam. The batter was forgiving. Some families added shredded cheese. Others folded in scallions or peppers. But the bones stayed the same. Canned corn, hot oil, and a little hope. Something so fast could be so filling.
Serve: 4 | Prep Time: 5 min | Cook Time: 8 min | Total Time: 13 min
Ingredients:
- 1 can (15 oz) corn, drained
- 1/2 cup flour
- 1 egg, beaten
- 1 tsp baking powder
- 2 tbsp milk
- Salt and pepper to taste
- 3 tbsp oil for frying
- Syrup or honey for serving
How To Make:
Step 1 – Mix Batter: Combine corn, flour, egg, baking powder, and milk. Season with salt and pepper.
Step 2 – Heat Oil: Heat oil in skillet over medium-high heat.
Step 3 – Drop: Spoon batter into skillet, about 2 tablespoons per fritter.
Step 4 – Fry: Cook 3-4 minutes per side until golden and crispy.
Step 5 – Serve: Drain on paper towels. Drizzle with syrup or honey.
Southern Pimento Cheese on Toast Points
This was the ultimate southern shortcut. Start with shredded cheddar. Stir in mayonnaise, chopped pimentos, and maybe vinegar.
Spread on triangle-cut toast. White bread, lightly buttered, broiled just enough to crisp. You can serve cold or pop in the oven until bubbly. Either way, only 10 minutes. Every southern cookbook had a version. This spread was cheese with personality. Sharp, tangy, creamy, and just spicy enough. Toast points gave it structure and crunch.
Just enough heft to make it a meal. Pimento cheese was quick and clever. Made from things already in the fridge. Served at weddings, funerals, and baby showers. Fast food in the best sense. Homemade, heartfelt, and ready in minutes.

“A true celebration of the South. From world-class fried chicken to heirloom biscuits, this book is more than a recipe collection—it’s a masterclass in Southern hospitality.”
Serve: 6 | Prep Time: 8 min | Cook Time: 2 min | Total Time: 10 min
Ingredients:
- 2 cups shredded sharp cheddar
- 1/2 cup mayonnaise
- 4 oz jar pimentos, chopped and drained
- 1 tsp worcestershire sauce
- 1/4 tsp cayenne pepper (optional)
- 8 slices white bread
- 2 tbsp butter, softened
How To Make:
Step 1 – Make Spread: Mix cheddar, mayo, pimentos, worcestershire, and cayenne in bowl.
Step 2 – Butter Toast: Butter bread slices lightly.
Step 3 – Cut: Cut each slice into 4 triangles.
Step 4 – Spread: Spread pimento cheese on toast points.
Step 5 – Broil: Optional – broil 1-2 minutes until bubbly. Or serve cold.
Depression Era One Egg Pancakes with Raisins
This was Depression-era brilliance disguised as breakfast. You need one egg, flour, water or milk, and salt. Raisins give sweetness.
No syrup needed if money was tight. Mix it all, drop onto a hot griddle, and in minutes you have hot cakes. These pancakes were thin, more like crepes. But warm, comforting, and filling. You could make six or eight with just a little batter. Stretching one egg across an entire meal.
For families living on pennies, that meant everything. The raisins added chew and sweetness. The treat inside the practical. Serve with powdered sugar if you have it. Or just butter. The smell of them cooking in a cold kitchen was worth more than money. A morning hug in lean times.
Serve: 2 | Prep Time: 3 min | Cook Time: 6 min | Total Time: 9 min
Ingredients:
- 1 egg, beaten
- 1/2 cup flour
- 1/2 cup water or milk
- Pinch of salt
- 1/4 cup raisins
- 1 tbsp butter for griddle
- Powdered sugar (optional)
How To Make:
Step 1 – Mix Batter: Whisk egg, flour, water, and salt until smooth.
Step 2 – Add Raisins: Stir in raisins.
Step 3 – Heat Griddle: Melt butter on griddle or pan over medium heat.
Step 4 – Cook: Pour small amounts of batter onto griddle. Cook 2-3 minutes per side.
Step 5 – Serve: Stack and dust with powdered sugar if desired.
Sweet Baked Apples with Brown Sugar and Margarine
This was one of the quickest desserts a family could make. But it tastes like it’s been in the oven for an hour.
Core an apple. Stuff the center with brown sugar and margarine. Microwave until soft and bubbling. Less than 10 minutes from counter to table. This dessert was a mid-century staple. Sweet, warm, and felt indulgent without needing flour or eggs. Apples were cheap. Margarine was always on hand.
Sometimes people added raisins, cinnamon, or nutmeg. But even plain, it worked. Serve with a spoon and a drizzle of the melted sugar-butter mix. Maybe cream if it’s special. These made humble fruit into something soft and fragrant. Comfort food when watching pennies but still wanting something sweet.
Serve: 2 | Prep Time: 3 min | Cook Time: 5 min | Total Time: 8 min
Ingredients:
- 2 large apples
- 2 tbsp brown sugar
- 2 tbsp margarine or butter
- 1/4 tsp cinnamon (optional)
- 2 tbsp raisins (optional)
- Cream for serving (optional)
How To Make:
Step 1 – Core: Core apples, leaving bottom intact.
Step 2 – Stuff: Fill center with brown sugar, margarine, and optional add-ins.
Step 3 – Place: Put apples in microwave-safe dish.
Step 4 – Microwave: Cook on high 4-5 minutes until soft.
Step 5 – Serve: Spoon melted sauce over apples. Add cream if desired.
Easy Creamed Corn and Egg Drop Skillet
This never looked fancy. But it always left you full.
Heat canned creamed corn in a skillet. Crack in a couple eggs. Gently stir while they cook through. That’s it. No chopping, no measuring, no baking. Just a few minutes on the stove and dinner is ready. This came from 1950s family meal plans. Simple, soft, and surprisingly rich.
The eggs add protein. The corn adds sweetness. If you have pepper or parsley, toss that in too. Some added milk to stretch it.
Others used cheese or crackers on top. This wasn’t a showpiece. It was a solution. A way to feed four people with one can and two eggs. Hot, fast, and ready in 10 minutes flat.
Serve: 4 | Prep Time: 2 min | Cook Time: 8 min | Total Time: 10 min
Ingredients:
- 1 can (14.75 oz) creamed corn
- 4 eggs
- 2 tbsp milk (optional)
- Salt and pepper to taste
- 2 tbsp butter
- Parsley for garnish (optional)
How To Make:
Step 1 – Heat Corn: Melt butter in skillet. Add creamed corn and heat through.
Step 2 – Add Milk: Stir in milk if using for creamier texture.
Step 3 – Crack Eggs: Crack eggs directly into corn mixture.
Step 4 – Stir: Gently stir, breaking up eggs as they cook, about 5 minutes.
Step 5 – Season: Add salt, pepper, and parsley. Serve hot.
Simple Shredded Lettuce with Mayonnaise and Paprika
This wasn’t just a salad. It was a way to make the simplest plate look complete.
Take iceberg lettuce. Shred it finely. Drop onto a dish in a small mound. Then comes the mayonnaise, a generous spoonful right on top. And the paprika, a dusting of orange that makes this look intentional. This was served on luncheon trays next to deviled eggs or tomato slices.
Fast, easy, and had just enough flavor to count as a side. No chopping vegetables. No dressing to mix. Just cold crunch, creamy topping, and a little spice. People loved it for texture. It played well with meatloaf, sandwiches, or tuna salad. Diet food and filler food all-in-one.
Serve: 4 | Prep Time: 5 min | Cook Time: 0 min | Total Time: 5 min
Ingredients:
- 1 head iceberg lettuce, shredded
- 1/2 cup mayonnaise
- 1 tsp paprika
- Fresh parsley or canned olives for garnish (optional)
How To Make:
Step 1 – Shred: Shred lettuce finely by hand or with knife.
Step 2 – Mound: Place lettuce on individual plates in small mounds.
Step 3 – Top: Spoon mayonnaise generously on top of each mound.
Step 4 – Sprinkle: Dust with paprika.
Step 5 – Garnish: Add parsley sprig or olive if desired. Serve cold.
Restaurant-Style Canned Asparagus with Cheese Sauce
This was the shortcut version of fancy hotel brunches. It made its way into Sunday suppers and quick weeknight meals.
Drain canned asparagus spears. Warm them in a pan. Pour over quick cheese sauce made from evaporated milk, margarine, and cheddar. Sometimes the cheese came from a jar. Sometimes from slices. No matter how you made it, the whole thing was ready in under 10 minutes.
The asparagus stays soft. But the richness of the cheese makes it special. This was a vegetable side that held its own next to baked ham or meatloaf. Housewives praised it for being company-worthy. Kids remembered it as the only way they liked asparagus. Easy, warm, and creamy.
Serve: 4 | Prep Time: 2 min | Cook Time: 8 min | Total Time: 10 min
Ingredients:
- 2 cans (14.5 oz each) asparagus spears, drained
- 1 cup evaporated milk
- 2 tbsp margarine or butter
- 1 cup shredded cheddar cheese
- 1/4 tsp black pepper
- Pinch of salt
How To Make:
Step 1 – Warm Asparagus: Heat asparagus in pan over low heat, about 3 minutes.
Step 2 – Make Sauce: In separate pan, melt margarine over medium heat.
Step 3 – Add Milk: Pour in evaporated milk, heat until warm.
Step 4 – Melt Cheese: Add cheddar, stir until melted and smooth.
Step 5 – Combine: Pour cheese sauce over asparagus. Season and serve.
No-Bake Graham Cracker Pudding Cups
These were the gold standard of no-bake desserts in mid-century America.
All you need is instant pudding, graham crackers, and clean teacups or jelly jars. Make the pudding. Layer it with crackers like it’s cake. That’s it. No oven, no stovetop. Just a spoon, a bowl, and 10 quiet minutes. These showed up in after-school kitchens and church socials.
As the crackers sat, they softened into cake-like layers. Soaking in the pudding and making every bite better. Sometimes kids added whipped topping or sprinkles. But even plain, these were perfect. The first spoonful felt like a reward. Today we reach for store-bought snacks. But these were homemade simplicity. They tasted like childhood.
Serve: 4 | Prep Time: 8 min | Cook Time: 0 min | Total Time: 8 min + 30 min chilling
Ingredients:
- 1 box (3.4 oz) instant pudding (any flavor)
- 2 cups cold milk
- 12 graham crackers
- Whipped topping (optional)
- Sprinkles or banana slices (optional)
How To Make:
Step 1 – Make Pudding: Whisk pudding mix and cold milk for 2 minutes until thick.
Step 2 – Layer: Break graham crackers to fit cups or jars.
Step 3 – Alternate: Layer pudding and crackers, starting and ending with pudding.
Step 4 – Chill: Refrigerate at least 30 minutes for crackers to soften.
Step 5 – Top: Add whipped topping or other garnishes before serving.
Quick Minute Steak with Mustard Butter Glaze
This is what you made when guests were coming and the meat was thin.
These paper-thin beef slices were cut to cook fast. Really fast. Drop them into a hot skillet. Watch them sizzle and curl. Flip quick before they toughened up. While they cook, mix soft butter with mustard.
Once steaks are off the heat, spoon that buttery glaze right on top. It melts across the surface like a sauce from a fancier kitchen. These were called minute steaks because they really were that fast.
Ten minutes from fridge to table. Postwar cookbooks framed it as efficient elegance. A way to feel proud of a meal even when meat was thin and time was shorter. That tangy butter turned plain steak into something memorable.
Serve: 4 | Prep Time: 3 min | Cook Time: 6 min | Total Time: 9 min
Ingredients:
- 4 minute steaks (thin cut beef)
- Salt and pepper to taste
- 2 tbsp oil
- 4 tbsp butter, softened
- 2 tbsp spicy brown mustard
- 1 tsp worcestershire sauce
How To Make:
Step 1 – Season: Season steaks with salt and pepper on both sides.
Step 2 – Make Glaze: Mix softened butter with mustard and worcestershire in small bowl.
Step 3 – Heat Pan: Heat oil in skillet over high heat until very hot.
Step 4 – Sear: Cook steaks 2-3 minutes per side. Don’t overcook.
Step 5 – Glaze: Remove from heat. Top each steak with mustard butter immediately.
Autumn Cottage Fried Apples with Butter and Sugar
These were the unofficial scent of fall kitchens and chilly mornings.
Take a few firm apples. Slice them thin. Drop into a hot pan with margarine or butter. Then comes brown sugar. It melts into the fruit and coats the slices until they soften and shimmer. Just this side of caramel.
The whole thing takes maybe 10 minutes, less if you’re not fussy. These apples were spooned onto toast, waffles, or oatmeal. They showed up next to pork chops or inside grilled cheese sandwiches.
During apple season, they were a way to use the less perfect fruit. Cottage fried apples came from country cookbooks. They were cozy, fast, and inexpensive. No cinnamon needed, though it never hurt.
Serve: 4 | Prep Time: 5 min | Cook Time: 8 min | Total Time: 13 min
Ingredients:
- 4 firm apples, sliced thin
- 3 tbsp butter or margarine
- 1/4 cup brown sugar
- 1/4 tsp cinnamon (optional)
- Pinch of salt
How To Make:
Step 1 – Heat Pan: Melt butter in large skillet over medium-high heat.
Step 2 – Add Apples: Add apple slices in single layer if possible.
Step 3 – Sprinkle Sugar: Sprinkle brown sugar over apples.
Step 4 – Cook: Cook 6-8 minutes, stirring occasionally, until soft and caramelized.
Step 5 – Season: Add cinnamon and salt if desired. Serve warm.
Budget Cracker Omelets
This was the kind of meal that only made sense once you were hungry enough to try it.
Beat a couple eggs. Crush in saltine crackers. Pour into a hot skillet. The crackers soften but keep texture. It puffs up slightly. You flip it if you can or just fold it.
Depression-era cookbooks listed it as a way to stretch eggs and add bulk. It tastes somewhere between a frittata and a savory pancake. People added onion, cheese, or vegetables if they had any. But even plain, it filled the belly.
Cheap, hot, and fast. This wasn’t restaurant food. It was survival food with a creative twist. Sometimes all a meal needed was one egg, a few crumbs, and a little grit.
Serve: 2 | Prep Time: 3 min | Cook Time: 6 min | Total Time: 9 min
Ingredients:
- 4 eggs, beaten
- 1/2 cup saltine crackers, crushed
- 2 tbsp milk
- Salt and pepper to taste
- 2 tbsp butter
- Optional: cheese, onion, or vegetables
How To Make:
Step 1 – Mix: Beat eggs with milk. Stir in crushed crackers. Let sit 1 minute.
Step 2 – Season: Add salt, pepper, and optional ingredients.
Step 3 – Heat: Melt butter in skillet over medium heat.
Step 4 – Pour: Pour egg mixture into pan. Cook without stirring 3 minutes.
Step 5 – Fold: Flip or fold omelet. Cook 2 more minutes until set.
Lunchroom Cheese Dreams
These were the lunchroom royalty of open-faced sandwiches. White bread, a slab of cheddar or American cheese, and one tomato slice in the center.
Broil until the cheese bubbles and the bread crisps. It looks simple, and it is. But for kids or tired parents, it feels like comfort. The tomato gives acidity. The cheese oozes at the edges. That soft bread turns crisp and chewy. These showed up in cookbooks from the 1940s through 1970s. Some sprinkled oregano. Others swapped in pimento cheese. But the idea stayed the same.
Fast, hot, satisfying. You made these when the fridge was nearly empty. They were cheap, cheerful, and best eaten straight from the pan. No fuss, just enough flavor to forget you were scraping by.
Serve: 4 | Prep Time: 3 min | Cook Time: 5 min | Total Time: 8 min
Ingredients:
- 4 slices white bread
- 4 slices cheddar or American cheese
- 4 tomato slices
- 1/4 tsp oregano (optional)
- Salt and pepper to taste
How To Make:
Step 1 – Arrange: Place bread slices on baking sheet.
Step 2 – Layer: Top each with cheese slice and tomato slice in center.
Step 3 – Season: Sprinkle with oregano, salt, and pepper if using.
Step 4 – Broil: Broil 4-5 minutes until cheese bubbles and bread crisps.
Step 5 – Serve: Serve immediately while hot.


Leave a Reply