
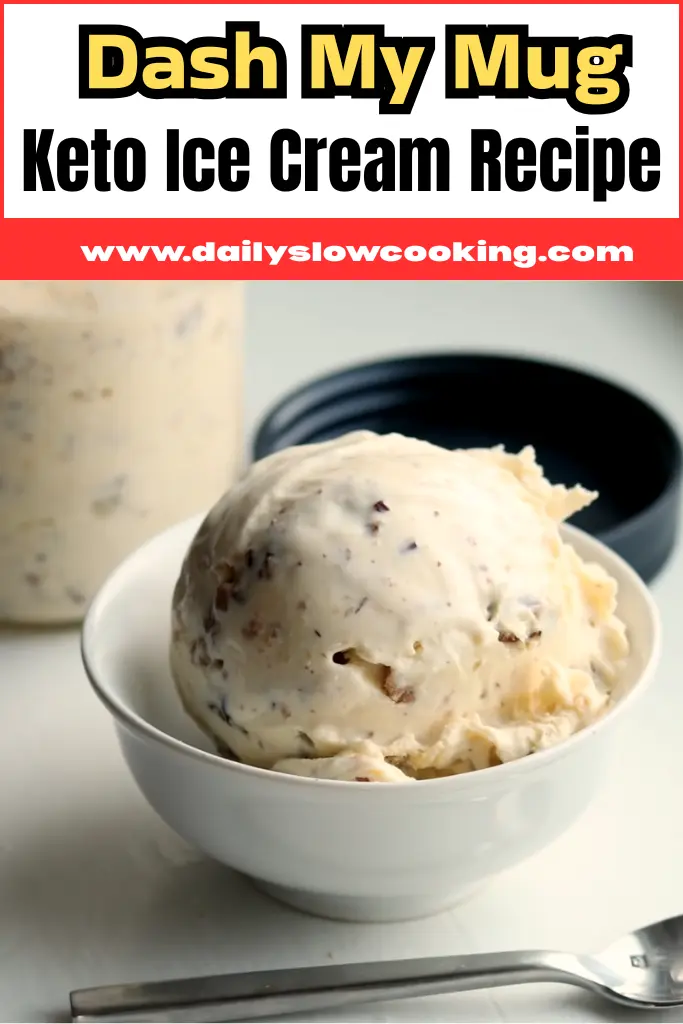
I love enjoying a sweet, creamy treat that fits my low-carb lifestyle, and this Dash My Mug Keto Ice Cream Recipe is just that.
Keto ice cream is made without sugar, so it’s perfect for anyone watching their carbs but still wanting something tasty and cold.
Using the Dash My Mug ice cream maker makes it super easy to make at home. Just mix a few simple ingredients, and you’ll have smooth, delicious ice cream in no time.
This recipe is great for anyone who wants a quick dessert that feels like a treat but stays healthy.
It reminds me a bit of frozen yogurt but without the extra sugar. You’ll enjoy how fresh and creamy this keto ice cream tastes, and I can’t wait for you to try it!
Why You Love This Dash My Mug Keto Ice Cream
This Dash My Mug Keto Ice Cream Recipe is a total winner, and here’s why:
- Low-Carb Heaven: It fits perfectly into a keto diet with minimal carbs.
- Quick and Easy: Ready in about 20 minutes with the Dash My Mug.
- Customizable: Add your favorite mix-ins like nuts or sugar-free chocolate.
- Single-Serve: Makes just enough for you, so no temptation to overeat.
- Creamy Delight: Tastes rich and smooth, like store-bought but better!
I’m obsessed with how simple this recipe is. It’s perfect for a quick dessert when I want something sweet but healthy. The Dash My Mug makes it fun to churn, and I can toss in my favorite toppings.
Dash My Mug Keto Ice Cream Ingredients
Here’s everything you need to make this yummy keto ice cream. Each ingredient plays a big role in making it creamy and delicious.
- Heavy Whipping Cream (1 cup): This is the star of the show! Heavy cream gives the ice cream its rich, smooth texture. Look for one with at least 36% fat for the best results. I grab mine from the dairy section, and it’s usually in a carton or bottle.
- Unsweetened Almond Milk (½ cup): Almond milk keeps the mix light and cuts down on the carbs. I use unsweetened to avoid any added sugar. It’s in the grocery store near the milk or in the non-dairy section.
- Powdered Erythritol (¼ cup): This is my go-to keto sweetener. It’s sugar-free, has zero carbs, and dissolves easily for a smooth texture. You’ll find it in the baking aisle or online. I love how it sweetens without a weird aftertaste.
- Vanilla Extract (1 tsp): Vanilla adds that classic ice cream flavor. Use pure vanilla extract for the best taste—it’s in the baking aisle. A little goes a long way to make it super flavorful.
- Pinch of Salt: Just a tiny bit of salt boosts all the flavors. I use regular table salt from my pantry. It’s a small thing, but it makes a big difference!
Helpful Swaps
If you’re missing something, don’t worry! Here are some swaps that work just as well:
- Heavy Whipping Cream: Swap with full-fat coconut cream (from a can) for a dairy-free version. It’s just as creamy but has a slight coconut taste.
- Unsweetened Almond Milk: Use unsweetened coconut milk (the kind in a carton) if you’re nut-free. It’s still low-carb and works great.
- Powdered Erythritol: Try powdered allulose instead. It’s another keto sweetener that dissolves nicely. Use a bit more (⅓ cup) since it’s less sweet.
- Vanilla Extract: If you’re out, use a scrape of vanilla bean seeds for a fancy twist. It’s pricier but gives a bold flavor.
Kitchen Equipment Needed
To make this Dash My Mug Keto Ice Cream, you’ll need:
- Dash My Mug Ice Cream Maker: The main tool! It churns your mix into ice cream. Make sure the mug is frozen for 24 hours before you start.
- Measuring Cups and Spoons: For getting the right amounts of cream, milk, and sweetener.
- Whisk or Spoon: To mix your ingredients smoothly before churning.
- Liquid Measuring Cup: Makes it easy to pour the mix into the ice cream maker.
- Spatula: Helps scrape out every bit of ice cream from the mug.
How To Make Dash My Mug Keto Ice Cream
Making this Dash My Mug Keto Ice Cream Recipe is so easy, even if you’ve never made ice cream before. Follow these steps, and you’ll have a creamy treat in no time!
Step 1 | Freeze the Mug
First, make sure your Dash My Mug’s cooling bowl is frozen. Pop it in the freezer, upright, for at least 24 hours. I keep mine in there all the time so it’s ready whenever I want ice cream. Your freezer should be at 0°F or colder.
Step 2 | Mix the Ingredients
In a liquid measuring cup, pour in 1 cup of heavy whipping cream and ½ cup of unsweetened almond milk. Add ¼ cup powdered erythritol, 1 teaspoon vanilla extract, and a tiny pinch of salt. Whisk it all together until the sweetener dissolves completely. I give it a good stir for about a minute to make sure it’s smooth.
Step 3 | Set Up the Ice Cream Maker
Take the frozen mug out of the freezer and place it on a flat surface, like your kitchen counter. Attach the motor to the lid—line up the pins with the slots until it clicks. Then, snap the paddle into the motor’s base. Lower the lid with the motor and paddle onto the mug, aligning the pins with the notches on the mug’s locking base. Twist it clockwise to lock it in place.
Step 4 | Start Churning
Plug in the ice cream maker and press the power switch. The paddle will start spinning. While it’s running, slowly pour your ice cream mix through the food chute on the lid. I pour it in a steady stream to keep things even. Let it churn for 15-20 minutes, or until it looks like soft-serve ice cream.
Step 5 | Add Mix-Ins (Optional)
If you want extras like sugar-free chocolate chips or chopped nuts, toss them in through the food chute during the last 5 minutes of churning. I love adding a few keto chocolate chips for a fun crunch!
Step 6 | Check the Texture
When the ice cream looks thick and creamy, turn off the motor. Unlock the lid by twisting it counterclockwise. The paddle might stay in the ice cream—that’s okay! Just pull it out gently.
Step 7 | Enjoy or Freeze
Grab a spoon and dig in right from the mug for soft-serve vibes. If you want it firmer, pop the mug in the freezer for 1-2 hours. I usually can’t wait, so I eat it right away!
Recipe Tips for Success
Here are some quick tips to make your Dash My Mug Keto Ice Cream turn out perfect every time:
- Chill Ingredients: Keep your cream and almond milk cold before mixing. It helps the ice cream freeze faster.
- Don’t Overfill: Stick to the recipe amounts so the mug doesn’t overflow while churning.
- Clean the Paddle: Rinse the paddle right after using it to avoid sticky buildup.
- Taste the Mix: Before churning, taste your mix. Add more sweetener if you like it sweeter.
- Freeze Properly: Make sure the mug is fully frozen for 24 hours for the best texture.
Dash My Mug Keto Ice Cream Serving Suggestion
Here’s how to enjoy your Dash My Mug Keto Ice Cream to the fullest:
- In a Cone: Scoop it into a keto-friendly ice cream cone for a classic treat.
- With Toppings: Drizzle with sugar-free chocolate syrup or sprinkle with crushed pecans.
- As a Sundae: Layer it in a bowl with whipped cream and a few raspberries.
- Straight from the Mug: Eat it right out of the mug for a cozy, no-fuss dessert.
- With Keto Cookies: Serve alongside a low-carb cookie for a sweet crunch.
How to Store Dash My Mug Keto Ice Cream
Storing your Dash My Mug Keto Ice Cream is easy. If you have leftovers (which is rare in my house!), cover the mug with a silicone lid or plastic wrap and pop it back in the freezer.
It’ll stay good for up to 2 weeks, but it’s best within a few days for that creamy texture. To serve, let it sit at room temp for 5-10 minutes to soften.
I scoop it into a bowl or eat it right from the mug. Freezing it longer might make it a bit hard, so stir it with a spoon to bring back the creaminess. Always keep the mug upright in the freezer to avoid spills.
Dash My Mug Keto Ice Cream Recipe FAQs
1. Can I make this without a Dash My Mug Ice Cream Maker?
Yes, you can! Mix the ingredients and pour them into a freezer-safe container. Freeze for 4 hours, stirring every 30 minutes to break up ice crystals. It won’t be as smooth as with the Dash My Mug, but it still tastes great. I tried this when my mug wasn’t frozen, and it worked in a pinch!
2. Is this recipe safe for diabetics?
This Dash My Mug Keto Ice Cream uses erythritol, a sugar-free sweetener that doesn’t spike blood sugar, making it diabetic-friendly. Always check with your doctor, though. I make this for my friend who’s diabetic, and she loves it. Just watch portion sizes since it’s rich in fat.
3. Can I use regular milk instead of almond milk?
Regular milk has more carbs, so it’s not ideal for keto. If you’re not strict keto, you can use it, but the carb count will go up. Stick with unsweetened almond or coconut milk for low-carb. I tried regular milk once, and it was tasty but not keto-friendly.
4. How do I clean the Dash My Mug Ice Cream Maker?
Wash the paddle, lid, and mug with warm, soapy water after use. Don’t soak the motor—it’s not waterproof. Dry everything well before storing. I rinse the mug right after eating to keep it clean. The manual says not to put it in the dishwasher, so I hand-wash mine.
5. Can I double the recipe?
The Dash My Mug is small, so doubling won’t fit. Make one batch at a time, or use a bigger ice cream maker if you have one. I tried squeezing in more mix once, and it overflowed—lesson learned! Stick to the recipe for best results.
6. Why is my ice cream too soft?
If it’s too soft, your mug might not be cold enough, or the ingredients weren’t chilled. Freeze the mug for a full 24 hours and use cold cream and milk. You can also freeze the ice cream for 1-2 hours after churning. I had this issue until I kept my mug frozen longer.
Dash My Mug Keto Ice Cream Recipe

Creamy Dash My Mug keto ice cream recipe ready in 20 minutes! Low carb, sugar-free, and rich—your perfect 2-serving dessert with just 1g net carbs.
Ingredients
- 1 cup Heavy Whipping Cream (36% fat or higher)
- ½ cup Unsweetened Almond Milk
- ¼ cup Powdered Erythritol
- 1 tsp Vanilla Extract
- Pinch of Salt
Instructions
Step 1 | Freeze the Mug
First, make sure your Dash My Mug’s cooling bowl is frozen. Pop it in the freezer, upright, for at least 24 hours. I keep mine in there all the time so it’s ready whenever I want ice cream. Your freezer should be at 0°F or colder.
Step 2 | Mix the Ingredients
In a liquid measuring cup, pour in 1 cup of heavy whipping cream and ½ cup of unsweetened almond milk. Add ¼ cup powdered erythritol, 1 teaspoon vanilla extract, and a tiny pinch of salt. Whisk it all together until the sweetener dissolves completely. I give it a good stir for about a minute to make sure it’s smooth.
Step 3 | Set Up the Ice Cream Maker
Take the frozen mug out of the freezer and place it on a flat surface, like your kitchen counter. Attach the motor to the lid—line up the pins with the slots until it clicks. Then, snap the paddle into the motor’s base. Lower the lid with the motor and paddle onto the mug, aligning the pins with the notches on the mug’s locking base. Twist it clockwise to lock it in place.
Step 4 | Start Churning
Plug in the ice cream maker and press the power switch. The paddle will start spinning. While it’s running, slowly pour your ice cream mix through the food chute on the lid. I pour it in a steady stream to keep things even. Let it churn for 15-20 minutes, or until it looks like soft-serve ice cream.
Step 5 | Add Mix-Ins (Optional)
If you want extras like sugar-free chocolate chips or chopped nuts, toss them in through the food chute during the last 5 minutes of churning. I love adding a few keto chocolate chips for a fun crunch!
Step 6 | Check the Texture
When the ice cream looks thick and creamy, turn off the motor. Unlock the lid by twisting it counterclockwise. The paddle might stay in the ice cream—that’s okay! Just pull it out gently.
Step 7 | Enjoy or Freeze
Grab a spoon and dig in right from the mug for soft-serve vibes. If you want it firmer, pop the mug in the freezer for 1-2 hours. I usually can’t wait, so I eat it right away!
Nutrition Information:
Serving Size:
1Amount Per Serving: Calories: 285Total Fat: 28gSaturated Fat: 17gCholesterol: 100mgSodium: 65mgCarbohydrates: 3gSugar: 1gProtein: 2g
Did you make this Dash My Mug Keto Ice Cream Recipe? Please leave a ⭐ rating and review!


Leave a Reply