
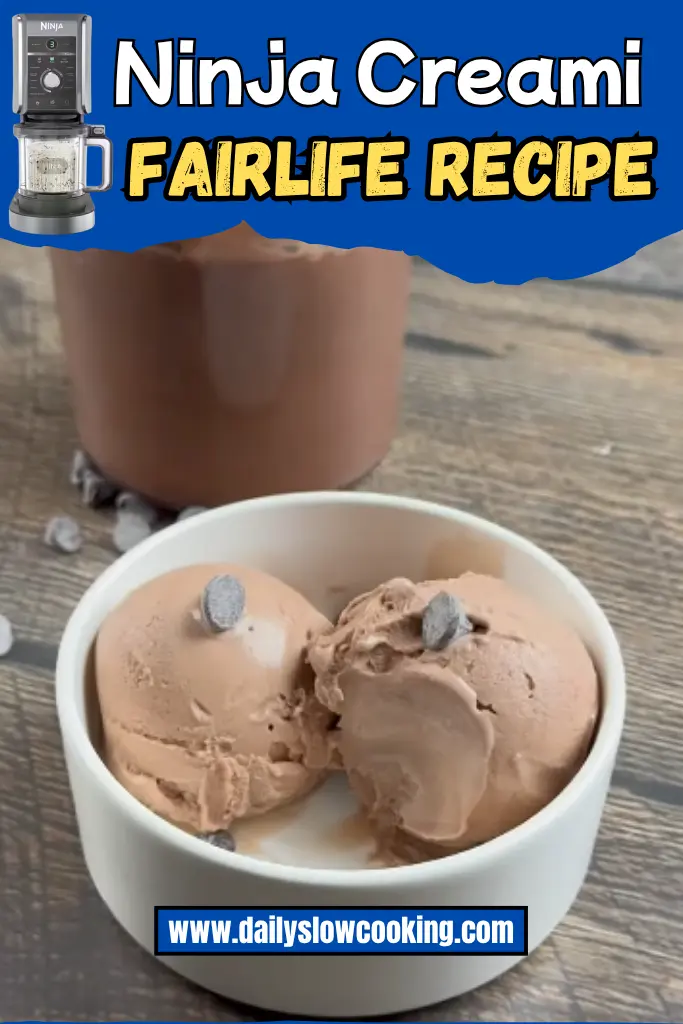
I love making ice cream at home, and this Ninja Creami Fairlife Recipe has become my go-to treat. Fairlife milk makes the creamiest, smoothest ice cream you can imagine.
The high protein content in Fairlife milk creates a rich texture that regular milk just can’t match. When I first tried this recipe, I was amazed at how simple it was to make restaurant-quality ice cream right in my kitchen.
The Ninja Creami does all the hard work for you. You just mix, freeze, and blend. This recipe will give you the most delicious vanilla ice cream that melts perfectly on your tongue.
Trust me, once you try this Ninja Creami Fairlife Recipe, you’ll never go back to store-bought ice cream. Check out my Ninja Creami Frosty Recipe for another amazing flavor option.
Why You Love This Ninja Creami Fairlife Recipe
This Ninja Creami Fairlife Recipe is a game-changer for dessert lovers. Here’s why it’s so awesome:
- Super Easy: You only need a few ingredients and a Ninja Creami to make it.
- Healthy and Tasty: Fairlife milk gives you lots of protein with less sugar.
- Creamy Texture: The Ninja Creami turns it into smooth, scoopable ice cream.
- Customizable: Add your favorite toppings like nuts or fruit to make it your own.
- Quick Prep: It takes just minutes to mix and freeze overnight.
I love this recipe because it’s so simple to make, even on busy days. The Ninja Creami does all the hard work, and Fairlife milk adds a rich, creamy flavor without the guilt.
Ninja Creami Fairlife Ingredients
Let’s talk about the ingredients for this Ninja Creami Fairlife Recipe. Each one plays a big role in making this ice cream creamy and delicious. Here’s what you need and why they matter:
- Fairlife Chocolate Milk (2 cups): This is the star of the recipe! Fairlife chocolate milk is ultra-filtered, which means it has more protein (about 13 grams per cup) and less sugar than regular milk. It gives the ice cream a rich, chocolatey flavor and a super creamy texture. I use the 2% version, but whole milk works too for extra richness. If you’re lactose intolerant, don’t worry—it’s lactose-free
- Sugar-Free Chocolate Pudding Mix (1 tablespoon): This adds a deeper chocolate flavor and helps make the ice cream thicker. I use Jell-O sugar-free instant pudding mix because it’s easy to find and blends well. You don’t need to make the pudding—just add the powder to the mix. It’s a simple way to boost flavor without extra sugar.
- Unsweetened Cocoa Powder (1 tablespoon): This gives an extra punch of chocolatey goodness. It’s not too sweet, so it balances the Fairlife milk perfectly. I like using a good-quality cocoa powder for a richer taste. It also adds a bit of thickness to the mixture.
- Optional Sweetener (1-2 teaspoons, like Stevia or honey): Fairlife chocolate milk is already sweet, but if you want a little more, add a touch of Stevia or honey. I usually skip this, but it’s great if you like your ice cream sweeter. Use a natural sweetener to keep it healthy.
Helpful Swaps
If you don’t have the exact ingredients or want to mix things up, here are some swaps that work great:
- Fairlife Milk Swap: If you can’t find Fairlife chocolate milk, try a Fairlife chocolate protein shake for even more protein (about 30 grams per bottle). You can also use Fairlife vanilla milk and add extra cocoa powder for a chocolate flavor.
- Pudding Mix Swap: No sugar-free pudding mix? Use regular instant chocolate pudding mix, but keep in mind it adds a bit more sugar. You can also skip it and add an extra tablespoon of cocoa powder for a lighter option.
- Cocoa Powder Swap: If you’re out of cocoa powder, try a chocolate protein powder (about 1 tablespoon). It adds flavor and a protein boost. Just make sure it’s unsweetened to avoid extra sugar.
- Sweetener Swap: Instead of Stevia or honey, you can use agave syrup or maple syrup. Start with 1 teaspoon and taste before adding more. If you’re avoiding sweeteners, the Fairlife milk is sweet enough on its own.
Kitchen Equipment Needed
To make this Ninja Creami Fairlife Recipe, you’ll need a few simple tools. Don’t worry—they’re easy to use, even for beginners:
- Ninja Creami Ice Cream Maker: This is the main tool that turns your mixture into creamy ice cream. It’s super easy to use with one-touch buttons like “Lite Ice Cream” and “Re-Spin.”
- Ninja Creami Pint Container: This comes with the Ninja Creami and holds your mixture while it freezes. Make sure it’s clean and dry before using to avoid ice crystals.
- Mixing Bowl: A small bowl to whisk your ingredients together. I use a regular cereal bowl—it’s the perfect size.
- Whisk or Hand Mixer: A whisk works fine to mix everything smoothly. If you have a hand mixer, it’s even faster to blend the pudding mix and cocoa powder.
- Measuring Cups and Spoons: You’ll need these to measure the milk, pudding mix, cocoa powder, and optional sweetener accurately.
- Spatula: A silicone spatula is great for scraping the mixture into the pint container and smoothing it out after spinning.
- Freezer: You’ll need space in your freezer to freeze the pint for 24 hours. Make sure it’s flat so the mixture freezes evenly.
How To Make Ninja Creami Fairlife Recipe
Making this Ninja Creami Fairlife Recipe is so easy, even if you’ve never made ice cream before. I’ll walk you through each step so you can follow along and get perfect results. Let’s get started!
Step 1 | Gather Your Ingredients
Grab your Fairlife chocolate milk, sugar-free pudding mix, cocoa powder, and optional sweetener. Having everything ready makes it quick and fun.
Step 2 | Mix the Ingredients
In a small mixing bowl, pour in 2 cups of Fairlife chocolate milk. Add 1 tablespoon of sugar-free chocolate pudding mix and 1 tablespoon of unsweetened cocoa powder. If you want it sweeter, add 1-2 teaspoons of Stevia or honey. Whisk everything together until it’s smooth. The pudding mix might leave tiny clumps, but that’s okay—they won’t show up in the final ice cream. I like using a hand mixer for a super smooth mix, but a whisk works fine too.
Step 3 | Pour into the Ninja Creami Pint
Carefully pour the mixture into the Ninja Creami pint container. Don’t go past the “MAX FILL” line on the container—this is important for the machine to work right. I use a spatula to scrape every bit from the bowl. Put the lid on tightly.
Step 4 | Freeze the Mixture
Place the pint container in your freezer, making sure it’s on a flat surface. Let it freeze for at least 24 hours. I usually pop it in at night so it’s ready the next evening. A flat surface helps it freeze evenly, which makes the ice cream creamier.
Step 5 | Set Up the Ninja Creami
After 24 hours, take the pint out of the freezer and remove the lid. Let it sit at room temperature for 3-5 minutes to soften a bit. Plug in your Ninja Creami and place it on a clean, flat counter.
Step 6 | Attach the Creamerizer Paddle
Press and hold the paddle latch on the outer bowl lid. Slide the Creamerizer Paddle into the bottom of the lid, then release the latch to lock it in. It should feel a little loose—that’s normal.
Step 7 | Assemble the Machine
Put the frozen pint into the outer bowl. Line up the lid’s tab just to the right of the outer bowl’s handle, then twist the lid clockwise to lock it. Place the outer bowl onto the Ninja Creami motor base, with the handle under the control panel. Twist the handle to the right until it clicks—this raises the platform and locks the bowl in place.
Step 8 | Run the Lite Ice Cream Program
Turn on the Ninja Creami by pressing the power button. The “Lite Ice Cream” button should light up. Press it to start the program, which takes about 2 minutes. You’ll see the progress bar light up as it works. When it’s done, the lights will flash twice and turn off.
Step 9 | Check the Texture
Remove the outer bowl by holding the release button and twisting the handle back to the center. Lift off the lid by pressing the unlock button and twisting counterclockwise. Scoop a bit of the ice cream to check if it’s smooth and creamy. If it’s crumbly or powdery, don’t worry—it just needs a little help.
Step 10 | Re-Spin if Needed
If the ice cream is crumbly, add 1 tablespoon of milk (any kind works) to the pint. Put the lid back on, lock the bowl in place, and press the “Re-Spin” button. This takes another 2 minutes and usually makes it super creamy. You might need to re-spin twice if it’s still not smooth.
Step 11 | Add Mix-Ins (Optional)
Want to get fancy? Add toppings like crushed Oreos, chocolate chips, or nuts. Make a small hole in the center of the ice cream, add your mix-ins (about ¼ cup), and put the lid back on. Lock the bowl in place and press the “Mix-In” button to blend them in evenly.
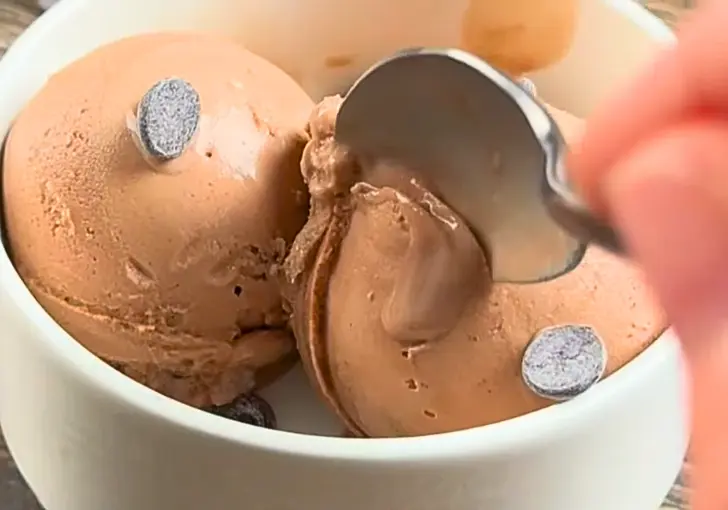
Step 12 | Serve and Enjoy
Scoop the ice cream into a bowl or cone and dig in! I love how creamy and chocolatey it tastes. If you have leftovers, flatten the top with a spatula, put the lid back on, and pop it back in the freezer.

Recipe Tips for Success
Here are some quick tips to make your Ninja Creami Fairlife Recipe turn out perfect every time. These aren’t in the steps but will help you get the best results:
- Use a Dry Pint Container: Make sure the Ninja Creami pint is completely dry before adding the mixture to avoid ice crystals.
- Freeze Flat: Always place the pint on a flat surface in the freezer for even freezing.
- Don’t Overfill: Stick to the “MAX FILL” line to prevent spills in the machine.
- Check Sweetness Before Freezing: Taste the mixture and adjust the sweetener if needed—it’s harder to fix after freezing.
- Let It Soften Slightly: If the ice cream is too hard after freezing, let it sit for 3-5 minutes before spinning.
- Clean the Paddle Right Away: Rinse the Creamerizer Paddle after use to avoid sticky residue.
Ninja Creami Fairlife Serving Suggestions
This Ninja Creami Fairlife Recipe is so versatile, and you can serve it in fun ways to make it extra special. Here are some ideas:
- Top with Fresh Fruit: Add sliced strawberries or bananas for a fresh, sweet twist.
- Sprinkle Nuts: Crushed almonds or peanuts add a nice crunch.
- Drizzle Chocolate Syrup: A little sugar-free chocolate syrup makes it feel indulgent.
- Serve in a Cone: Scoop it into a waffle cone for a classic ice cream vibe.
- Add Whipped Cream: A dollop of whipped cream makes it look fancy.
How to Store Ninja Creami Fairlife
Storing your Ninja Creami Fairlife Recipe is simple, so you can enjoy it later. If you have leftovers, flatten the top of the ice cream with a spatula to make it smooth.
Pop the lid back on the Ninja Creami pint container and place it in the freezer. It’ll stay good for up to a month, but I bet you’ll eat it sooner!
When you’re ready to enjoy it again, let the pint sit at room temperature for 5-10 minutes or microwave it for 10-15 seconds to soften. Then, process it again using the “Lite Ice Cream” or “Re-Spin” setting to get that creamy texture back.
Don’t transfer it to another container—the Ninja Creami pint is perfect for freezing and re-spinning.
Ninja Creami Fairlife Recipe FAQs
1. Can I use regular milk instead of Fairlife milk?
Yes, you can use regular chocolate milk, but it won’t be as creamy or high in protein. Fairlife milk is ultra-filtered, giving it more protein (13 grams per cup) and less sugar, which makes the ice cream thicker and healthier. Regular milk might make the texture icier, so you may need to add a tablespoon of cream or re-spin twice for smoothness. Try to stick with Fairlife for the best results.
2. What if I don’t have a Ninja Creami?
Without a Ninja Creami, it’s tough to get the same creamy texture. You can try mixing the ingredients, pouring them into a shallow dish, and freezing for 6-8 hours, stirring every 30 minutes to break up ice crystals. It won’t be as smooth, but it’ll still taste good. A blender might help after freezing, but the Ninja Creami is what makes this recipe so easy and creamy.
3. Can I use a different flavor of Fairlife milk?
Absolutely! Fairlife vanilla or strawberry milk works great. If you use vanilla, add an extra tablespoon of cocoa powder to keep the chocolate flavor. The protein content stays high, and the texture will still be creamy. You can also try Fairlife protein shakes for a flavor twist and even more protein (up to 30 grams per bottle). Just adjust the sweetener to taste.
4. Why is my ice cream crumbly after the first spin?
If your ice cream is crumbly, it’s likely too cold or low in fat. Add 1 tablespoon of milk (any kind) and run the “Re-Spin” program. You might need to re-spin twice. Also, make sure you’re using the “Lite Ice Cream” setting, as it’s designed for low-sugar recipes like this one. Letting the pint soften for a few minutes before spinning can help too.
5. How can I add more protein to this recipe?
To boost protein, add 1 scoop of chocolate or vanilla protein powder to the mix before freezing. This can add 10-20 grams of protein per pint, depending on the brand. You can also use a Fairlife chocolate protein shake instead of milk, which has about 30 grams of protein per bottle. Whisk well to avoid clumps, and taste to adjust sweetness.
Ninja Creami Fairlife Recipe
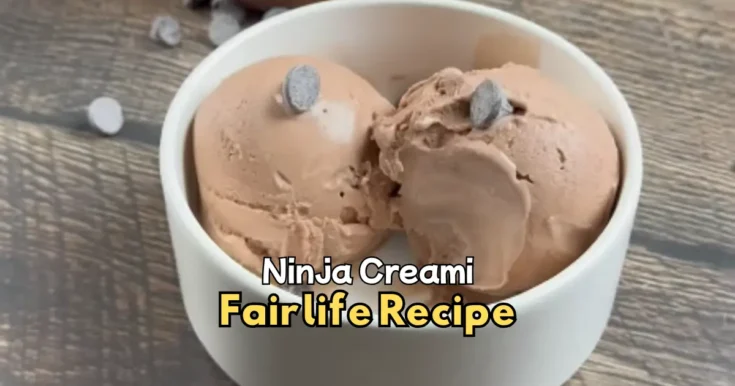
Creamy chocolate Ninja Creami Fairlife ice cream in just 5 minutes of prep time! High-protein, low-sugar treat made with Fairlife chocolate milk.
Ingredients
- 2 cups Fairlife 2% Chocolate Milk
- 1 tablespoon Sugar-Free Chocolate Pudding Mix (e.g., Jell-O brand)
- 1 tablespoon Unsweetened Cocoa Powder
- 1–2 teaspoons Optional Sweetener (Stevia, honey, or preferred sweetener)
Instructions
Step 1 | Gather Your Ingredients
Grab your Fairlife chocolate milk, sugar-free pudding mix, cocoa powder, and optional sweetener. Having everything ready makes it quick and fun.
Step 2 | Mix the Ingredients
In a small mixing bowl, pour in 2 cups of Fairlife chocolate milk. Add 1 tablespoon of sugar-free chocolate pudding mix and 1 tablespoon of unsweetened cocoa powder. If you want it sweeter, add 1-2 teaspoons of Stevia or honey. Whisk everything together until it’s smooth. The pudding mix might leave tiny clumps, but that’s okay—they won’t show up in the final ice cream. I like using a hand mixer for a super smooth mix, but a whisk works fine too.
Step 3 | Pour into the Ninja Creami Pint
Carefully pour the mixture into the Ninja Creami pint container. Don’t go past the “MAX FILL” line on the container—this is important for the machine to work right. I use a spatula to scrape every bit from the bowl. Put the lid on tightly.
Step 4 | Freeze the Mixture
Place the pint container in your freezer, making sure it’s on a flat surface. Let it freeze for at least 24 hours. I usually pop it in at night so it’s ready the next evening. A flat surface helps it freeze evenly, which makes the ice cream creamier.
Step 5 | Set Up the Ninja Creami
After 24 hours, take the pint out of the freezer and remove the lid. Let it sit at room temperature for 3-5 minutes to soften a bit. Plug in your Ninja Creami and place it on a clean, flat counter.
Step 6 | Attach the Creamerizer Paddle
Press and hold the paddle latch on the outer bowl lid. Slide the Creamerizer Paddle into the bottom of the lid, then release the latch to lock it in. It should feel a little loose—that’s normal.
Step 7 | Assemble the Machine
Put the frozen pint into the outer bowl. Line up the lid’s tab just to the right of the outer bowl’s handle, then twist the lid clockwise to lock it. Place the outer bowl onto the Ninja Creami motor base, with the handle under the control panel. Twist the handle to the right until it clicks—this raises the platform and locks the bowl in place.
Step 8 | Run the Lite Ice Cream Program
Turn on the Ninja Creami by pressing the power button. The “Lite Ice Cream” button should light up. Press it to start the program, which takes about 2 minutes. You’ll see the progress bar light up as it works. When it’s done, the lights will flash twice and turn off.
Step 9 | Check the Texture
Remove the outer bowl by holding the release button and twisting the handle back to the center. Lift off the lid by pressing the unlock button and twisting counterclockwise. Scoop a bit of the ice cream to check if it’s smooth and creamy. If it’s crumbly or powdery, don’t worry—it just needs a little help.
Step 10 | Re-Spin if Needed
If the ice cream is crumbly, add 1 tablespoon of milk (any kind works) to the pint. Put the lid back on, lock the bowl in place, and press the “Re-Spin” button. This takes another 2 minutes and usually makes it super creamy. You might need to re-spin twice if it’s still not smooth.
Step 11 | Add Mix-Ins (Optional)
Want to get fancy? Add toppings like crushed Oreos, chocolate chips, or nuts. Make a small hole in the center of the ice cream, add your mix-ins (about ¼ cup), and put the lid back on. Lock the bowl in place and press the “Mix-In” button to blend them in evenly.
Step 12 | Serve and Enjoy
Scoop the ice cream into a bowl or cone and dig in! I love how creamy and chocolatey it tastes. If you have leftovers, flatten the top with a spatula, put the lid back on, and pop it back in the freezer.
Nutrition Information:
Serving Size:
1Amount Per Serving: Calories: 150Total Fat: 4gSaturated Fat: 2gCholesterol: 15mgSodium: 210mgCarbohydrates: 15gFiber: 3gSugar: 8gProtein: 13g
Did you make this Ninja Creami Fairlife Recipe? Please leave a ⭐ rating and review!


Leave a Reply