Making coffee ice cream at home feels easy and fun with the Ninja Creami Coffee Ice Cream Recipe.
This recipe lets you create a smooth, creamy ice cream with rich coffee flavor right in your own kitchen. You just mix simple ingredients, freeze the mixture, and let the Ninja Creami machine do the magic.
I love how fresh and bold the coffee taste comes through without any complicated steps. It’s perfect for anyone who enjoys coffee and wants a cool treat anytime.
Plus, this recipe is a great way to try something new with your Ninja Creami. Want to try another flavor? Check out my Ninja Creami Frosty Recipe for a delicious twist!
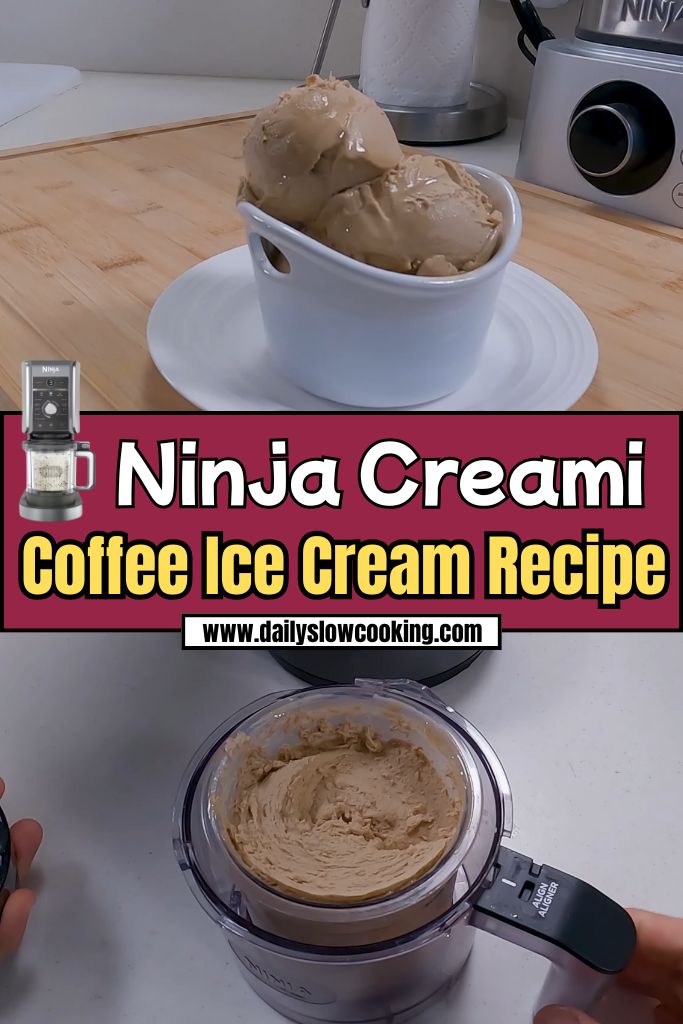
Why You Love This Ninja Creami Coffee Ice Cream
Oh, let me tell you why this Ninja Creami Coffee Ice Cream is a total winner! Here’s what makes it so special:
- Bold coffee flavor: It’s like your morning coffee turned into a sweet, creamy dessert.
- Super easy to make: Just a few ingredients and the Ninja Creami does all the hard work.
- Customizable: Add your favorite toppings or mix-ins to make it your own.
- Healthy-ish: You can tweak it to be lower in sugar or even dairy-free.
- Perfect texture: The Ninja Creami gives it that smooth, scoopable feel every time.
Ninja Creami Coffee Ice Cream Ingredients
Let’s talk about what you need to make this delicious Ninja Creami Coffee Ice Cream. I’ve kept it simple with just five ingredients, and I’ll explain each one so you know exactly what to grab at the store.
- Heavy Cream (1 cup): This is the secret to that rich, velvety texture. Heavy cream makes the ice cream super creamy and smooth. I use regular heavy cream, but you can swap it for half-and-half if you want it a bit lighter. Just don’t skip it—it’s what gives the ice cream its decadent feel.
- Whole Milk (1 cup): Whole milk adds to the creaminess but keeps things balanced so it’s not too heavy. It helps the ice cream freeze nicely in the Ninja Creami. If you don’t have whole milk, 2% milk works, but it won’t be quite as rich.
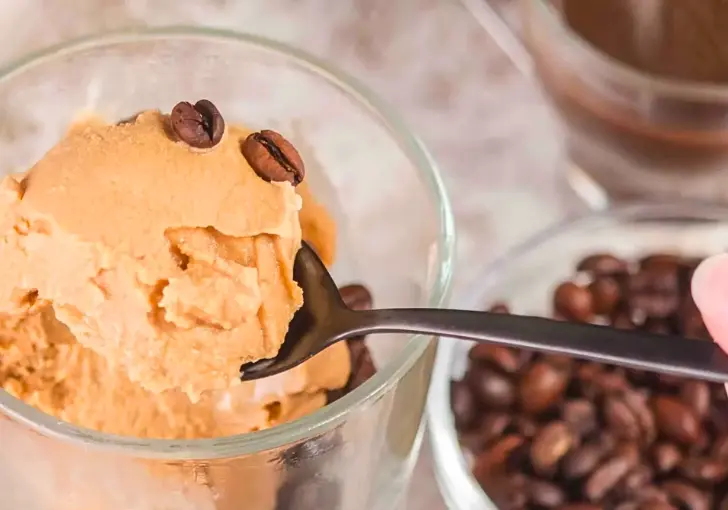
- Instant Coffee Granules (2 tablespoons): This is where the coffee magic happens! I use instant coffee granules because they dissolve easily and give a strong, bold flavor. I love Café Bustelo for its rich taste, but any instant coffee or espresso powder will do. If you want a milder flavor, use 1 tablespoon instead.
- Granulated Sugar (3/4 cup): Sugar sweetens the ice cream and helps it stay soft and scoopable. I stick with regular white sugar because it blends well. You can adjust the amount if you like it less sweet, but don’t skip it entirely—it helps with the texture.
- Vanilla Extract (1 teaspoon): A splash of vanilla adds a warm, cozy flavor that pairs perfectly with coffee. Use pure vanilla extract for the best taste, or vanilla bean paste if you want little specks of vanilla in your ice cream. It’s a small ingredient but makes a big difference.
Helpful Swaps
If you don’t have all the ingredients or want to make this recipe fit your diet, here are some easy swaps:
- Heavy Cream: Try half-and-half or coconut cream for a lighter or dairy-free option.
- Whole Milk: Use 2% milk, oat milk, or almond milk. Plant-based milks might make it less creamy, so keep that in mind.
- Instant Coffee: Swap for a shot of brewed espresso or strong cold brew coffee. Just reduce the milk by the same amount to keep the texture right.
- Granulated Sugar: Use maple syrup, honey, or a keto-friendly sweetener like allulose for a low-carb version.
- Vanilla Extract: Vanilla bean paste or even a pinch of cinnamon can work for a different flavor twist.
Kitchen Equipment Needed
You don’t need a ton of stuff to make this Ninja Creami Coffee Ice Cream. Here’s what I use:
- Ninja Creami Ice Cream Maker: The star of the show! It turns your frozen mix into creamy ice cream in minutes.
- Ninja Creami Pint Container: Comes with the machine and is perfect for freezing and processing your ice cream.
- Mixing Bowl: A medium-sized bowl to mix your ingredients before pouring them into the pint container.
- Whisk or Hand Mixer: To blend everything smoothly. A hand mixer makes it quick, but a whisk works fine too.
- Measuring Cups and Spoons: For getting the right amounts of cream, milk, sugar, and coffee.
- Spatula: To scrape the mixture into the pint container and smooth it out before freezing.
- Freezer: You’ll need space to freeze the pint container for 24 hours.
How to Make Ninja Creami Coffee Ice Cream
Making this Ninja Creami Coffee Ice Cream is so easy, even if you’ve never made ice cream before. I’ll walk you through each step so you can follow along and get perfect results. Let’s do this!
Step 1 | Mix the Ingredients
Grab a medium mixing bowl and pour in 1 cup of heavy cream, 1 cup of whole milk, 3/4 cup of granulated sugar, 2 tablespoons of instant coffee granules, and 1 teaspoon of vanilla extract.
Use a whisk or hand mixer to blend everything until the sugar and coffee granules are completely dissolved. It should look smooth and a little frothy. This takes about 2-3 minutes.
Step 2 | Pour into the Pint Container
Take your Ninja Creami pint container and pour the mixture in. Make sure it doesn’t go past the “MAX FILL” line on the container. If it’s a bit foamy from mixing, let it sit for a minute to settle. Use a spatula to scrape every last bit from the bowl.
Step 3 | Freeze the Mixture
Pop the lid on the pint container and place it in your freezer. Make sure it’s on a flat surface so it freezes evenly. Let it freeze for at least 24 hours. I usually prep mine in the evening so it’s ready the next night.
Step 4 | Set Up the Ninja Creami
After 24 hours, take the pint out of the freezer and remove the lid. Place the pint in the Ninja Creami’s outer bowl. Attach the Creamerizer Paddle to the outer bowl lid by pressing the latch and inserting the paddle.
Then, lock the lid onto the outer bowl by aligning the tab slightly to the right of the handle and twisting it clockwise.
Step 5 | Process the Ice Cream
Plug in your Ninja Creami and place the outer bowl on the motor base. Twist the handle to the right until it clicks to lock it in place. Press the power button, then select the “ICE CREAM” setting. The machine will run for about 2 minutes, turning your frozen mix into creamy ice cream.
Step 6 | Check the Texture
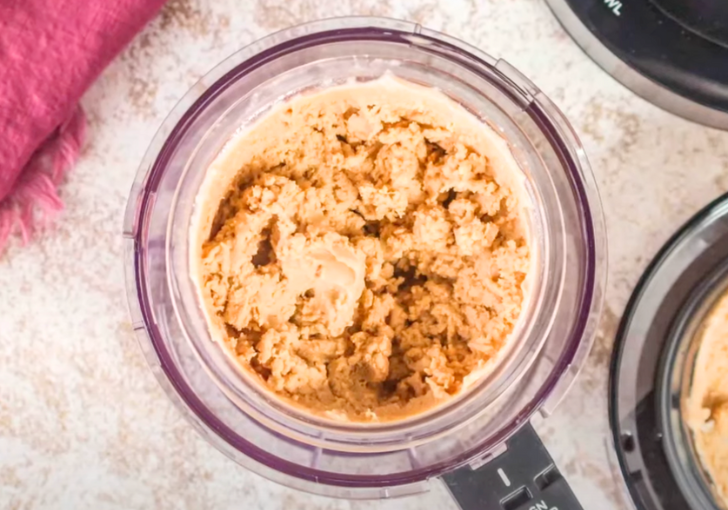
When the machine stops, unlock the outer bowl by twisting the handle back to the center and lift it off. Remove the lid and check your ice cream. If it looks crumbly or powdery, don’t worry! Just add 1-2 tablespoons of milk, put the lid back on, and run the “RE-SPIN” setting. This usually makes it super smooth.
Step 7 | Serve and Enjoy
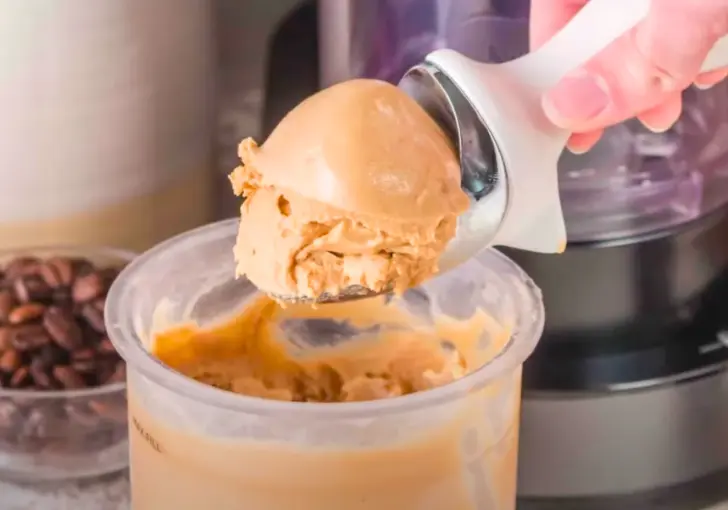
Once it’s creamy and scoopable, grab a spoon or ice cream scoop and dig in! You can eat it right away for a soft-serve texture or pop it back in the freezer for 30 minutes if you want it firmer.
Recipe Tips for Success
Here are some quick tips to make your Ninja Creami Coffee Ice Cream turn out perfect every time:
- Use a strong coffee: If you want a bold flavor, go for instant espresso or a strong instant coffee brand.
- Don’t overfill: Stick to the MAX FILL line to avoid issues with the Ninja Creami.
- Freeze flat: Make sure the pint is level in the freezer for even freezing.
- Check after re-spin: If it’s still crumbly after one re-spin, add a tiny splash of milk and try again.
- Taste before freezing: Adjust the sugar or coffee if you want it sweeter or stronger.
- Clean the paddle: Rinse the Creamerizer Paddle right after use to avoid sticky buildup.
Ninja Creami Coffee Ice Cream Serving Suggestions
This Ninja Creami Coffee Ice Cream is so versatile, you can serve it in tons of fun ways. Here are some ideas to make it even more delicious:
- Scoop it plain: Enjoy it in a bowl or cone for that classic ice cream vibe.
- Make an affogato: Pour a shot of hot espresso over a scoop for a fancy coffee dessert.
- Add toppings: Sprinkle on chocolate chips, crushed nuts, or a drizzle of caramel sauce.
- Blend into a milkshake: Mix with a little milk in the Ninja Creami using the MILKSHAKE setting.
- Ice cream sandwich: Sandwich a scoop between two cookies for a fun treat.
How to Store Ninja Creami Coffee Ice Cream
Storing your Ninja Creami Coffee Ice Cream is super easy. After you’ve made it, you might have some leftovers (if you don’t eat it all!).
Smooth out the top with a spatula, pop the lid back on the Ninja Creami pint, and place it in the freezer. It’ll stay good for up to a month.
When you’re ready to eat it again, let it sit at room temperature for 5-10 minutes to soften. If it’s too hard, you can run it through the Ninja Creami again on the ICE CREAM setting.
Just make sure the pint is tightly sealed to avoid freezer burn. I always keep a couple of pints in my freezer for a quick treat!
Ninja Creami Coffee Ice Cream Recipe FAQs
1. Can I use decaf coffee for this recipe?
Yes, you can totally use decaf instant coffee granules! It works the same way and gives you the same rich flavor without the caffeine. I use decaf when I want to enjoy this ice cream at night. Just make sure to dissolve the granules completely when mixing for a smooth texture.
2. What if I don’t have instant coffee?
No instant coffee? No problem! You can use a shot of brewed espresso or strong cold brew. Just swap out 1/4 cup of the milk for the coffee to keep the liquid amount right. I’ve tried it with cold brew, and it’s just as yummy.
3. Why is my ice cream crumbly after the first spin?
If your ice cream is crumbly, it’s likely too cold. Just add 1-2 tablespoons of milk and run the RE-SPIN cycle. I’ve had this happen when my freezer is extra cold, and a quick re-spin always fixes it for a smooth, creamy result.
4. Can I add mix-ins to this recipe?
Yes, mix-ins are so fun! After the first spin, dig a small hole in the center of the ice cream, add chocolate chips, nuts, or cookie bits, and run the MIX-IN cycle. I love adding crushed Oreos for a mocha vibe.
5. How long does it take to make this ice cream?
The prep takes about 5 minutes, but you need to freeze the mixture for 24 hours. Processing in the Ninja Creami takes about 2 minutes, plus a possible re-spin. I plan ahead and make it the day before I want to eat it.
Ninja Creami Coffee Ice Cream Recipe
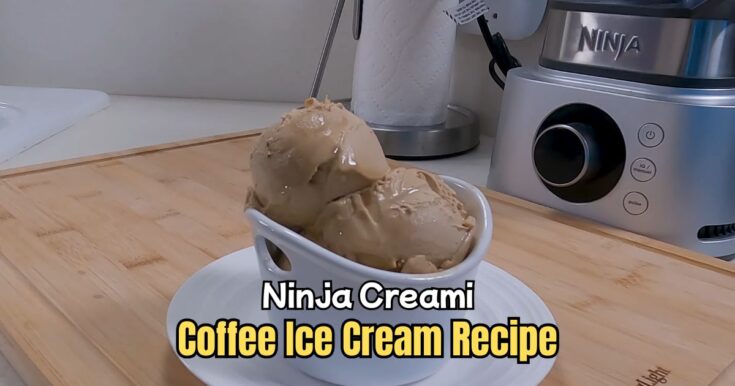
Rich and creamy Ninja Creami Coffee Ice Cream made in just minutes after 24 hours freeze time. Bold coffee flavor with only 5 simple ingredients!
Ingredients
- 1 cup Heavy Cream
- 1 cup Whole Milk
- 2 tablespoons Instant Coffee Granules (use 1 tbsp for milder flavor)
- ¾ cup Granulated Sugar
- 1 teaspoon Vanilla Extract
Instructions
Step 1 | Mix the Ingredients
Grab a medium mixing bowl and pour in 1 cup of heavy cream, 1 cup of whole milk, 3/4 cup of granulated sugar, 2 tablespoons of instant coffee granules, and 1 teaspoon of vanilla extract. Use a whisk or hand mixer to blend everything until the sugar and coffee granules are completely dissolved. It should look smooth and a little frothy. This takes about 2-3 minutes.
Step 2 | Pour into the Pint Container
Take your Ninja Creami pint container and pour the mixture in. Make sure it doesn’t go past the “MAX FILL” line on the container. If it’s a bit foamy from mixing, let it sit for a minute to settle. Use a spatula to scrape every last bit from the bowl.
Step 3 | Freeze the Mixture
Pop the lid on the pint container and place it in your freezer. Make sure it’s on a flat surface so it freezes evenly. Let it freeze for at least 24 hours. I usually prep mine in the evening so it’s ready the next night.
Step 4 | Set Up the Ninja Creami
After 24 hours, take the pint out of the freezer and remove the lid. Place the pint in the Ninja Creami’s outer bowl. Attach the Creamerizer Paddle to the outer bowl lid by pressing the latch and inserting the paddle. Then, lock the lid onto the outer bowl by aligning the tab slightly to the right of the handle and twisting it clockwise.
Step 5 | Process the Ice Cream
Plug in your Ninja Creami and place the outer bowl on the motor base. Twist the handle to the right until it clicks to lock it in place. Press the power button, then select the “ICE CREAM” setting. The machine will run for about 2 minutes, turning your frozen mix into creamy ice cream.
Step 6 | Check the Texture
When the machine stops, unlock the outer bowl by twisting the handle back to the center and lift it off. Remove the lid and check your ice cream. If it looks crumbly or powdery, don’t worry! Just add 1-2 tablespoons of milk, put the lid back on, and run the “RE-SPIN” setting. This usually makes it super smooth.
Step 7 | Serve and Enjoy
Once it’s creamy and scoopable, grab a spoon or ice cream scoop and dig in! You can eat it right away for a soft-serve texture or pop it back in the freezer for 30 minutes if you want it firmer.
Nutrition Information:
Serving Size:
1Amount Per Serving: Calories: 290Total Fat: 20gSaturated Fat: 13gCholesterol: 70mgSodium: 35mgCarbohydrates: 25gSugar: 25gProtein: 2g
Did you make this Ninja Creami Coffee Ice Cream Recipe? Please leave a ⭐ rating and review!





Leave a Reply