
I love making ice cream at home, and my Ninja Creami has changed everything for me. This Ninja Creami Ice Cream Base Recipe is my go-to method for creating smooth, creamy ice cream every single time.
I started making this base when I got tired of store-bought ice cream that never tasted quite right. This simple recipe uses basic ingredients you probably have in your kitchen right now.
The best part? You can turn this base into any flavor you want. I make this base twice a week because my family asks for it so much. Once you try this method, you will never go back to regular ice cream making.
Trust me, this recipe will make your Ninja Creami work like magic. You can also check out my Ninja Creami Strawberry Ice Cream Recipe for another favorite.
Why You’ll Love This Ninja Creami Ice Cream Base
This Ninja Creami Ice Cream Base Recipe is a game-changer, and here’s why it’ll steal your heart:
- Super Easy: You only need a few ingredients and simple steps.
- Customizable: Add your favorite mix-ins like chocolate chips or fruit.
- Creamy Goodness: It’s smooth and rich, just like store-bought ice cream.
- Diet-Friendly: You can tweak it for low-sugar or dairy-free diets.
- Fun for All: Perfect for kids, adults, or anyone with a sweet tooth.
I love this recipe because it’s so simple to make, and I can change it up with whatever I’m craving.
Ninja Creami Ice Cream Base Ingredients
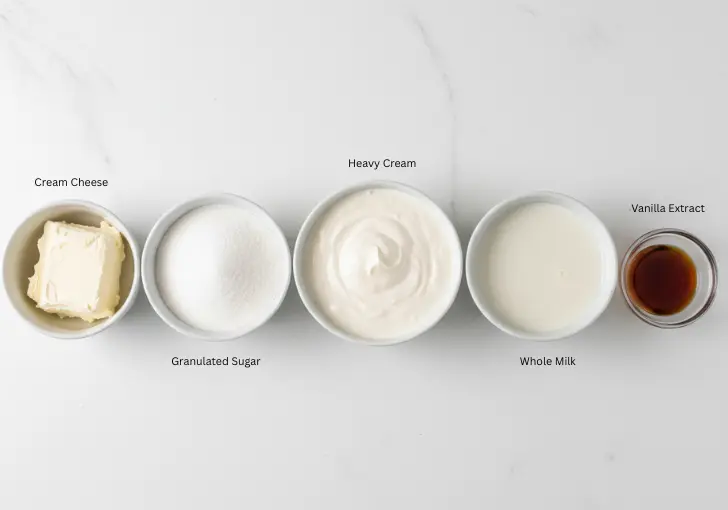
Let’s talk about the ingredients you’ll need for this Ninja Creami Ice Cream Base Recipe. I’ve kept it simple with just five items, and I’ll explain why each one matters.
- Cream Cheese (1 tablespoon): This adds a rich, tangy flavor and helps make the ice cream super smooth. I use full-fat cream cheese for the best texture, but whipped cream cheese works if you want it easier to mix. Make sure it’s at room temperature so it blends well.
- Granulated Sugar (1/3 cup): Sugar sweetens the base and keeps it from freezing too hard. I stick with regular white sugar because it dissolves easily. You can adjust the amount if you like it less sweet.
- Heavy Cream (3/4 cup): This is the key to that creamy, dreamy texture. Heavy cream has a high fat content, which makes the ice cream rich. If you’re in a pinch, half-and-half can work, but it won’t be as creamy.
- Whole Milk (1 cup): Milk balances the richness of the cream and keeps the base pourable. I use whole milk for the best flavor, but 2% or even skim milk can work if you’re watching calories.
- Vanilla Extract (1 teaspoon): This gives the base that classic ice cream flavor. I use pure vanilla extract for a bold taste, but imitation works fine too. It’s the secret to making your ice cream taste like the real deal.
Helpful Swaps
If you don’t have all the ingredients or want to make this recipe fit your diet, here are some swaps that work just as well:
- Cream Cheese: Swap with vegan cream cheese for a dairy-free version. Greek yogurt or cottage cheese can also work for a protein boost.
- Sugar: Try honey, maple syrup, or a sugar substitute like monk fruit sweetener. Just check the conversion amounts on the package.
- Heavy Cream: Use coconut cream for a dairy-free option. Half-and-half is a lighter choice but less creamy.
- Whole Milk: Almond milk, oat milk, or cashew milk are great dairy-free alternatives. Fairlife milk adds extra protein.
- Vanilla Extract: Vanilla bean paste or even a pinch of vanilla powder can replace it for a different twist.
Kitchen Equipment Needed
You don’t need a ton of gear to make this Ninja Creami Ice Cream Base Recipe, but here’s what I use to keep things simple:
- Ninja Creami Machine: The star of the show! It churns your frozen base into creamy ice cream.
- Ninja Creami Pint Container: This is where you’ll mix and freeze your base. It comes with the machine.
- Mixing Bowl: A medium-sized bowl to combine your ingredients before pouring them into the pint.
- Whisk or Spatula: For mixing the ingredients smoothly. I prefer a whisk for a lump-free mix.
- Measuring Cups and Spoons: To get the amounts just right.
- Microwave (Optional): To soften the cream cheese quickly if it’s not at room temperature.
- Freezer: You’ll need space to freeze the pint for at least 24 hours.
How to Make Ninja Creami Ice Cream Base
Making this Ninja Creami Ice Cream Base Recipe is so easy, even if you’re new to cooking. I’ll walk you through each step like I’m right there with you in the kitchen. Let’s get started!
Step 1 | Soften the Cream Cheese
Put 1 tablespoon of cream cheese in a small bowl. Microwave it for 10-15 seconds to soften it. If you don’t want to use a microwave, just let it sit at room temperature for about 30 minutes. Soft cream cheese mixes better and avoids lumps.
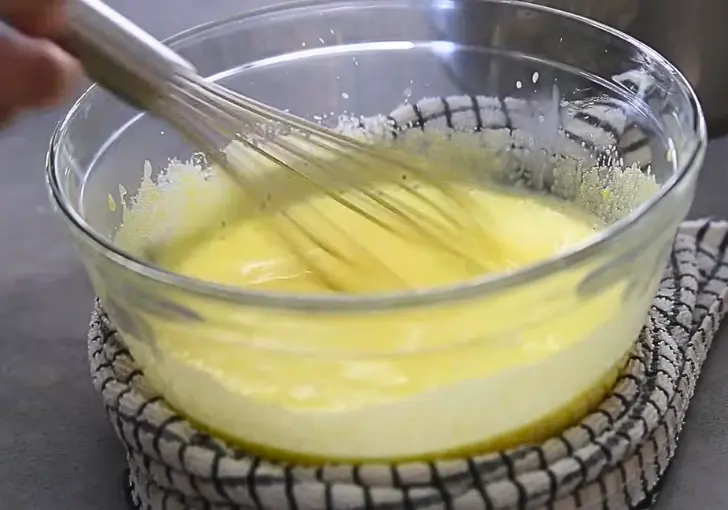
Step 2 | Mix the Base
In a medium bowl, add the softened cream cheese, 1/3 cup sugar, and 1 teaspoon vanilla extract. Use a whisk or spatula to mix them until smooth. It should look like a thick paste. Slowly pour in 3/4 cup heavy cream and 1 cup whole milk, whisking as you go. Keep mixing until everything is blended and there are no clumps.
Step 3 | Pour into Pint
Pour the mixture into your Ninja Creami pint container. Don’t go past the “MAX FILL” line on the side. I usually leave a little space below the line to be safe. Snap the lid on tightly.
Step 4 | Freeze the Base
Place the pint in your freezer on a flat surface. Let it freeze for at least 24 hours. I know waiting is tough, but this step is key for creamy ice cream. If you’re impatient like me, prep a few pints so you always have one ready!
Step 5 | Set Up the Ninja Creami
After freezing, take the pint out and remove the lid. Plug in your Ninja Creami and place it on a flat counter. Put the pint into the outer bowl. Attach the Creamerizer Paddle to the lid by pressing the latch and inserting it. Then, lock the lid onto the bowl by twisting it clockwise until it clicks.
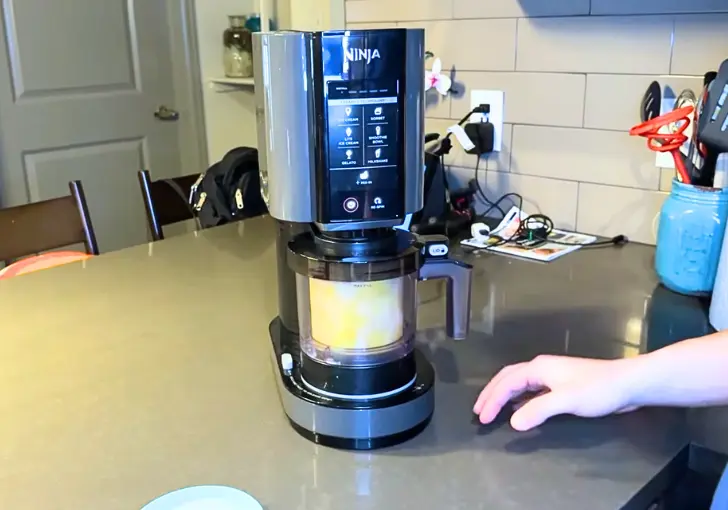
Step 6 | Churn the Ice Cream
Place the outer bowl onto the Ninja Creami base. Twist the handle to the right to lock it in place. You’ll hear a click when it’s secure. Turn on the machine by pressing the power button. Select the “Ice Cream” setting and let it run for 1-2 minutes. The machine will stop when it’s done.
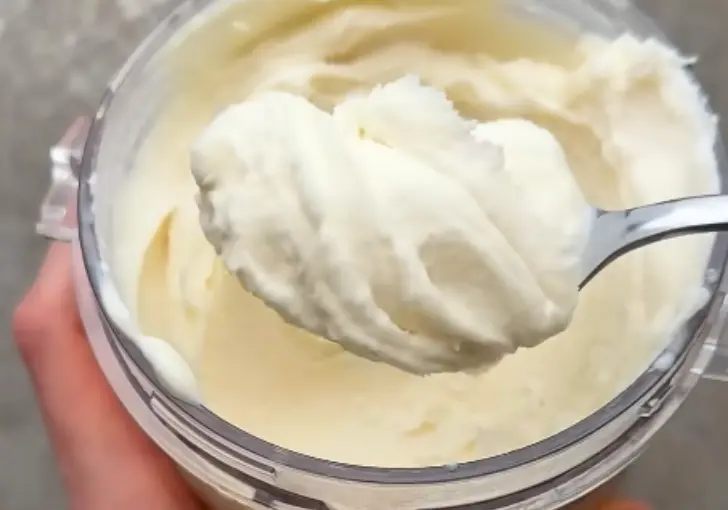
Step 7 | Check the Texture
Remove the outer bowl by pressing the release button and twisting the handle back. Take off the lid and check your ice cream. If it looks powdery or crumbly, add 1-2 tablespoons of milk, reattach the lid, and run the “Re-Spin” setting. This usually makes it super creamy.
Step 8 | Add Mix-Ins (Optional)
If you want to add fun stuff like chocolate chips or crushed cookies, make a small hole in the center of the ice cream. Drop in your mix-ins (about 1/4 cup works well), reattach the lid, and run the “Mix-In” setting. This blends them in perfectly.
Step 9 | Serve and Enjoy
Scoop your ice cream into bowls or cones and dig in! If you have leftovers, smooth the top with a spoon, put the lid back on, and freeze it again.
Recipe Tips for Success
Here are some quick tips to make your Ninja Creami Ice Cream Base Recipe turn out perfect every time:
- Don’t Overfill: Stick to the “MAX FILL” line to avoid machine jams.
- Freeze Flat: Keep the pint level in the freezer to prevent uneven freezing.
- Check Freezer Temp: Your freezer should be between -7°F and 9°F for best results.
- Re-Spin if Needed: A quick re-spin fixes crumbly textures.
- Prep Extra Pints: Freeze multiple pints so you’re always ready for ice cream.
- Clean Right Away: Rinse the paddle and bowl to avoid sticky residue.
Ninja Creami Ice Cream Base Serving Suggestions
Here’s how you can serve this Ninja Creami Ice Cream Base to make it extra special:
- Classic Bowl: Scoop it into a bowl and top with sprinkles or whipped cream.
- Ice Cream Cone: Serve in a waffle cone for a fun, old-school vibe.
- With Dessert: Pair it with brownies or pie for a decadent treat.
- Fruit Topping: Add fresh berries or sliced bananas for a fresh twist.
- Sundae Style: Drizzle with chocolate syrup and add a cherry on top.
How to Store Ninja Creami Ice Cream Base
Storing your Ninja Creami Ice Cream Base is easy, and it stays fresh for weeks. After you churn it, smooth the top with a spoon to make it even.
Snap the lid back on the pint and pop it into the freezer. It’ll stay good for up to a month. When you’re ready to eat it again, just run it through the “Ice Cream” setting to make it creamy.
If you added mix-ins, they might get blended up more, so keep that in mind. I always keep a couple of pints in my freezer so I can have ice cream whenever I want. Just make sure your freezer is cold enough to keep it solid
Ninja Creami Ice Cream Base Recipe FAQs
1. Why is my ice cream crumbly after churning?
If your ice cream is crumbly, it’s usually too cold or needs more liquid. Try adding 1-2 tablespoons of milk and running the “Re-Spin” setting. I’ve had this happen when my freezer is extra cold. A quick re-spin fixes it every time, giving you that smooth, scoopable texture.
2. How long does it take to freeze the base?
The Ninja Creami manual says to freeze for at least 24 hours, but I’ve found 18 hours works in a pinch. A full 24 hours ensures the base is solid, which helps get that creamy texture. Make sure your freezer is set to -7°F or colder for the best results.
3. Can I use sugar substitutes?
Absolutely! You can use honey, maple syrup, or a sugar substitute like monk fruit or stevia. Check the package for conversion amounts, as they vary. I’ve used monk fruit sweetener, and it worked great without changing the flavor too much. Just mix it well to avoid graininess.
4. What mix-ins work best with this base?
You can add almost anything! Chocolate chips, crushed cookies, fresh fruit, or nuts are my favorites. I love tossing in some chopped Oreos for a cookies-and-cream vibe. Add about 1/4 cup of mix-ins and use the “Mix-In” setting to blend them in evenly. Experiment and have fun
5. Why does my Ninja Creami make so much noise?
The Ninja Creami is loud because it shaves the frozen base to make it creamy. It’s normal, but I suggest running it when no one’s napping! The noise lasts only 1-2 minutes per cycle. I usually set it up in the kitchen and step away while it works its magic.
Ninja Creami Ice Cream Base Recipe
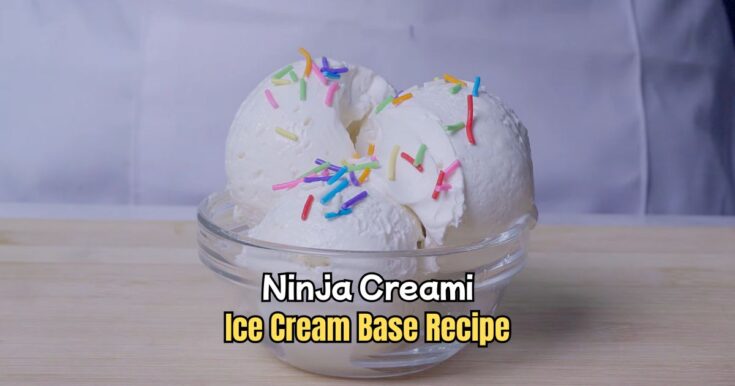
Creamy homemade Ninja Creami Ice Cream Base recipe ready in just 10 minutes prep and 24 hours freeze time. Perfect texture and flavor every time.
Ingredients
- 1 tablespoon cream cheese (softened, full-fat preferred)
- 1/3 cup granulated sugar
- 3/4 cup heavy cream
- 1 cup whole milk
- 1 teaspoon vanilla extract
Instructions
Step 1 | Soften the Cream Cheese
Put 1 tablespoon of cream cheese in a small bowl. Microwave it for 10-15 seconds to soften it. If you don’t want to use a microwave, just let it sit at room temperature for about 30 minutes. Soft cream cheese mixes better and avoids lumps.
Step 2 | Mix the Base
In a medium bowl, add the softened cream cheese, 1/3 cup sugar, and 1 teaspoon vanilla extract. Use a whisk or spatula to mix them until smooth. It should look like a thick paste. Slowly pour in 3/4 cup heavy cream and 1 cup whole milk, whisking as you go. Keep mixing until everything is blended and there are no clumps.
Step 3 | Pour into Pint
Pour the mixture into your Ninja Creami pint container. Don’t go past the “MAX FILL” line on the side. I usually leave a little space below the line to be safe. Snap the lid on tightly.
Step 4 | Freeze the Base
Place the pint in your freezer on a flat surface. Let it freeze for at least 24 hours. I know waiting is tough, but this step is key for creamy ice cream. If you’re impatient like me, prep a few pints so you always have one ready!
Step 5 | Set Up the Ninja Creami
After freezing, take the pint out and remove the lid. Plug in your Ninja Creami and place it on a flat counter. Put the pint into the outer bowl. Attach the Creamerizer Paddle to the lid by pressing the latch and inserting it. Then, lock the lid onto the bowl by twisting it clockwise until it clicks.
Step 6 | Churn the Ice Cream
Place the outer bowl onto the Ninja Creami base. Twist the handle to the right to lock it in place. You’ll hear a click when it’s secure. Turn on the machine by pressing the power button. Select the “Ice Cream” setting and let it run for 1-2 minutes. The machine will stop when it’s done.
Step 7 | Check the Texture
Remove the outer bowl by pressing the release button and twisting the handle back. Take off the lid and check your ice cream. If it looks powdery or crumbly, add 1-2 tablespoons of milk, reattach the lid, and run the “Re-Spin” setting. This usually makes it super creamy.
Step 8 | Add Mix-Ins (Optional)
If you want to add fun stuff like chocolate chips or crushed cookies, make a small hole in the center of the ice cream. Drop in your mix-ins (about 1/4 cup works well), reattach the lid, and run the “Mix-In” setting. This blends them in perfectly.
Step 9 | Serve and Enjoy
Scoop your ice cream into bowls or cones and dig in! If you have leftovers, smooth the top with a spoon, put the lid back on, and freeze it again.
Nutrition Information:
Serving Size:
1Amount Per Serving: Calories: 260Total Fat: 21gSaturated Fat: 13gCholesterol: 75mgSodium: 40mgCarbohydrates: 15gSugar: 14gProtein: 3g
Did you make this Ninja Creami Ice Cream Base Recipe? Please leave a ⭐ rating and review!


Leave a Reply