
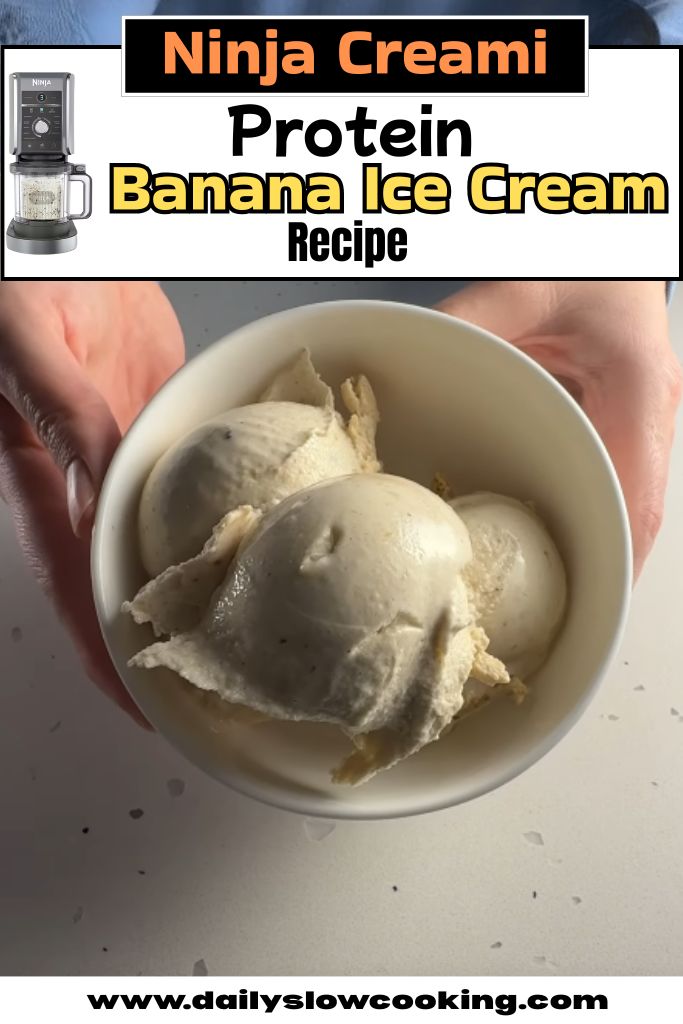
Have you ever had a craving for something cold and sweet, but didn’t want all the sugar and guilt? That’s exactly how I came up with this Ninja Creami Protein Banana Ice Cream Recipe.
I had a couple of ripe bananas sitting on my counter and thought, why not turn them into something tasty and healthy? So I grabbed my Ninja Creami and got to work.
The taste? It’s smooth, creamy, and full of banana flavor. It’s sweet but not too sweet, and it gives me a good dose of protein too. This ice cream is the kind of thing that makes your home feel a little more cozy.
It feels good knowing you made something from scratch that’s better than store-bought. And yes, it’s the perfect dessert too! You can check out more dessert recipes here.
Why I Love This Ninja Creami Protein Banana Ice Cream
I’m obsessed with this Ninja Creami Protein Banana Ice Cream Recipe because it’s the perfect mix of healthy and indulgent. Here’s why it’s a winner in my kitchen:
- Tastes Amazing: It’s sweet, creamy, and full of banana flavor—like a milkshake and ice cream had a baby!
- Healthy Boost: Packed with protein, it keeps me full and supports my active lifestyle.
- Super Easy: With just a few ingredients and my Ninja Creami, it’s ready in no time.
- Customizable: I can add mix-ins like nuts or chocolate chips to switch things up.
This recipe is my go-to when I want something sweet but don’t want to derail my healthy eating. It’s like a hug in dessert form, and I love how it makes my kitchen feel like a fun ice cream shop!
Ninja Creami Protein Banana Ice Cream Ingredients
Here’s everything you need to make this delicious ice cream. Each ingredient plays a big role in making it creamy and tasty.
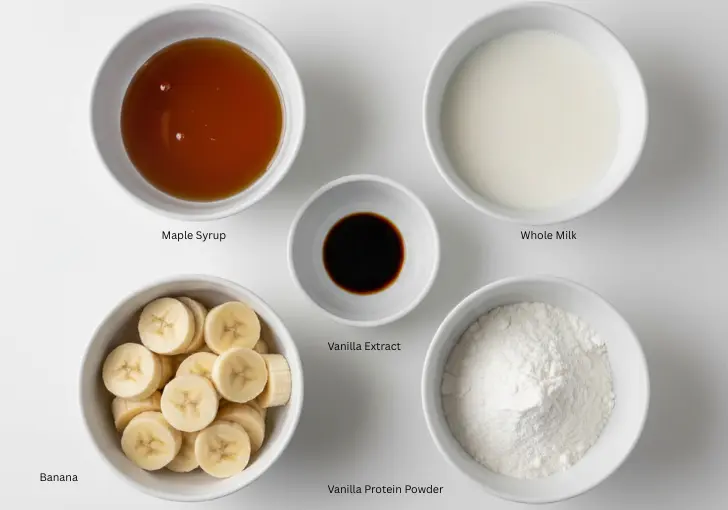
- Banana (1 medium, ripe): A ripe banana is key for natural sweetness and a smooth texture. Look for one with some brown spots—it’s sweeter and blends better. Bananas add fiber and potassium, which are great for your body. I mash it with a fork or blend it to get it nice and smooth.
- Milk (1 cup, 2% Fairlife): I use Fairlife 2% milk because it’s high in protein and low in sugar. It gives the ice cream a rich, creamy base without being too heavy. You can use any milk, but Fairlife makes it extra smooth and nutritious.
- Vanilla Protein Powder (1 scoop, about 30g): This is the protein star! I use a clean, unflavored or vanilla protein powder to keep the banana flavor strong. It adds about 20-25 grams of protein per scoop and helps thicken the ice cream. Pick one you love the taste of!
- Maple Syrup (1 tablespoon): A touch of maple syrup adds just the right sweetness. It blends well with the banana and gives a cozy flavor. You can skip it if your banana is super ripe, but I love the extra depth it brings.
- Vanilla Extract (1/2 teaspoon): This boosts the flavor and makes the ice cream taste like a classic dessert. Use pure vanilla extract for the best taste—it’s worth it!
Helpful Swaps
If you don’t have an ingredient or want to mix things up, here are some easy swaps:
- Banana: Try half a cup of mashed mango or avocado for a different flavor. They’re creamy but change the taste a bit.
- Milk: Use almond, oat, or coconut milk for a dairy-free option. Oat milk is my favorite for creaminess.
- Protein Powder: If you don’t have vanilla, use chocolate or unflavored. Just know it might tweak the flavor.
- Maple Syrup: Honey or agave syrup works great. You can also use a sugar-free sweetener like stevia if you’re watching carbs.
- Vanilla Extract: Skip it if you don’t have it, or use a pinch of cinnamon for a warm twist.
Kitchen Equipment Needed
You don’t need much to make this ice cream, but here’s what I use:
- Ninja Creami Ice Cream Maker: This is the star of the show! It turns your frozen mix into creamy ice cream.
- Ninja Creami Pint Container: Comes with the machine. You’ll freeze your mix in this.
- Blender or Immersion Blender: I use a blender to mix everything smoothly. A fork works for mashing the banana if you don’t have one.
- Measuring Cups and Spoons: For getting the amounts just right.
- Spatula or Spoon: To scrape the mix into the pint and stir if needed.
- Freezer: To freeze the mixture for 24 hours before churning.
How to Make Ninja Creami Protein Banana Ice Cream
Making this Ninja Creami Protein Banana Ice Cream Recipe is so easy, even if you’re new to cooking. I’ll walk you through each step like we’re in the kitchen together. Let’s get started!
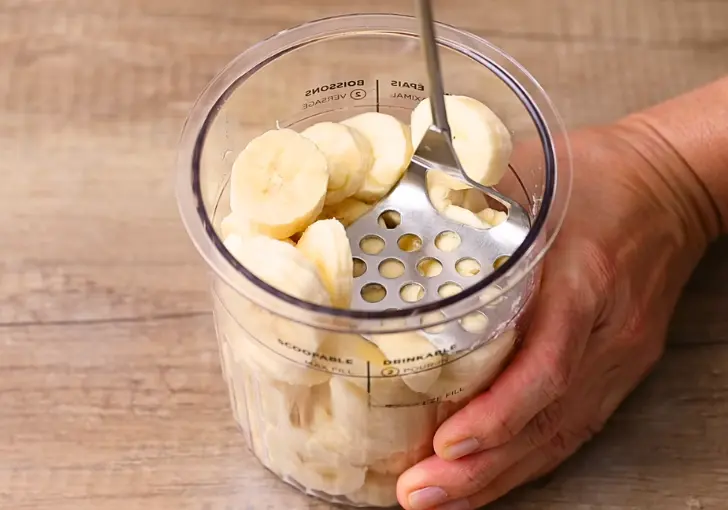
Step 1 | Peel and Mash the Banana
Grab your ripe banana and peel it. Break it into chunks and mash it with a fork in a bowl. You want it smooth, like baby food. If you’re using a blender, toss the banana in there and blend until it’s creamy.
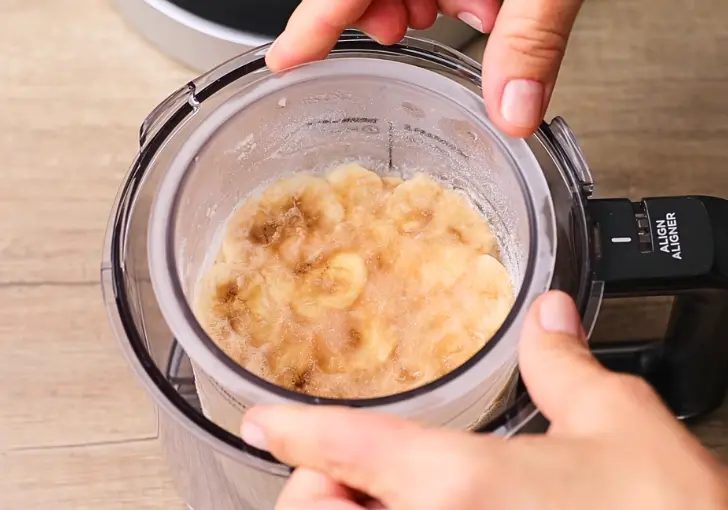
Step 2 | Mix the Ingredients
In your blender (or a bowl if you’re using an immersion blender), add the mashed banana, 1 cup of Fairlife 2% milk, 1 scoop of vanilla protein powder, 1 tablespoon of maple syrup, and 1/2 teaspoon of vanilla extract. Blend or whisk until everything is super smooth. It should look like a thick smoothie.
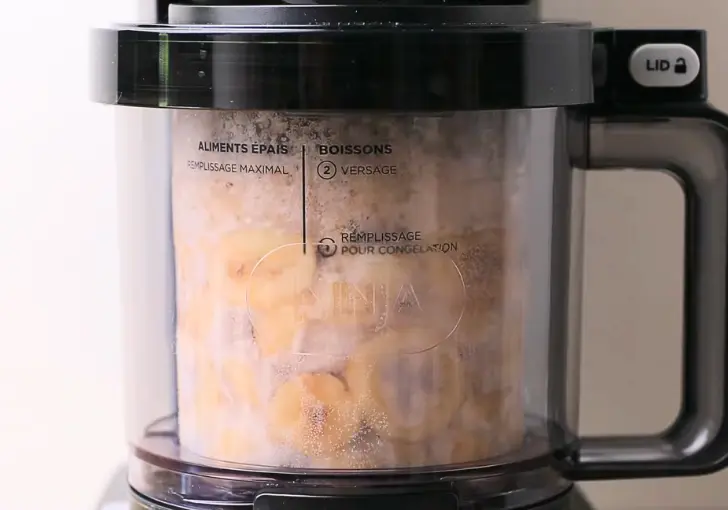
Step 3 | Pour into the Ninja Creami Pint
Take your Ninja Creami pint container and pour the mixture in. Don’t go over the “max fill” line—it’s marked on the container. This keeps your machine happy when it churns.
Step 4 | Freeze the Mixture
Put the lid on the pint container tightly. Place it on a flat spot in your freezer and let it freeze for 24 hours. I like to freeze it overnight so it’s ready the next day.
Step 5 | Set Up the Ninja Creami
After 24 hours, take the pint out of the freezer and remove the lid. Pop the pint into the Ninja Creami’s outer bowl. Attach the Creamerizer Paddle to the lid and lock it onto the bowl.
Step 6 | Churn the Ice Cream
Place the bowl assembly on the Ninja Creami machine and twist the handle to lock it. Press the “Lite Ice Cream” button. It’ll take a few minutes and make some noise, but that’s normal!
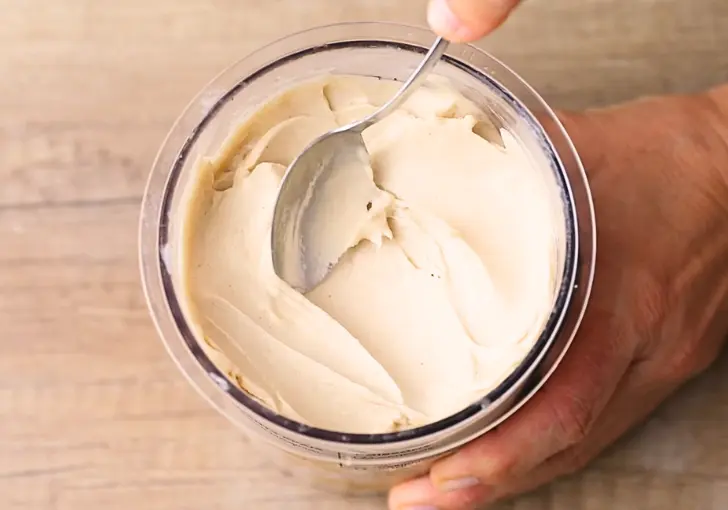
Step 7 | Check the Texture
Once it’s done, unlock the bowl and check the ice cream. If it looks powdery or crumbly, don’t worry! Make a small hole in the center, add 1 tablespoon of milk, and lock it back in. Press the “Re-Spin” button. This usually makes it super creamy.
Step 8 | Add Mix-Ins (Optional)
If you want to get fancy, add mix-ins like chocolate chips or crushed nuts. Make a hole in the center of the ice cream, add 1-2 tablespoons of your mix-in, and press the “Mix-In” button.
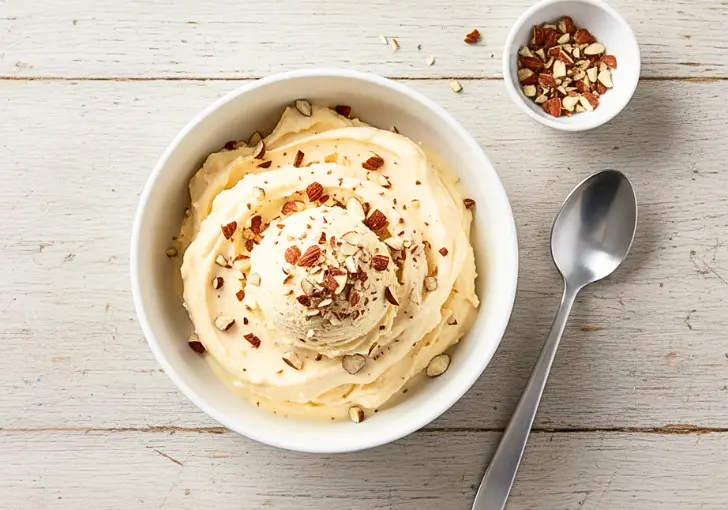
Step 9 | Serve and Enjoy
Scoop the ice cream into a bowl or eat it straight from the pint! It’s best enjoyed right away, so dig in!
Recipe Tips for Success
Here are some quick tips to make your ice cream perfect every time:
- Use a Ripe Banana: Brown spots mean sweeter flavor and better texture.
- Don’t Overfill: Stick to the max fill line to avoid a mess in the Ninja Creami.
- Freeze Flat: Keep the pint level in the freezer for even freezing.
- Re-Spin if Needed: If it’s not creamy, add a splash of milk and re-spin.
- Taste Before Freezing: Make sure the mix tastes good to you before freezing.
- Clean the Blade: Rinse the Creamerizer Paddle right after to avoid sticky buildup.
Make Ahead Tips
I love prepping this Ninja Creami Protein Banana Ice Cream Recipe ahead of time for busy days. You can mix the ingredients and pour them into the pint container up to a week in advance.
Just store it in the freezer with the lid on tight. When you’re ready, pop it in the Ninja Creami and churn. I often make two or three pints at once so I have a stash ready. Label the pints with the flavor and date so you don’t forget what’s what.
This way, you’ve got a healthy dessert ready whenever a craving hits, and it saves you time during the week!
What Can Serve With Ninja Creami Protein Banana Ice Cream
This ice cream is awesome on its own, but you can make it even more fun with these pairings:
- Fresh Fruit: Sliced strawberries or blueberries add a juicy burst.
- Nuts: Sprinkle chopped almonds or walnuts for a crunchy contrast.
- Chocolate Drizzle: A little melted dark chocolate makes it feel fancy.
- Granola: Adds a nice crunch and makes it feel like a parfait.
How to Store Ninja Creami Protein Banana Ice Cream
Storing this ice cream is super easy. After churning, if you don’t eat it all (which is hard!), smooth the top with a spatula, put the lid back on the pint, and pop it back in the freezer.
It’ll stay good for 3-6 months if the lid is tight to prevent freezer burn. When you’re ready for more, just re-spin it in the Ninja Creami to get that creamy texture back.
I keep mine on a flat freezer shelf to avoid any weird shapes. This way, you’ve always got a healthy treat ready to go!
Ninja Creami Protein Banana Ice Cream Recipe FAQs
1. Can I use frozen bananas for this recipe?
Yes, you can! Thaw frozen bananas first so they blend smoothly with the other ingredients. Frozen bananas work great, but if you put them in the Ninja Creami pint without blending them with liquid, you might get a chunky texture. I thaw mine in the fridge for a few hours, then mash or blend them. This keeps the ice cream creamy and ensures the Ninja Creami can churn it properly.
2. What if I don’t have Fairlife milk?
No worries! You can use any milk, like regular 2%, whole, or plant-based options like almond or oat milk. Fairlife adds extra protein, but other milks work fine. Just know that lower-fat milks might make the ice cream a bit less creamy. I’ve tried oat milk, and it’s pretty smooth—just pick one you like the taste of!
3. Can I skip the protein powder?
You can, but the protein powder adds thickness and nutrition. Without it, the ice cream might be more like a sorbet. Try adding a mashed avocado or extra banana for creaminess. I’ve done this when I ran out of protein powder, and it still tastes great, just less protein-packed.
4. Why is my ice cream powdery after the first spin?
This happens sometimes! It just needs a little help. Make a small hole in the center, add 1-2 tablespoons of milk, and hit the “Re-Spin” button. I’ve had to do this a couple of times, and it always turns out creamy. Your freezer might be super cold, which can make the mix harder.
5. Can I add mix-ins like chocolate chips?
Absolutely! After the first spin, make a hole in the ice cream, add 1-2 tablespoons of chocolate chips, nuts, or fruit, and use the “Mix-In” setting. I love adding dark chocolate chips for a sweet crunch. Just don’t add too much, or it might not mix evenly.
6. How long does it take to make this ice cream?
The prep takes about 5 minutes, but you need to freeze the mix for 24 hours. Churning in the Ninja Creami takes 5-10 minutes, including re-spins. I usually prep it at night so it’s ready to churn the next day. It’s worth the wait for that creamy goodness!
Did you make this Ninja Creami Protein Banana Ice Cream Recipe? Please leave a ⭐ rating and review!


Leave a Reply